Willkommen bei Bower! In dieser Anleitung baust du auf den zuvor erlernten Fertigkeiten auf, um schneller zu entwerfen und komplexere Webprojekte zu erstellen.
Wir behandeln die Auswahl-, Zwischenablage- und Strukturwerkzeuge, die dir enorm helfen werden.
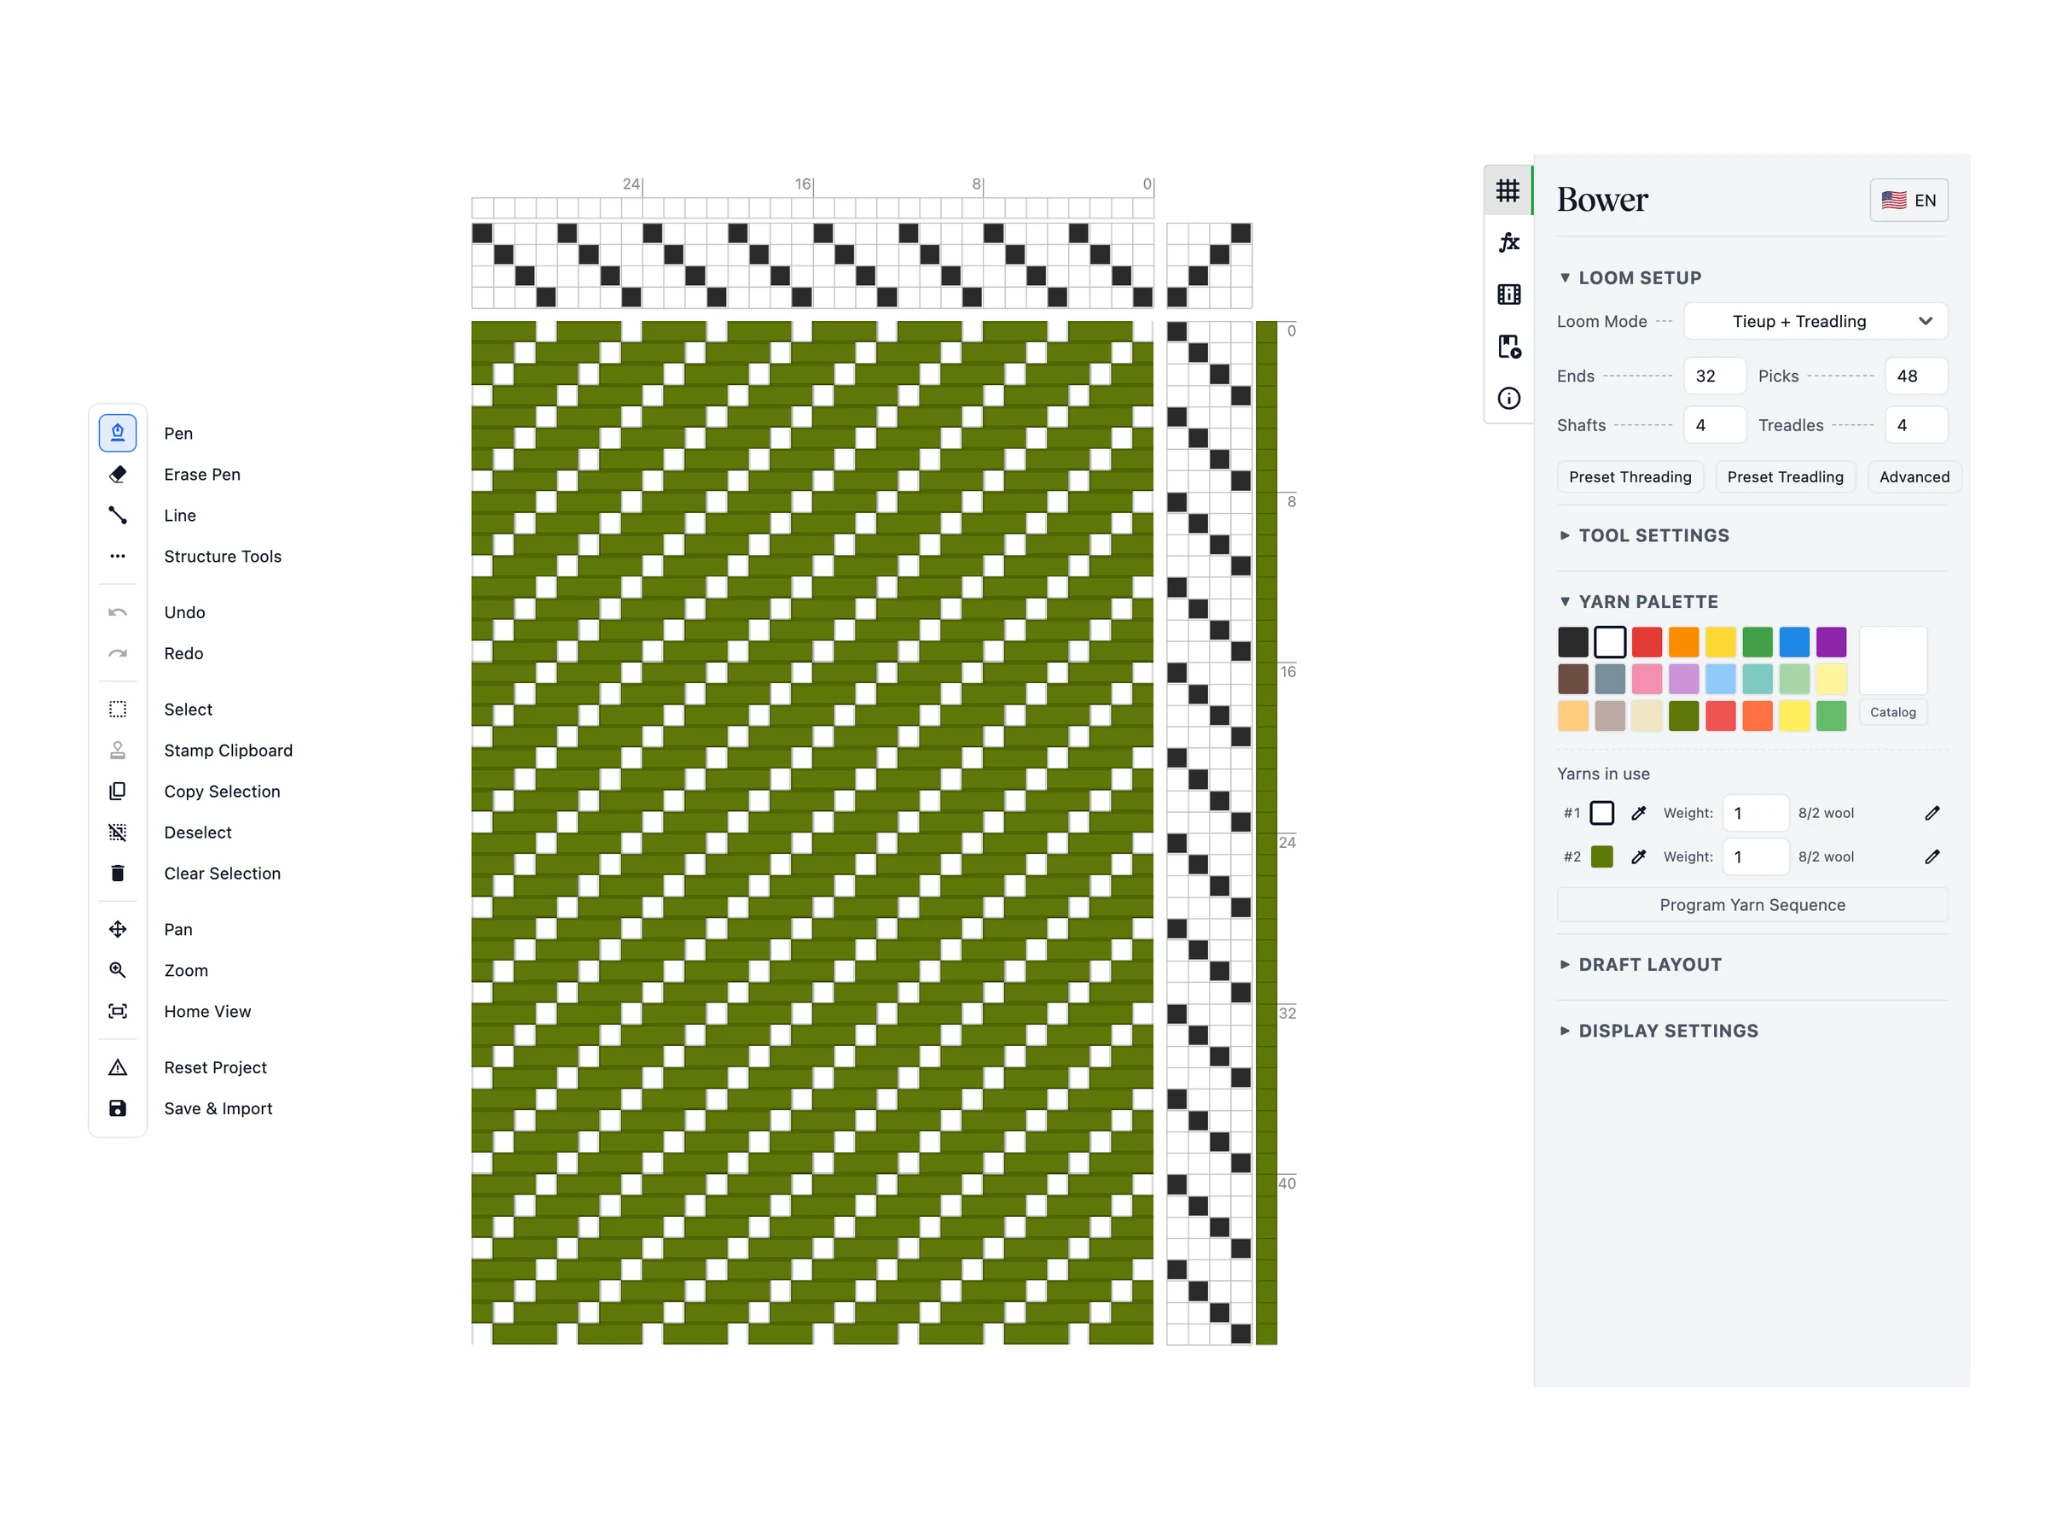
Denk daran: Das ist dein Startbildschirm. Die Oberfläche von Bower ist in eine Werkzeugleiste links, den Editor in der Mitte und ein Eigenschaftenpanel rechts gegliedert.
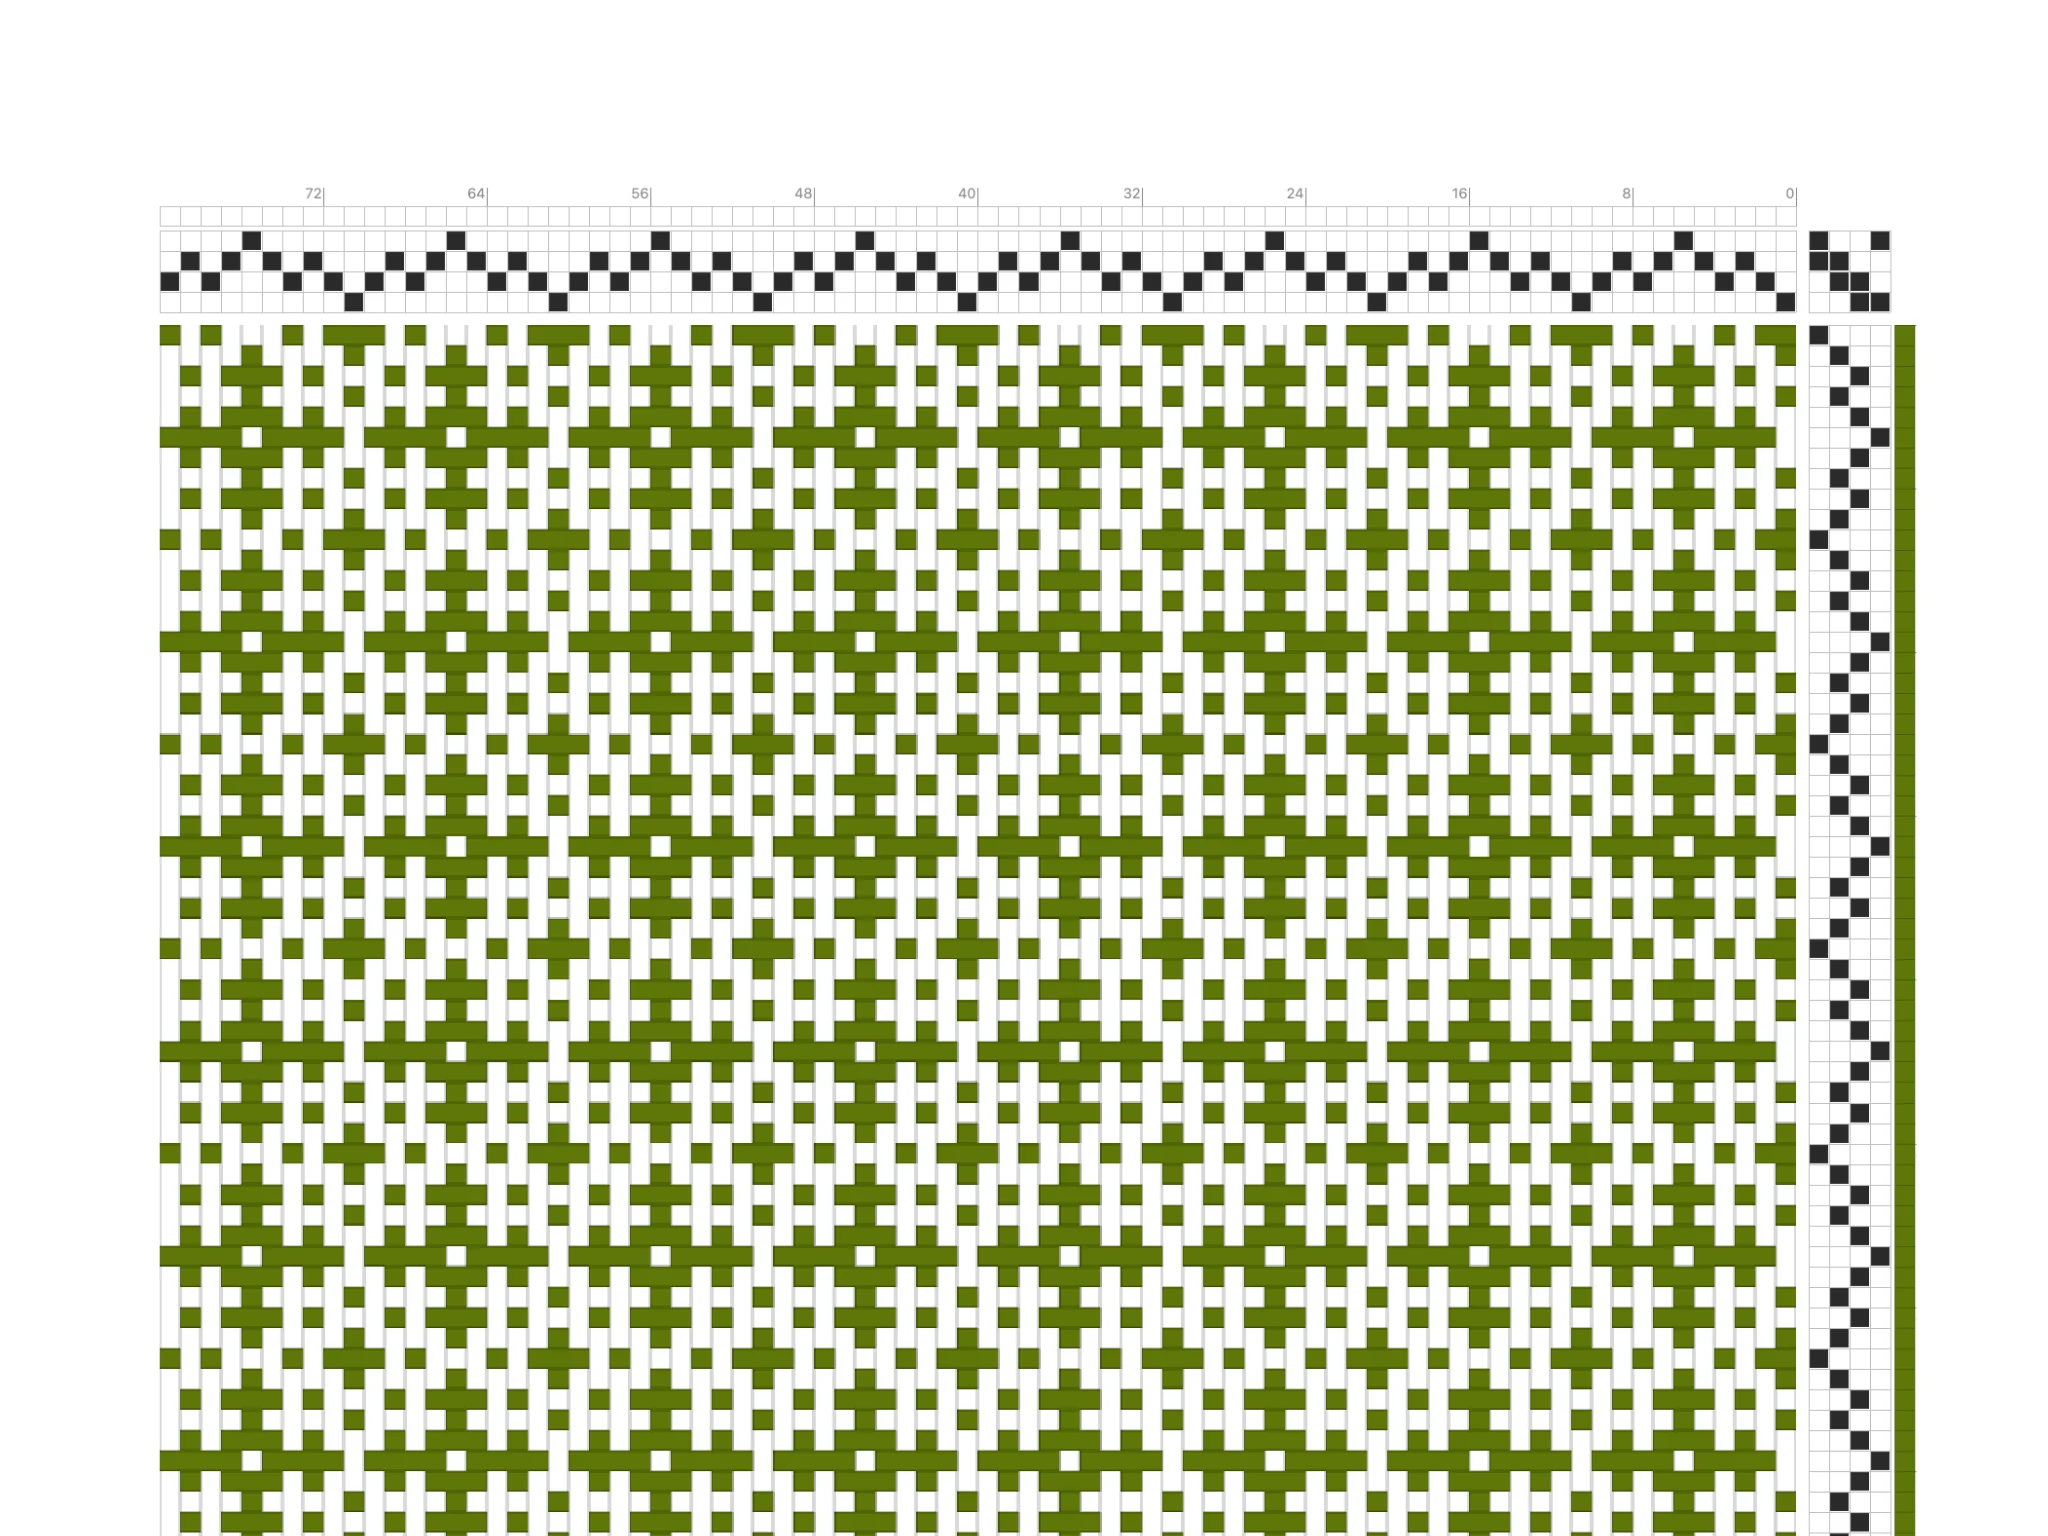
Beginnen wir damit, einen interessanten Einzug zu erstellen. Zeichne mit dem Stift-Werkzeug im Einzugsbereich des Editors. Ich habe eine Sequenz 1-2-3-2-3-4-3-2-3-2-1 für einen zickzackigen Spitzeinzug erstellt.
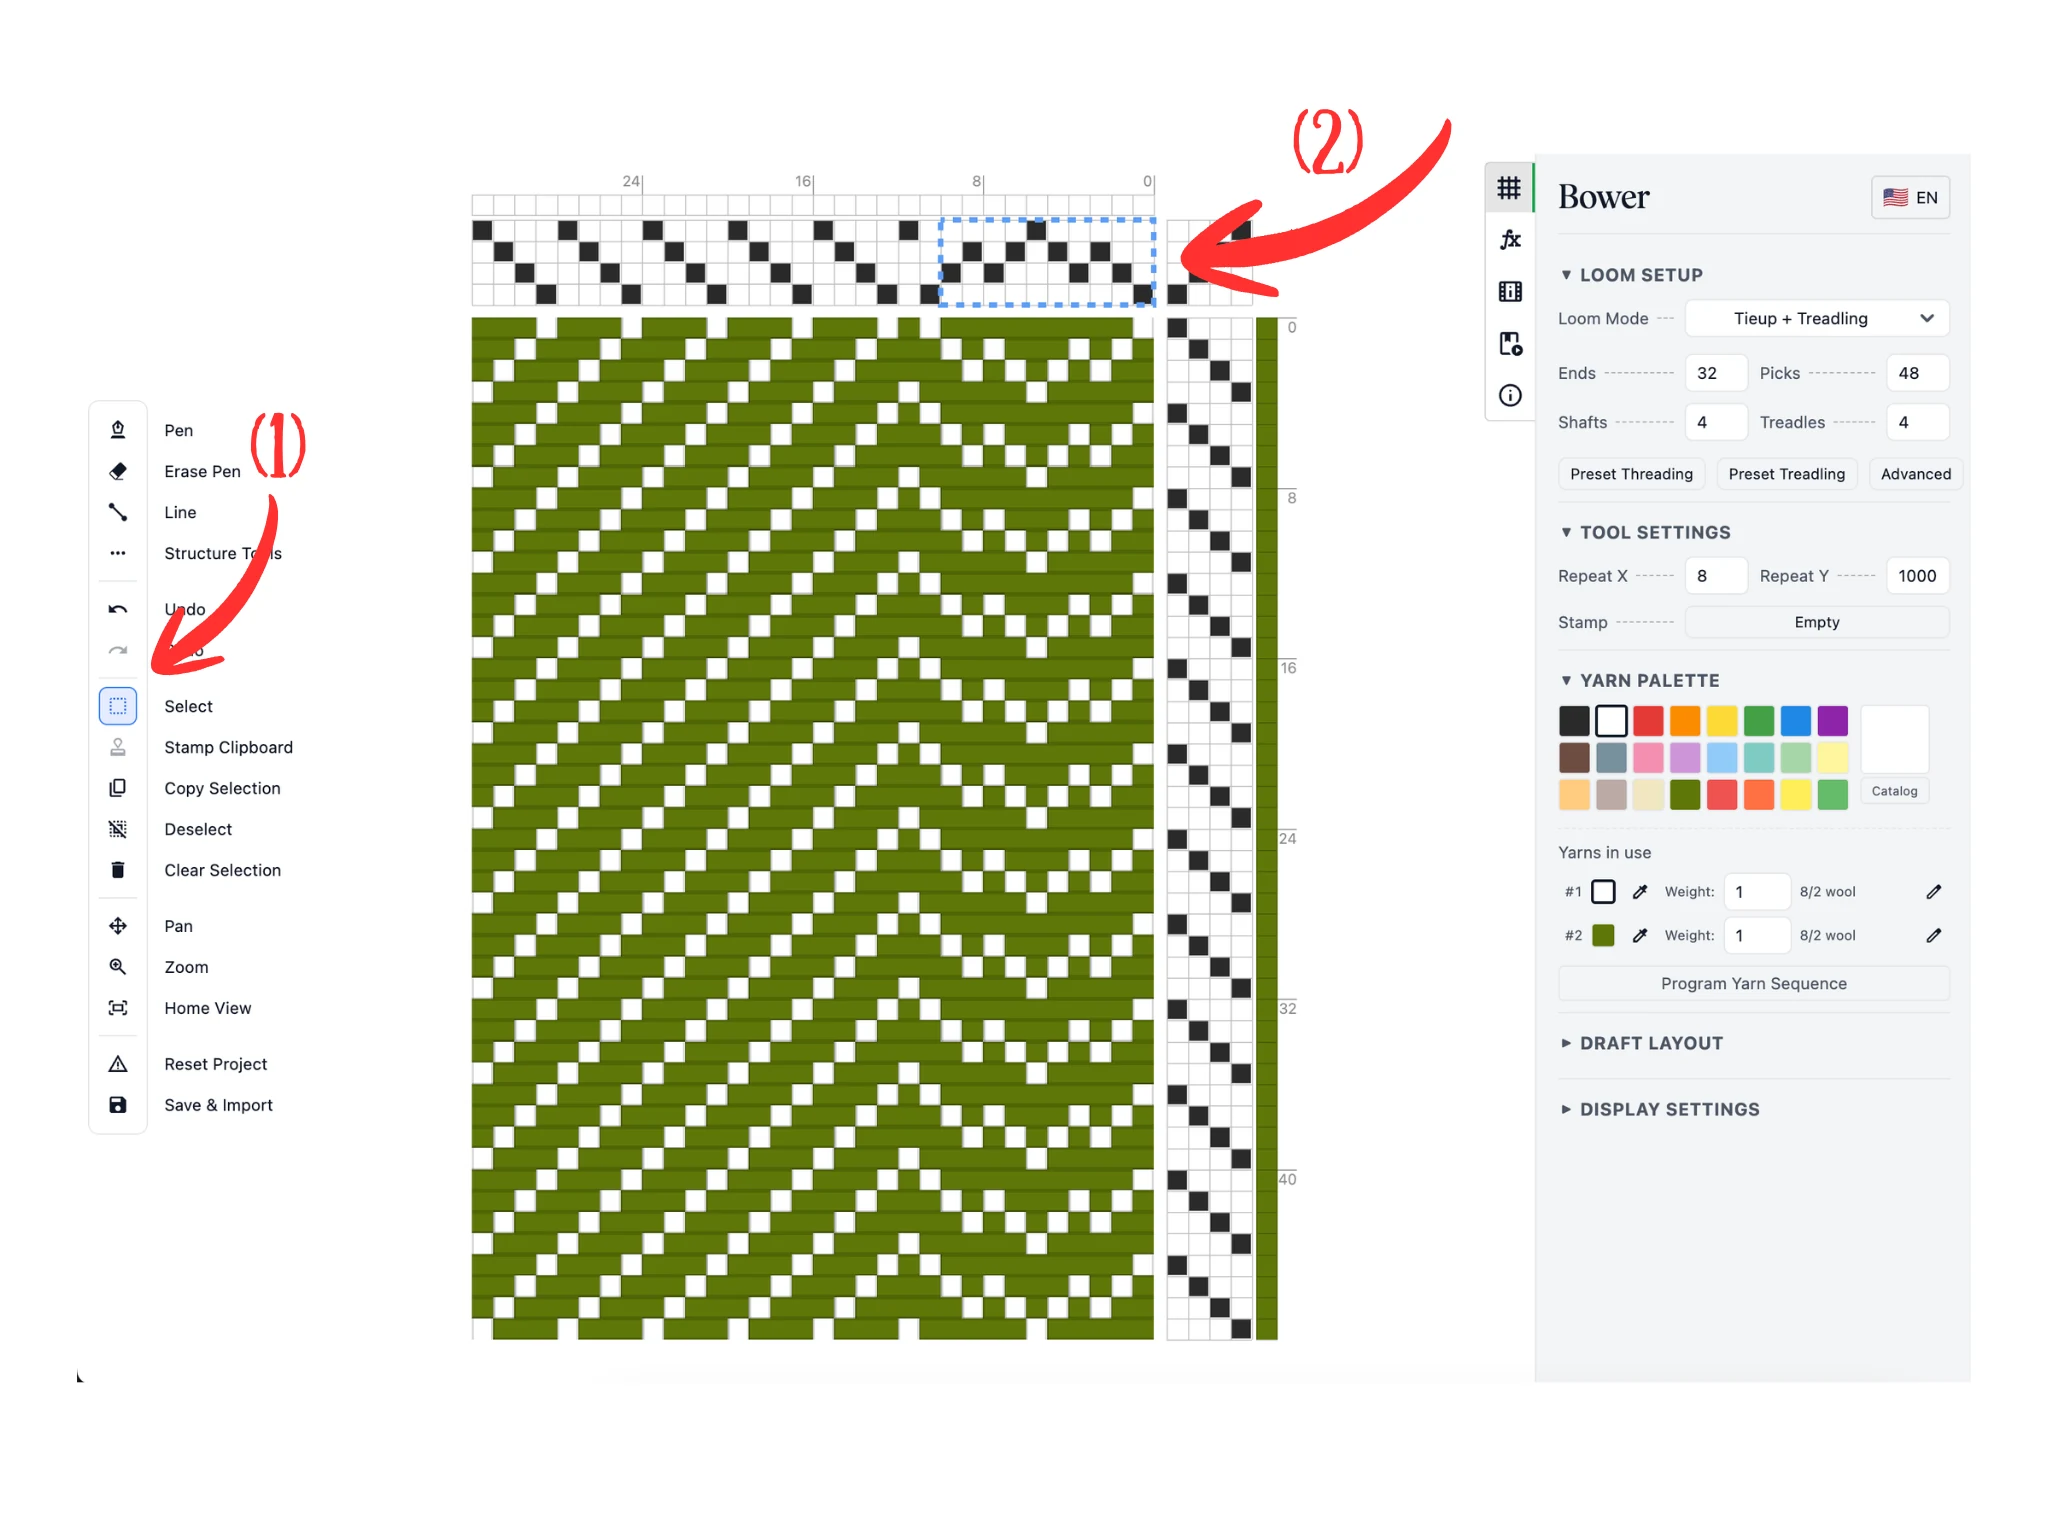
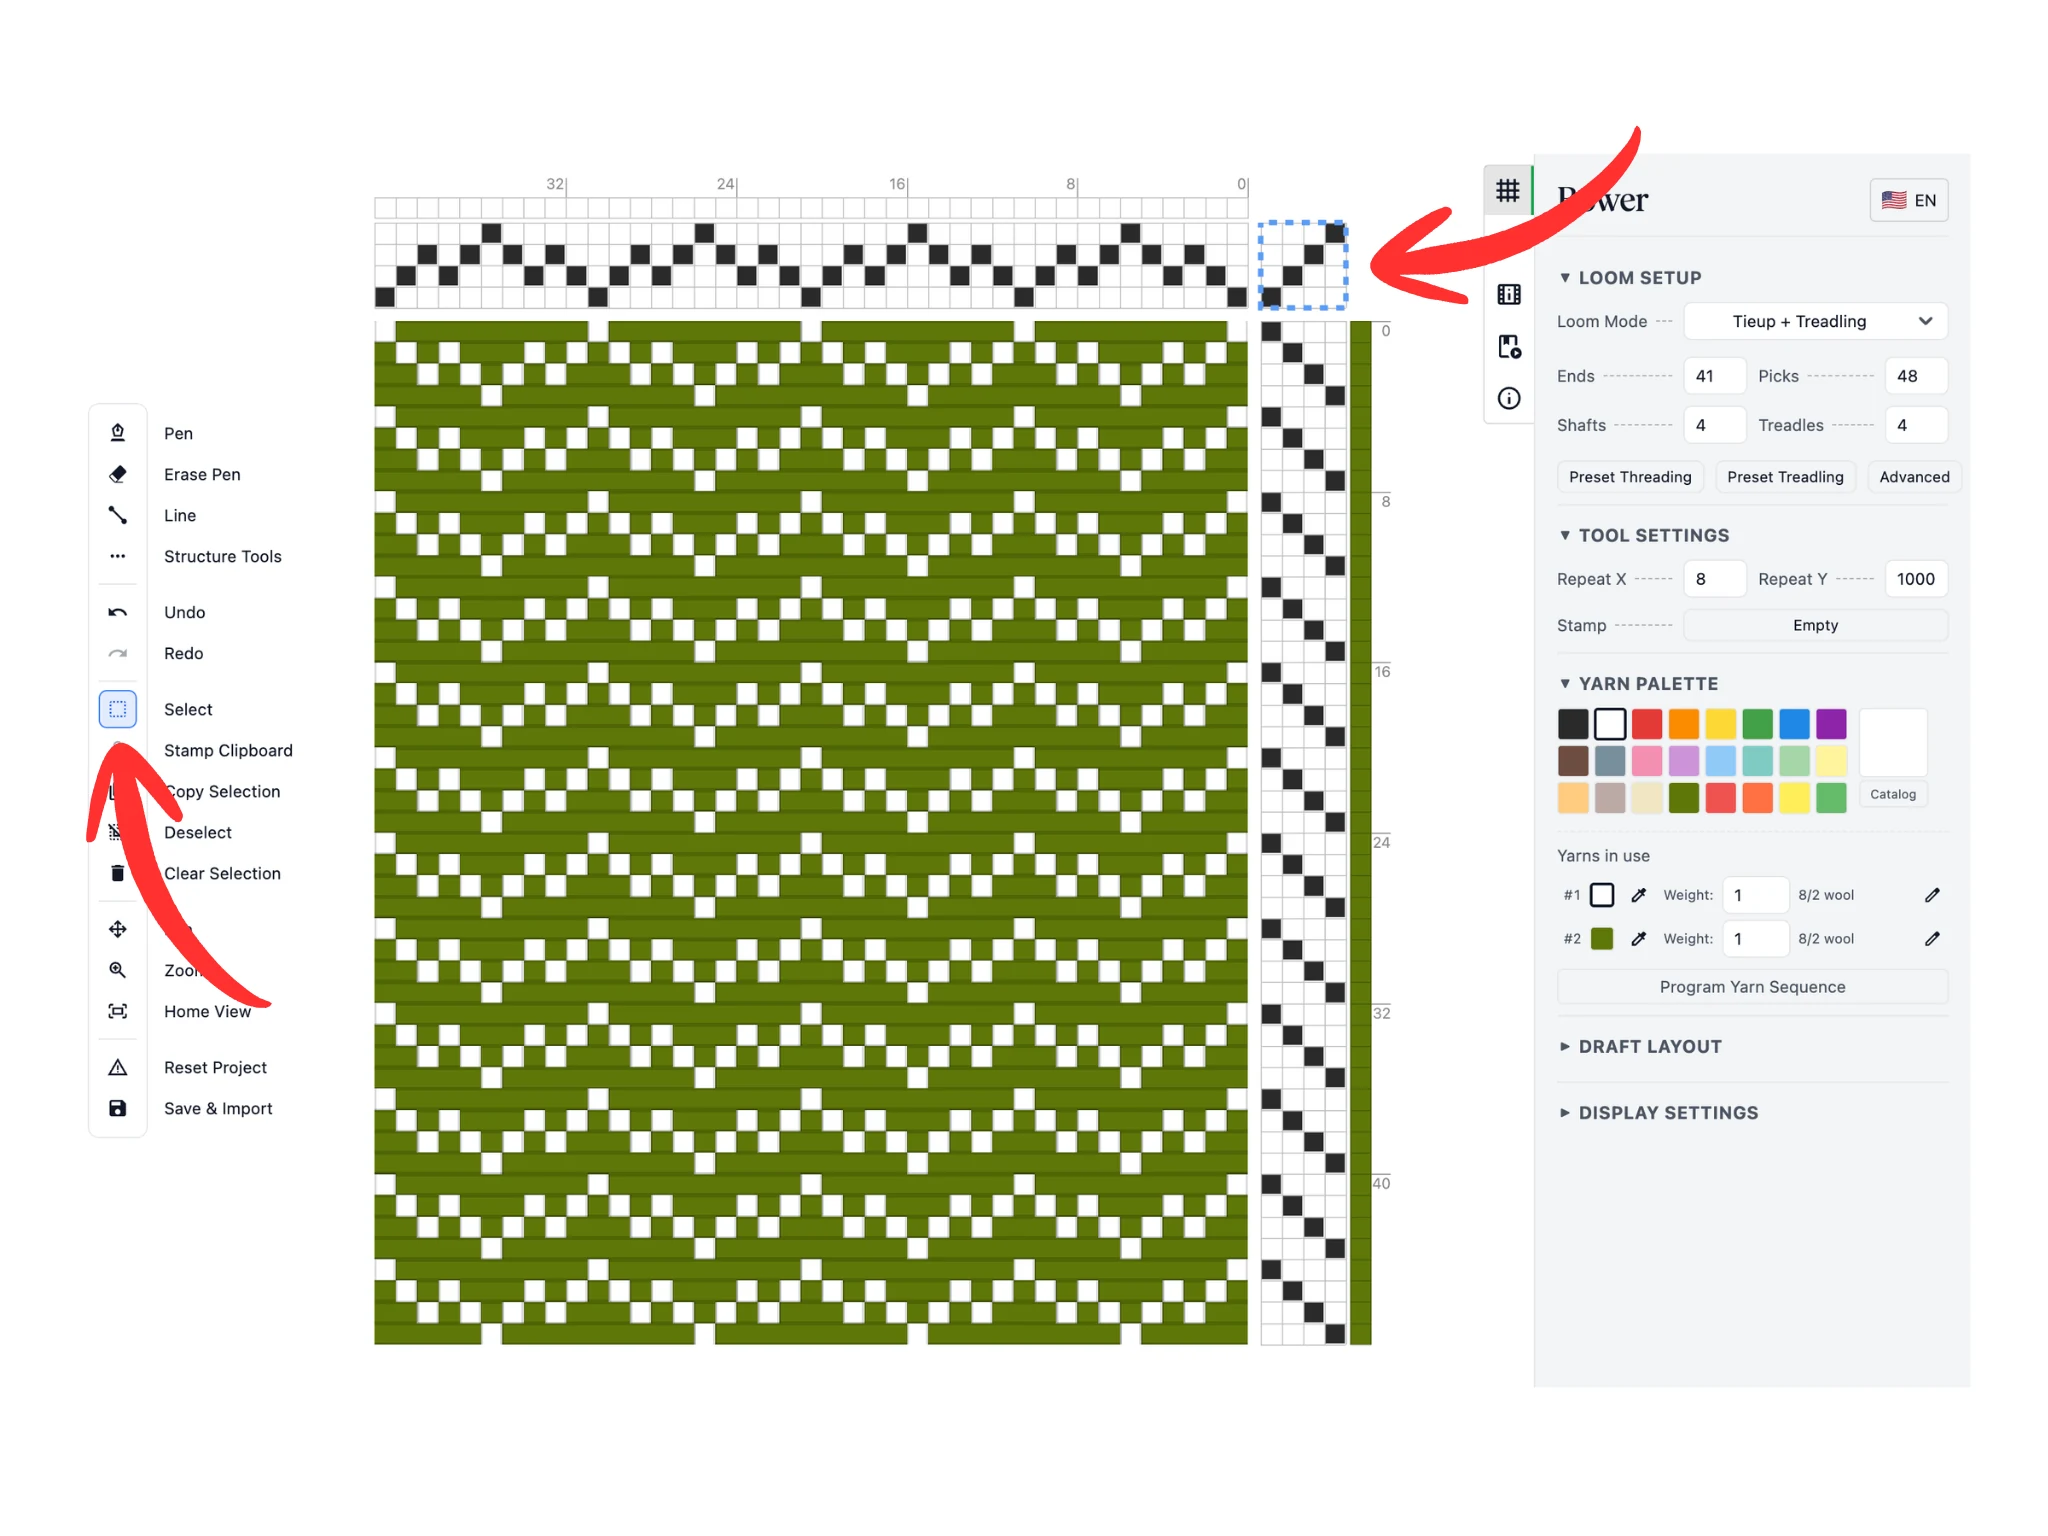
Als Nächstes (1) wähle das Auswahl-Werkzeug in der Werkzeugleiste links.
Du kannst (2) im Einzugsbereich des Editors mit der linken Maustaste klicken und ziehen (was einen gestrichelten blauen Auswahlrahmen erzeugt). Alle Daten innerhalb des blau gestrichelten Rahmens gelten als ausgewählt.
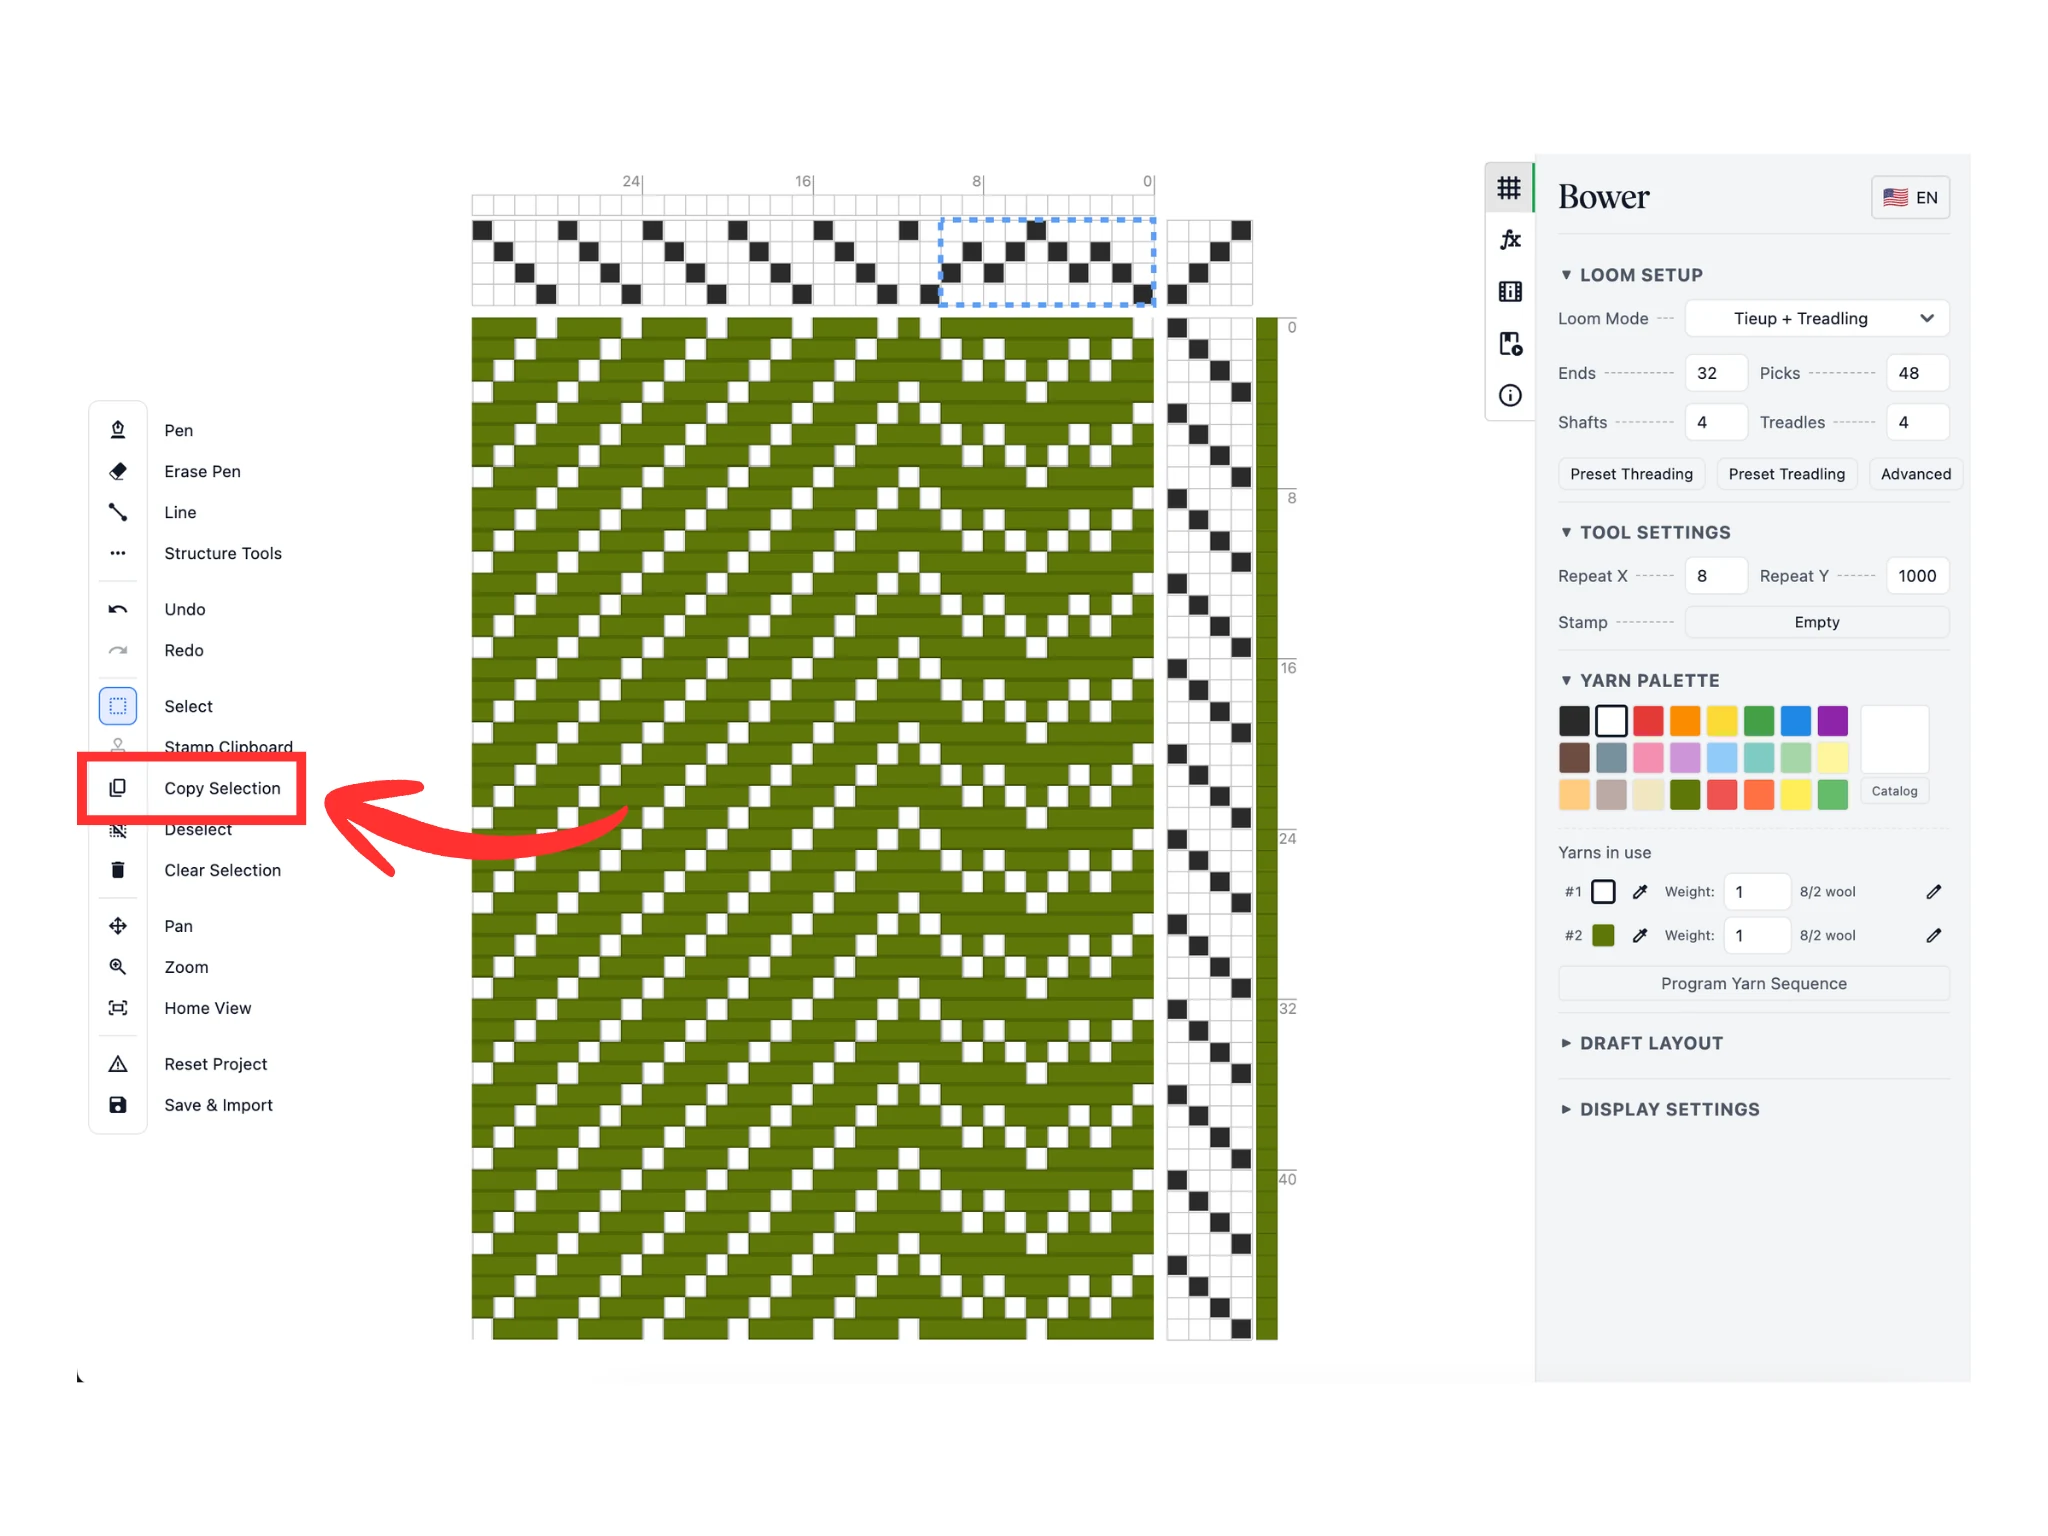
Kopiere die Auswahl als Nächstes mit der Schaltfläche Auswahl kopieren in die Zwischenablage. Sobald du darauf klickst, wechselt die Software automatisch zum Stempel-Werkzeug.
Die interne Zwischenablage der Software speichert eine Kopie der Editordaten. Sie kann immer nur eine Kopie einer Auswahl auf einmal speichern.
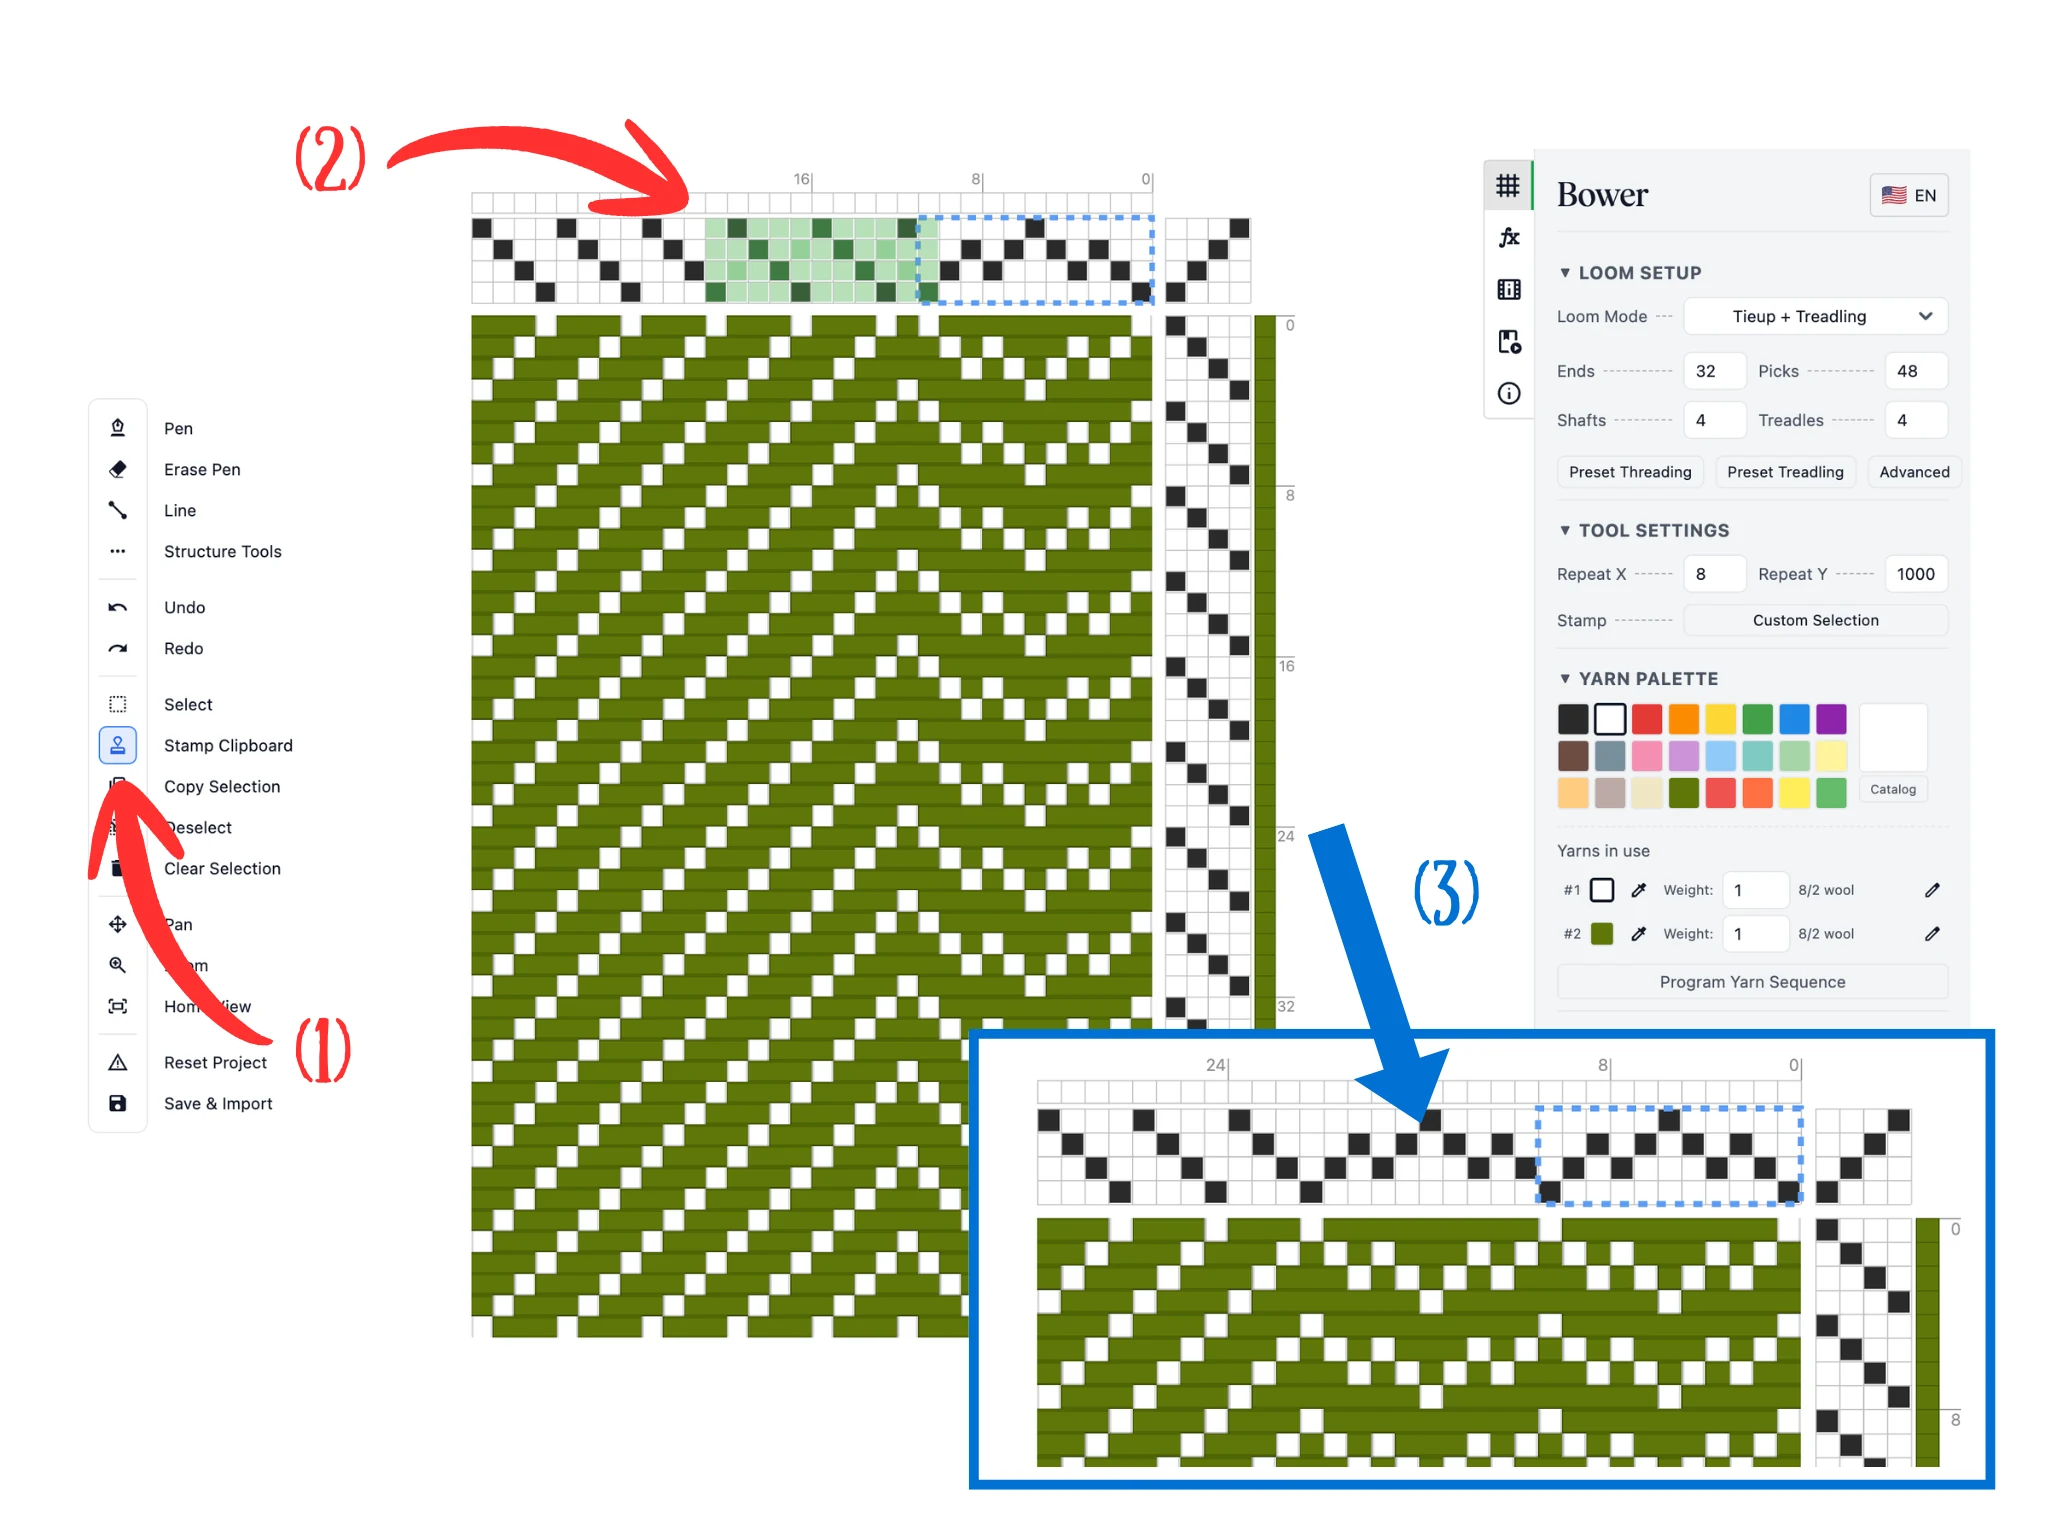
Du solltest jetzt das Stempel-Werkzeug aktiv haben (1). Wie gesagt: Nach einem Klick auf Auswahl kopieren wechselt die Software automatisch zum Stempel-Werkzeug.
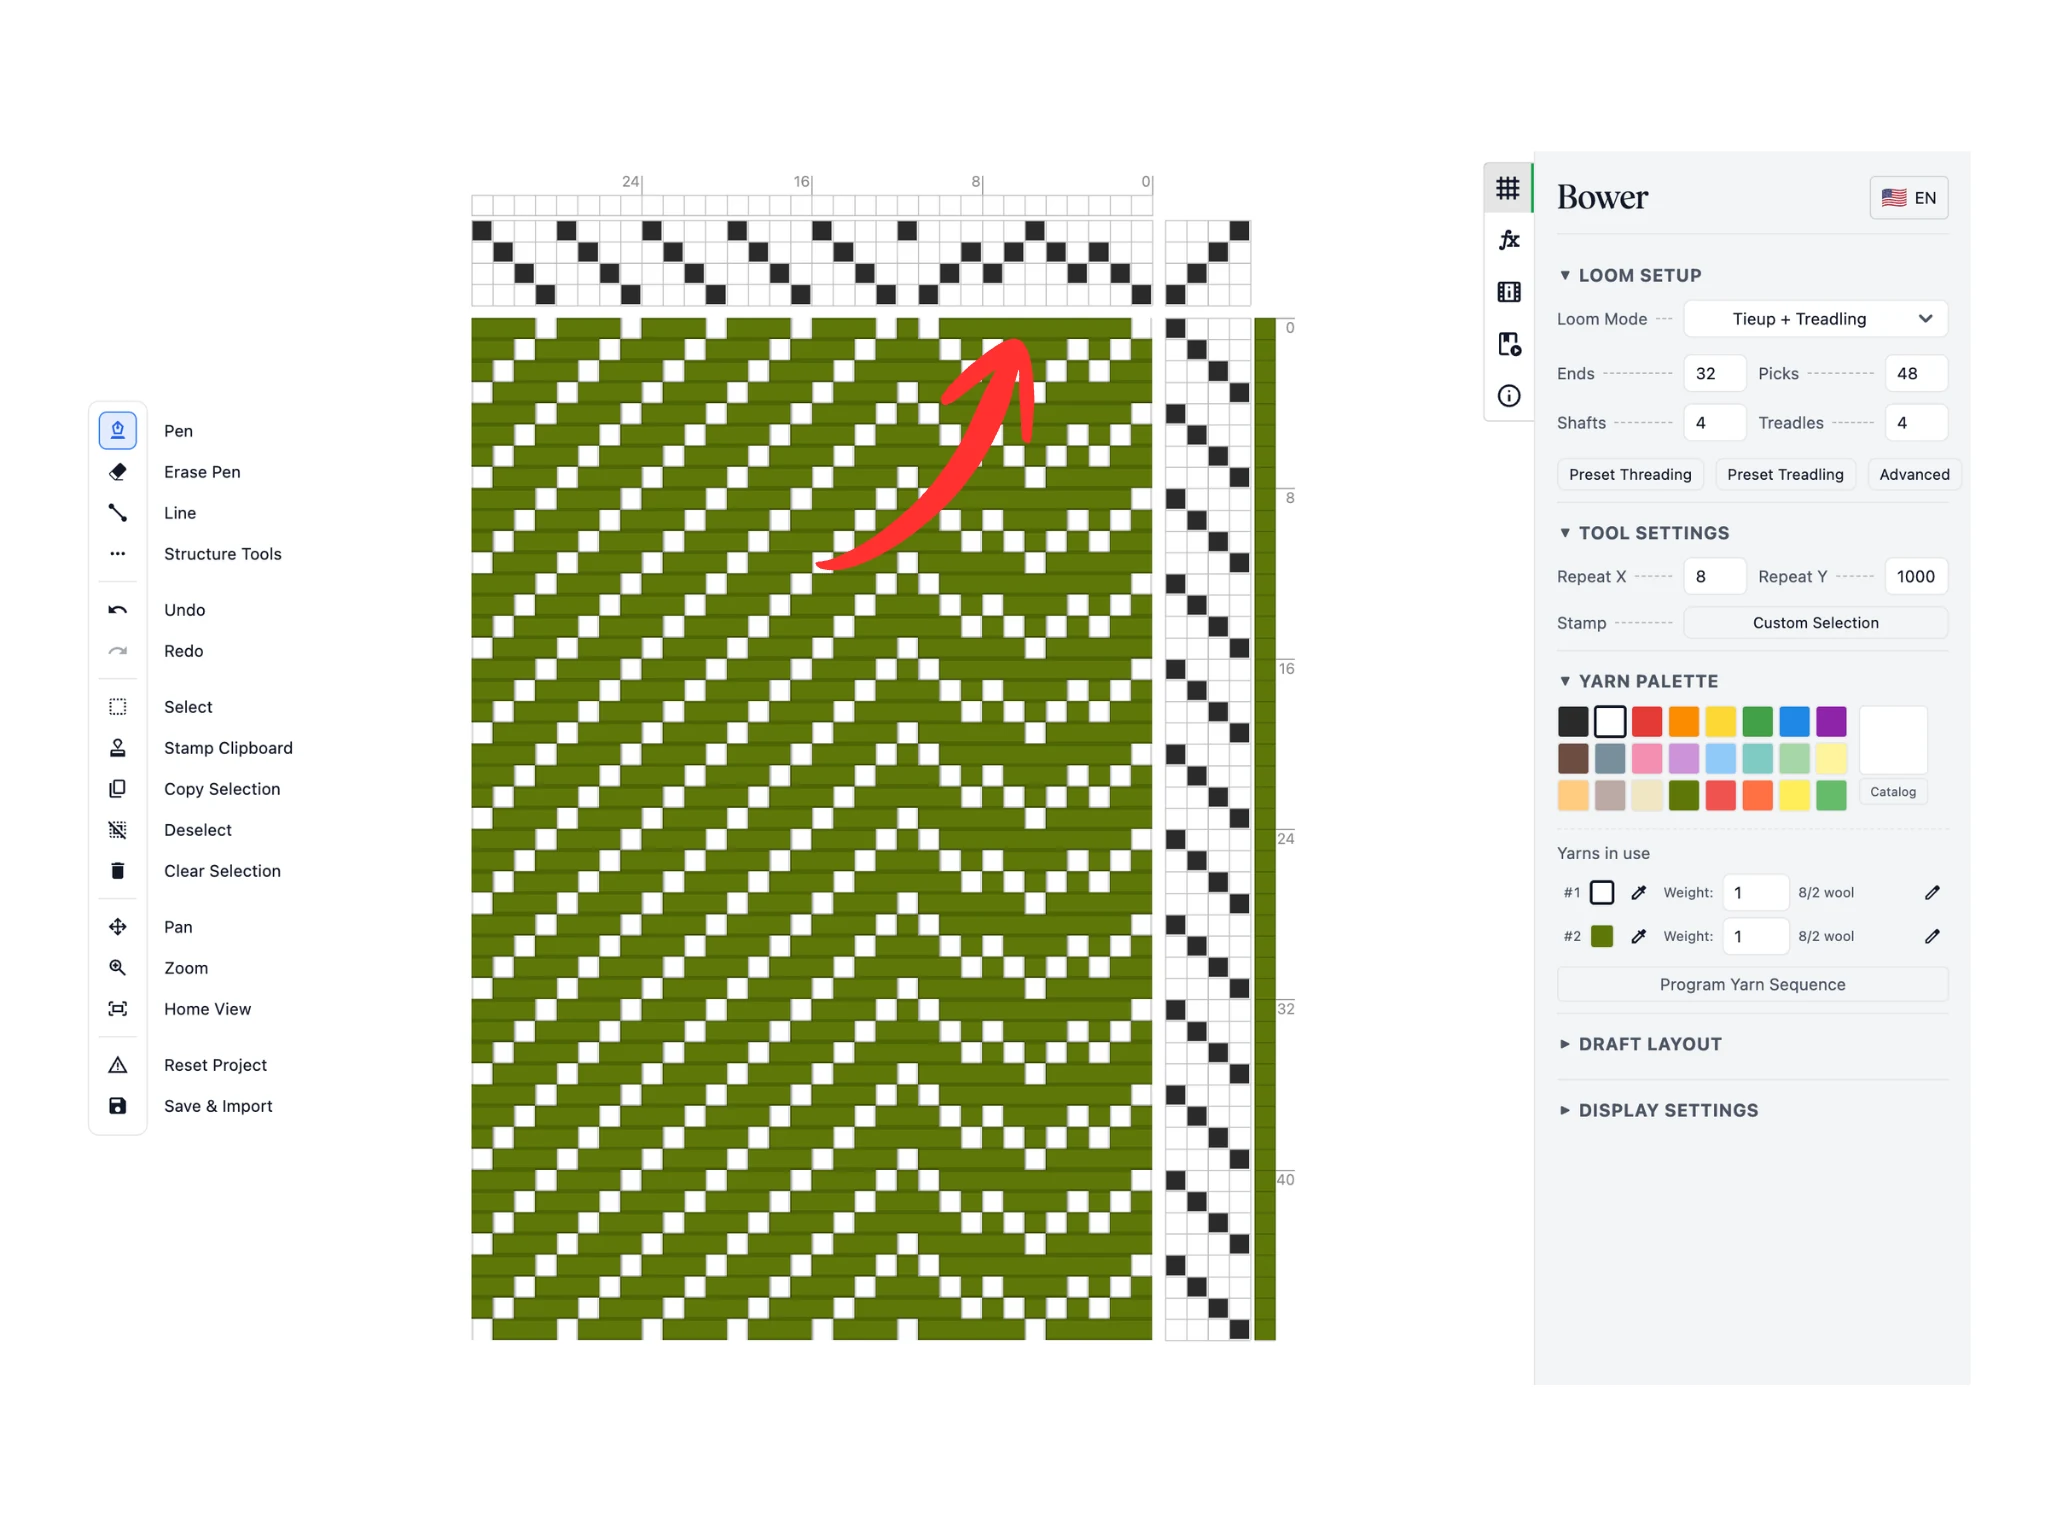
Wenn du mit der Maus über den Einzugsbereich fährst (2), siehst du ein blassgrünes Rechteck, das eine Vorschau der Zwischenablagedaten ist. Positioniere die Maus an die gewünschte Stelle und klicke, um die Zwischenablagedaten in den Einzug zu stempeln.
Das Ergebnis siehst du in (3). So kannst du komplexe Sequenzen überall in der Patrone kopieren und einfügen, statt sie jedes Mal neu zu zeichnen. Das ist bei großen Projekten mit Hunderten von Kettfäden sehr hilfreich.
Hinweis: Auf einem Tablet oder iPhone ohne Hover-Funktion siehst du die Vorschau erst, wenn du mit der linken Maustaste klickst und ziehst. Das Stempel-Werkzeug stempelt, sobald du deinen Finger oder Stift loslässt.
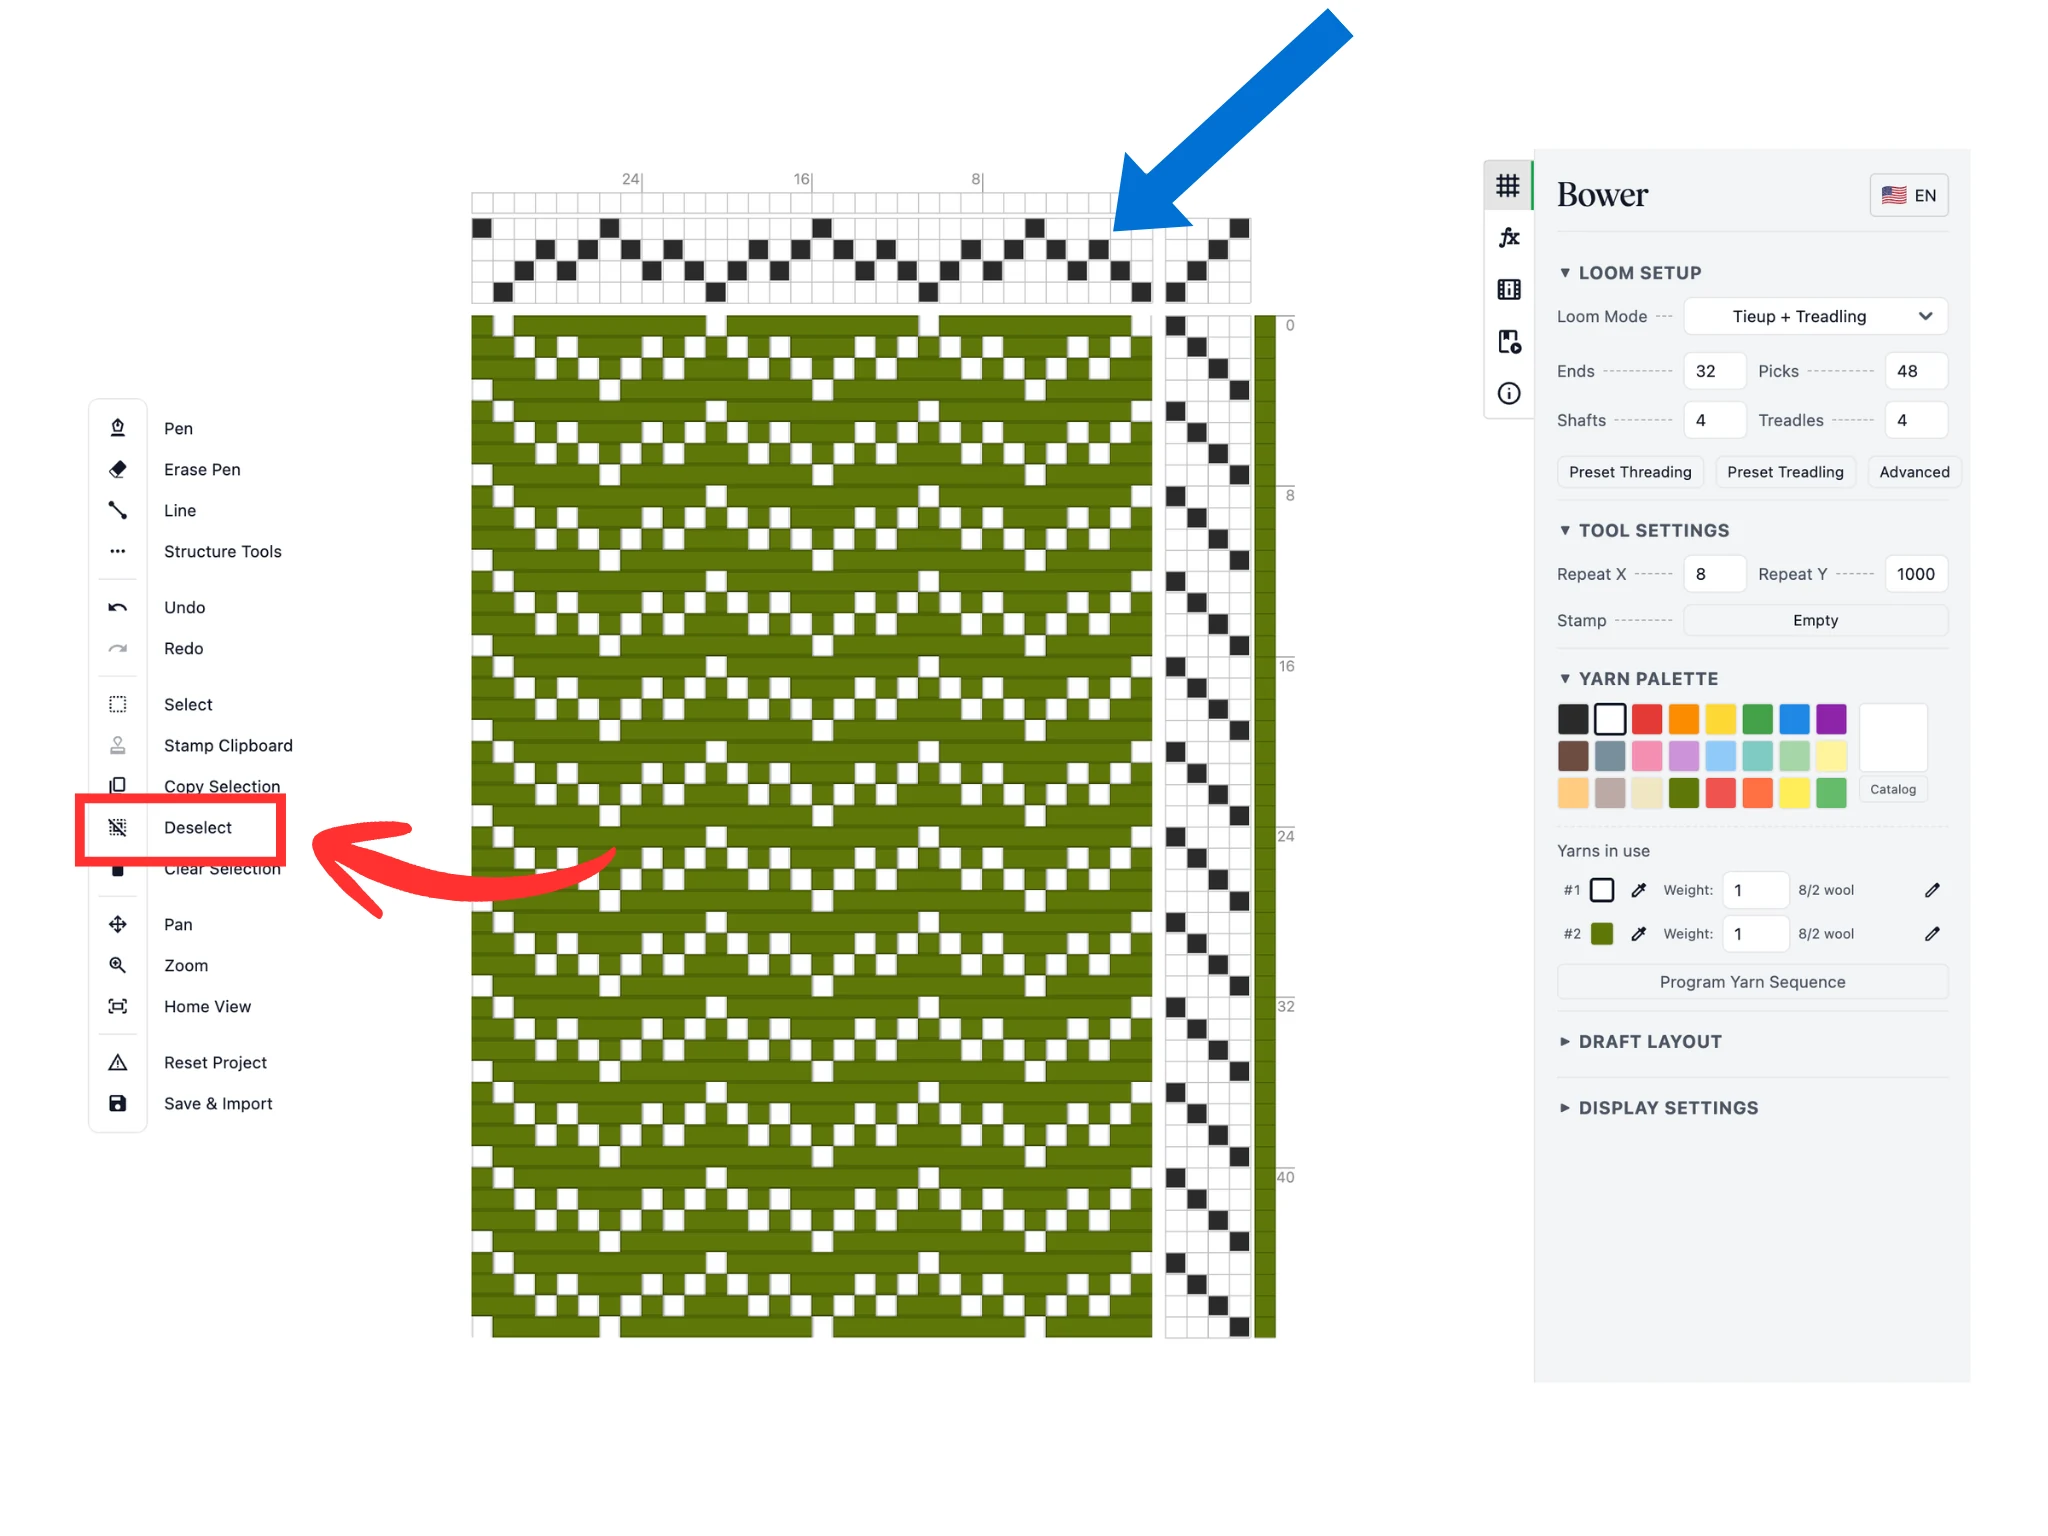
Um den Auswahlrahmen zu entfernen, klicke in der Werkzeugleiste auf die Schaltfläche Auswahl aufheben. Du siehst, wie das gestrichelte blaue Rechteck verschwindet.
Zusammengefasst geben dir das Auswahl-Werkzeug, Auswahl kopieren, das Stempel-Werkzeug und Auswahl aufheben den üblichen Kopieren-/Einfügen-Arbeitsablauf in der Bower-Software. Diese Werkzeuge funktionieren in den Bereichen Einzug, Anbindung und Trittfolge des Editors.
Klicke als Nächstes in der Werkzeugleiste auf die Schaltfläche Strukturwerkzeuge, die eine Unterleiste öffnet. Wähle das Werkzeug Faden/Schuss löschen (1).
Wenn du über den Einzug fährst (2), wird die Kettfadenspalte unter dem Cursor rot hervorgehoben. Mit einem Klick löschst du diesen Kettfaden. Du kannst auch mit der linken Maustaste klicken und ziehen, um einen Bereich von Kettfäden zu löschen.
Wie du in (3) siehst, ist die gesamte Spalte des Kettfadens nun verschwunden. Dieses Werkzeug funktioniert in der Trittfolge ähnlich, nur löscht es dort Schüsse, also Zeilen im Editor.
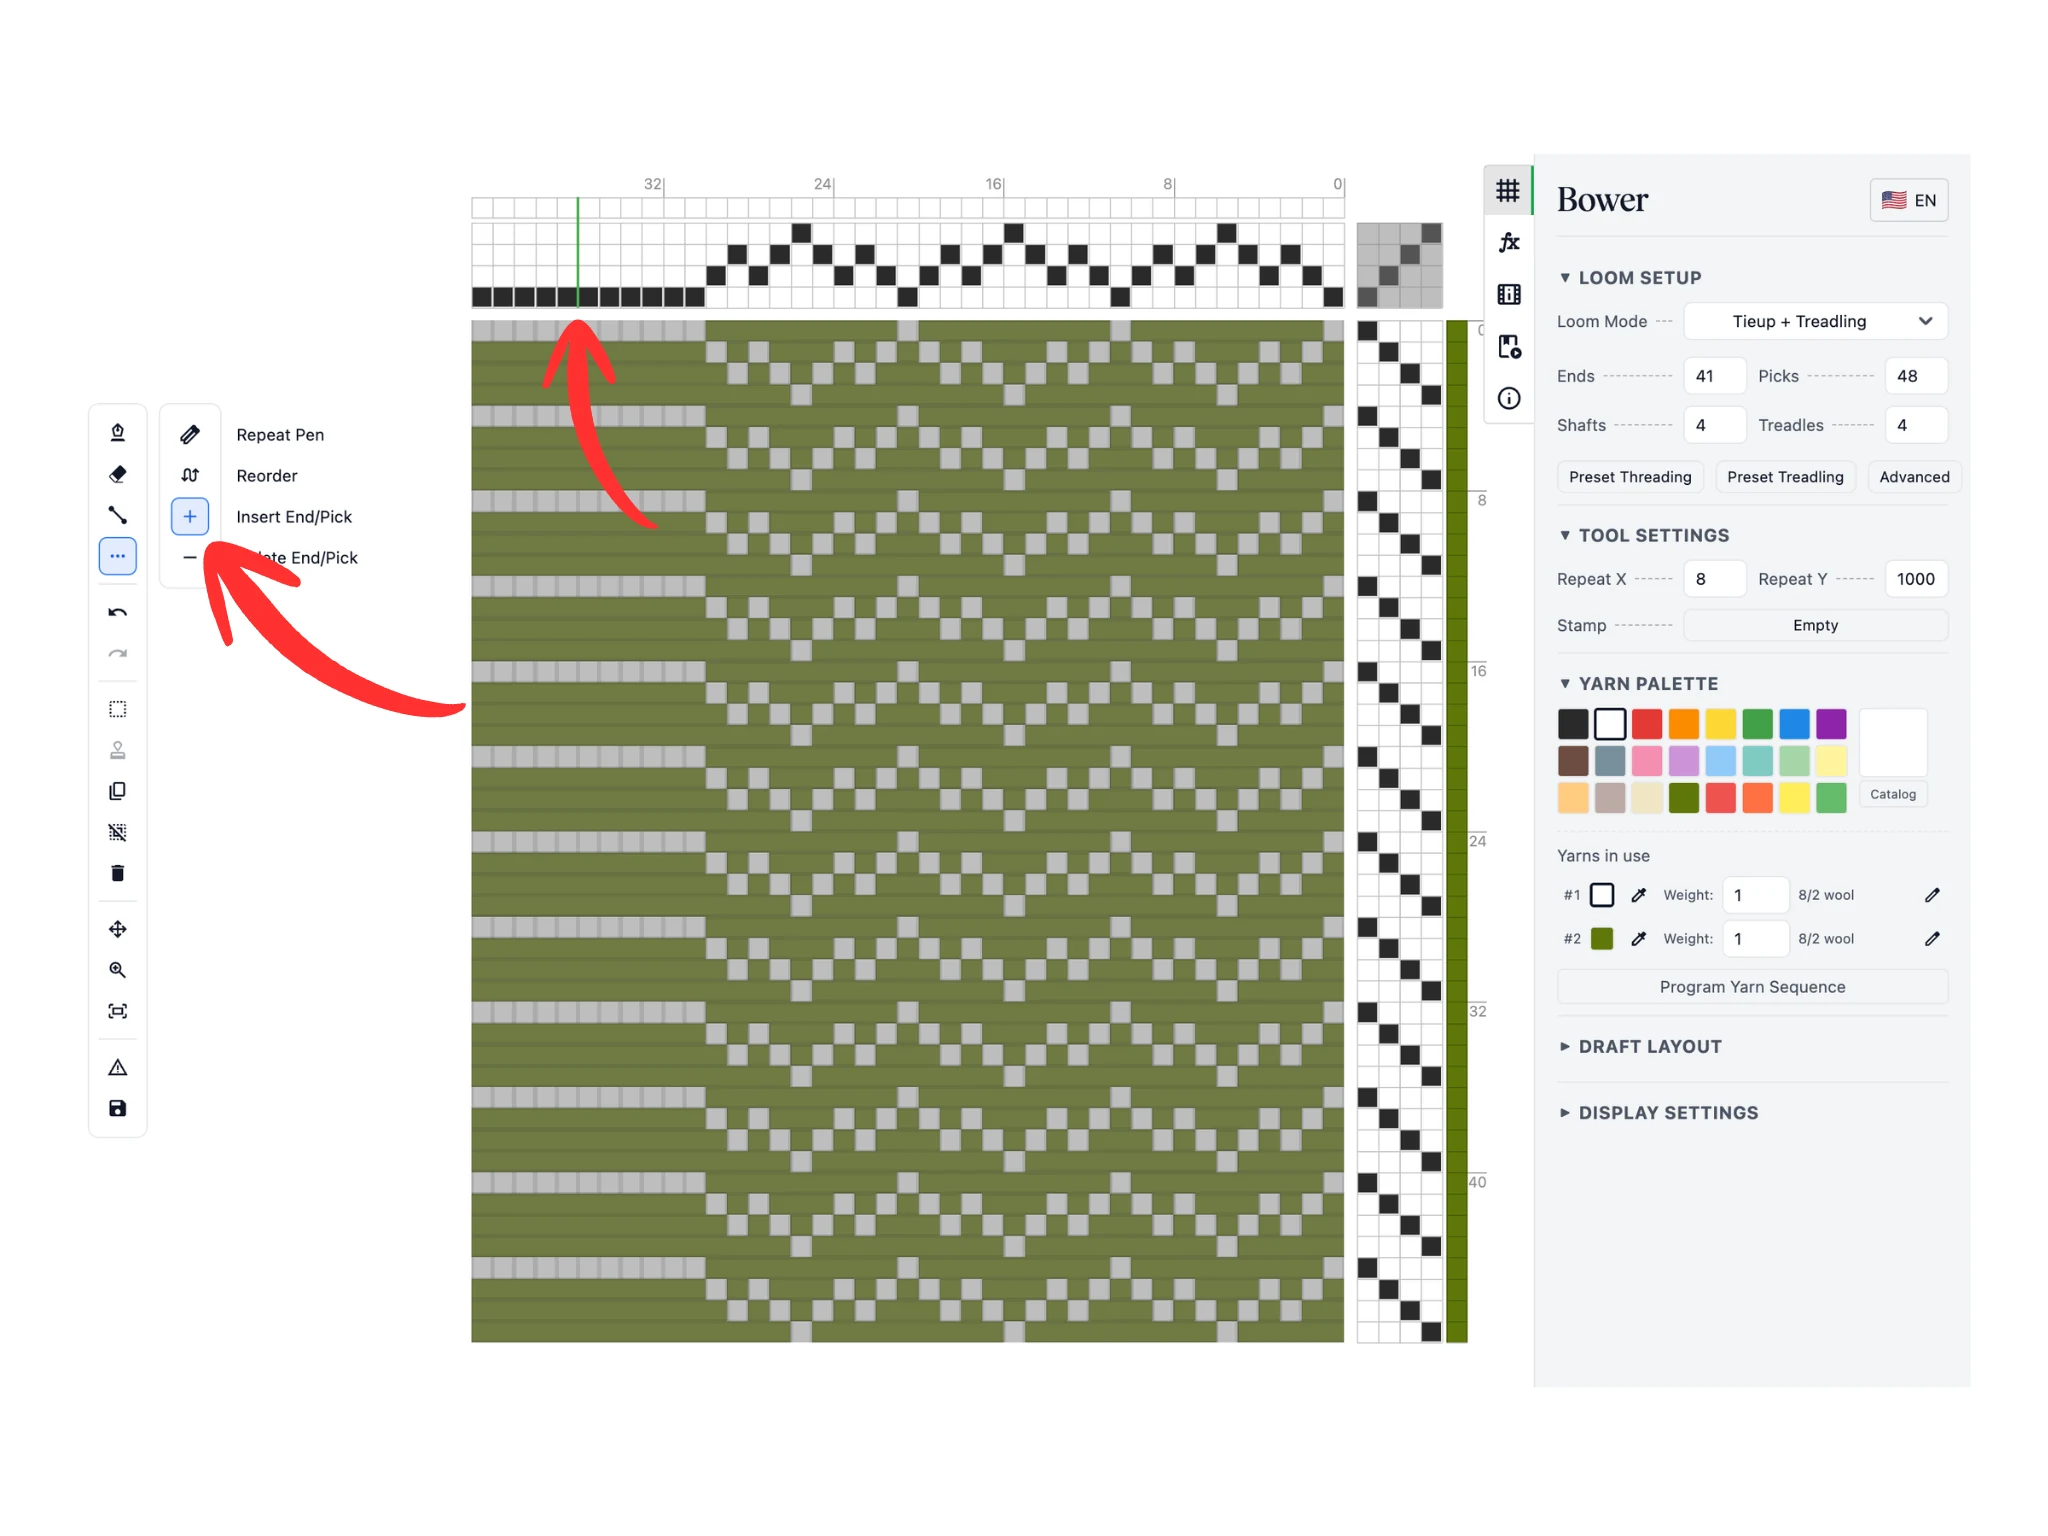
Lasse die Strukturwerkzeuge in der Werkzeugleiste geöffnet und wähle in der Unterleiste das Werkzeug Faden/Schuss einfügen.
Wenn du über den Einzug fährst (2), erscheint eine dünne grüne Linie zwischen zwei Kettfäden. Mit einem Klick fügst du einen Kettfaden zwischen den beiden ein.
In der Anleitung habe ich mit dem Werkzeug Faden/Schuss einfügen 10-mal geklickt, um genug Kettfäden einzufügen, damit eine weitere Kopie meiner zickzackigen Spitzeinzug-Sequenz hineinpasst. Das Werkzeug funktioniert im Trittfolgebereich ähnlich zum Einfügen von Schüssen.
Wie du siehst, helfen dir die Werkzeuge Faden/Schuss löschen und einfügen, die Mitte von Einzugs-/Trittfolgesequenzen mühelos zu bearbeiten.
Für diese Anleitung haben wir die zickzackige Spitzeinzug-Sequenz kopiert und gestempelt, um die neu eingefügten Kettfäden zu füllen.
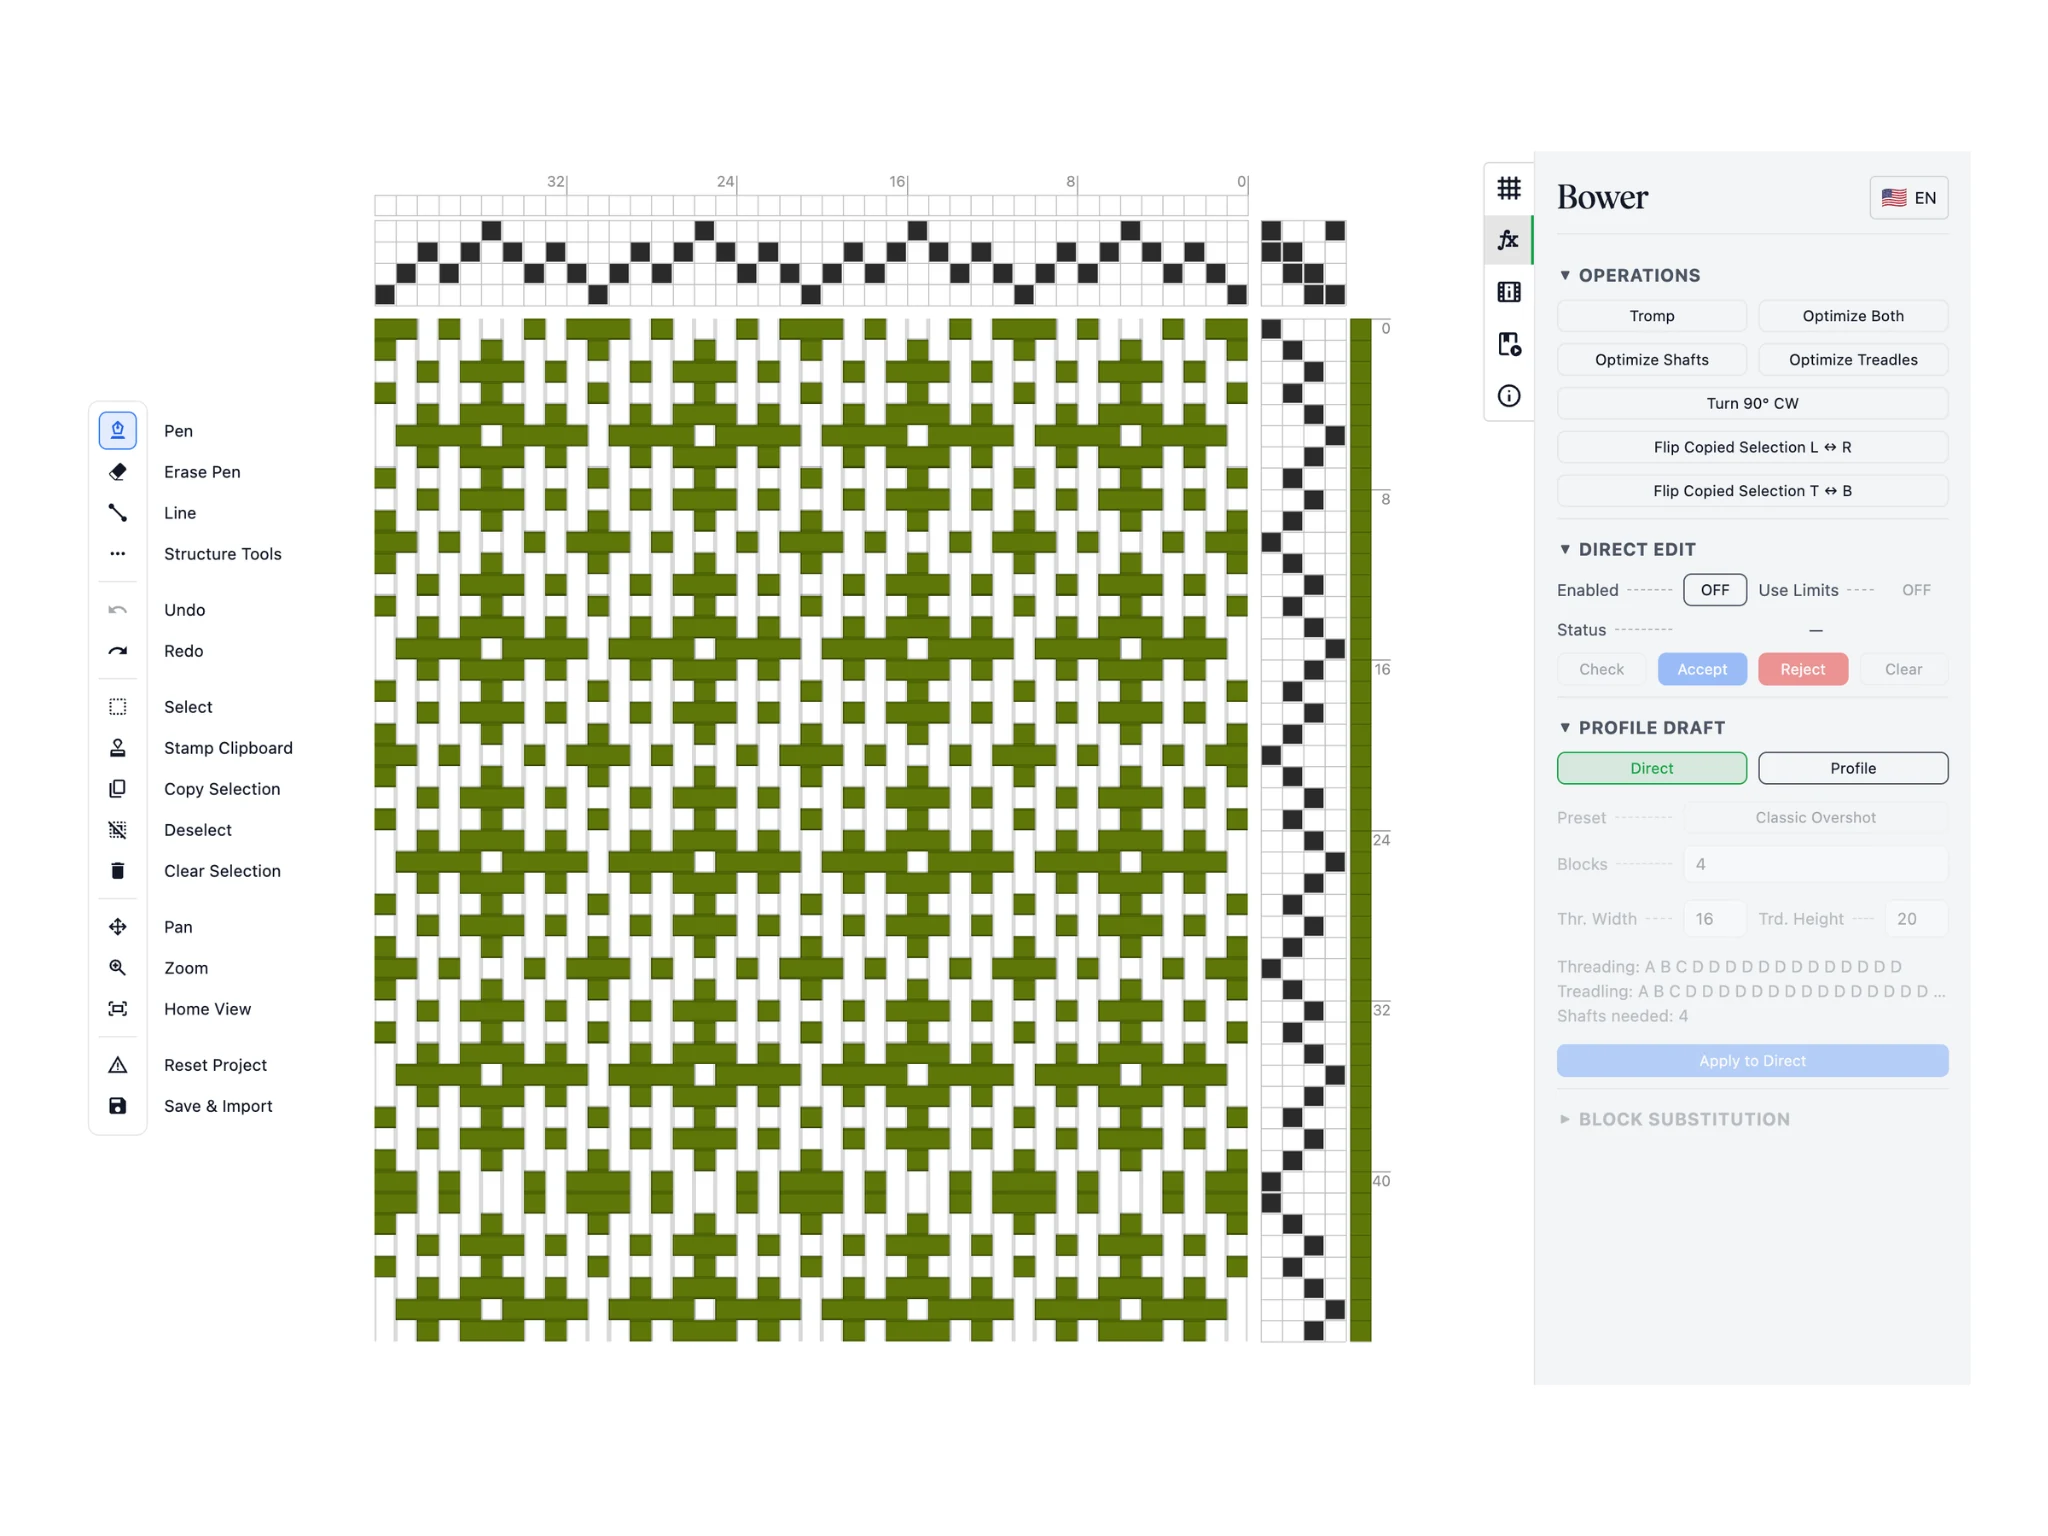
Verwende als Nächstes das Auswahl-Werkzeug und wähle alle Zellen in der Anbindung aus. Denk daran: Die Auswahlwerkzeuge funktionieren in den Bereichen Einzug, Anbindung und Trittfolge der Patrone.
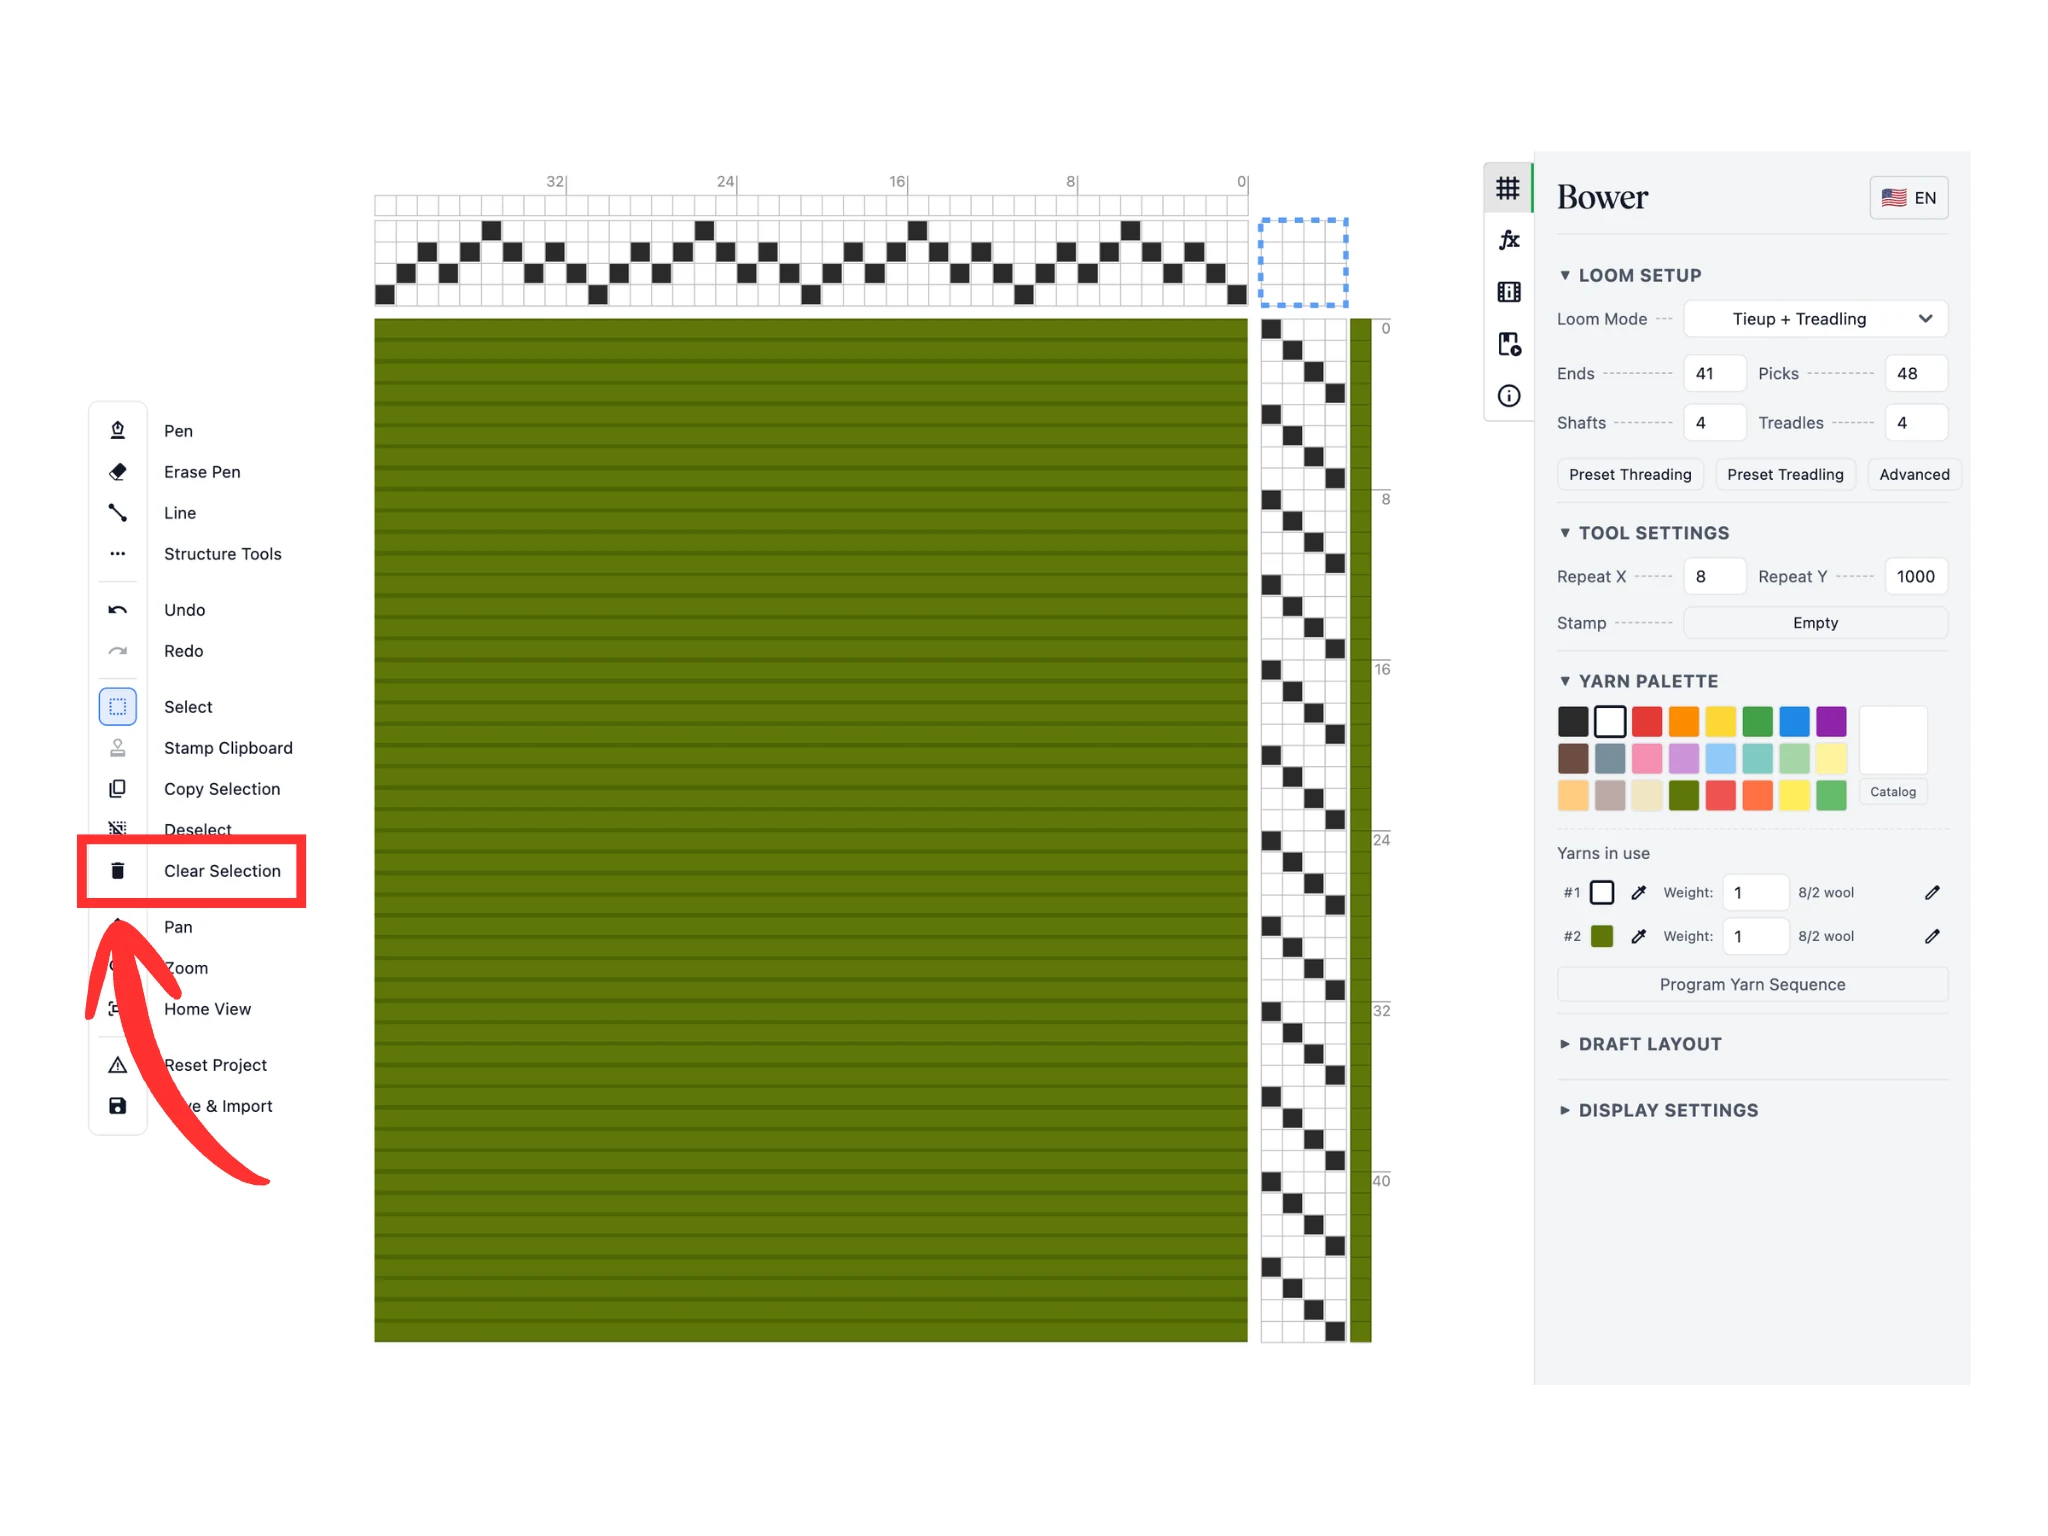
Verwende die Schaltfläche Auswahl löschen, um alle Daten innerhalb einer Auswahl zu löschen. Du siehst, dass alles innerhalb des gestrichelten blauen Rahmens gelöscht wurde.
Mit einer leeren Anbindung aktualisiert sich die Patrone entsprechend und zeigt uns alle Kettfäden.
Das Werkzeug Auswahl löschen ist nützlich, wenn du Teile deiner Patrone löschen möchtest, oft um sie neu zu erstellen.
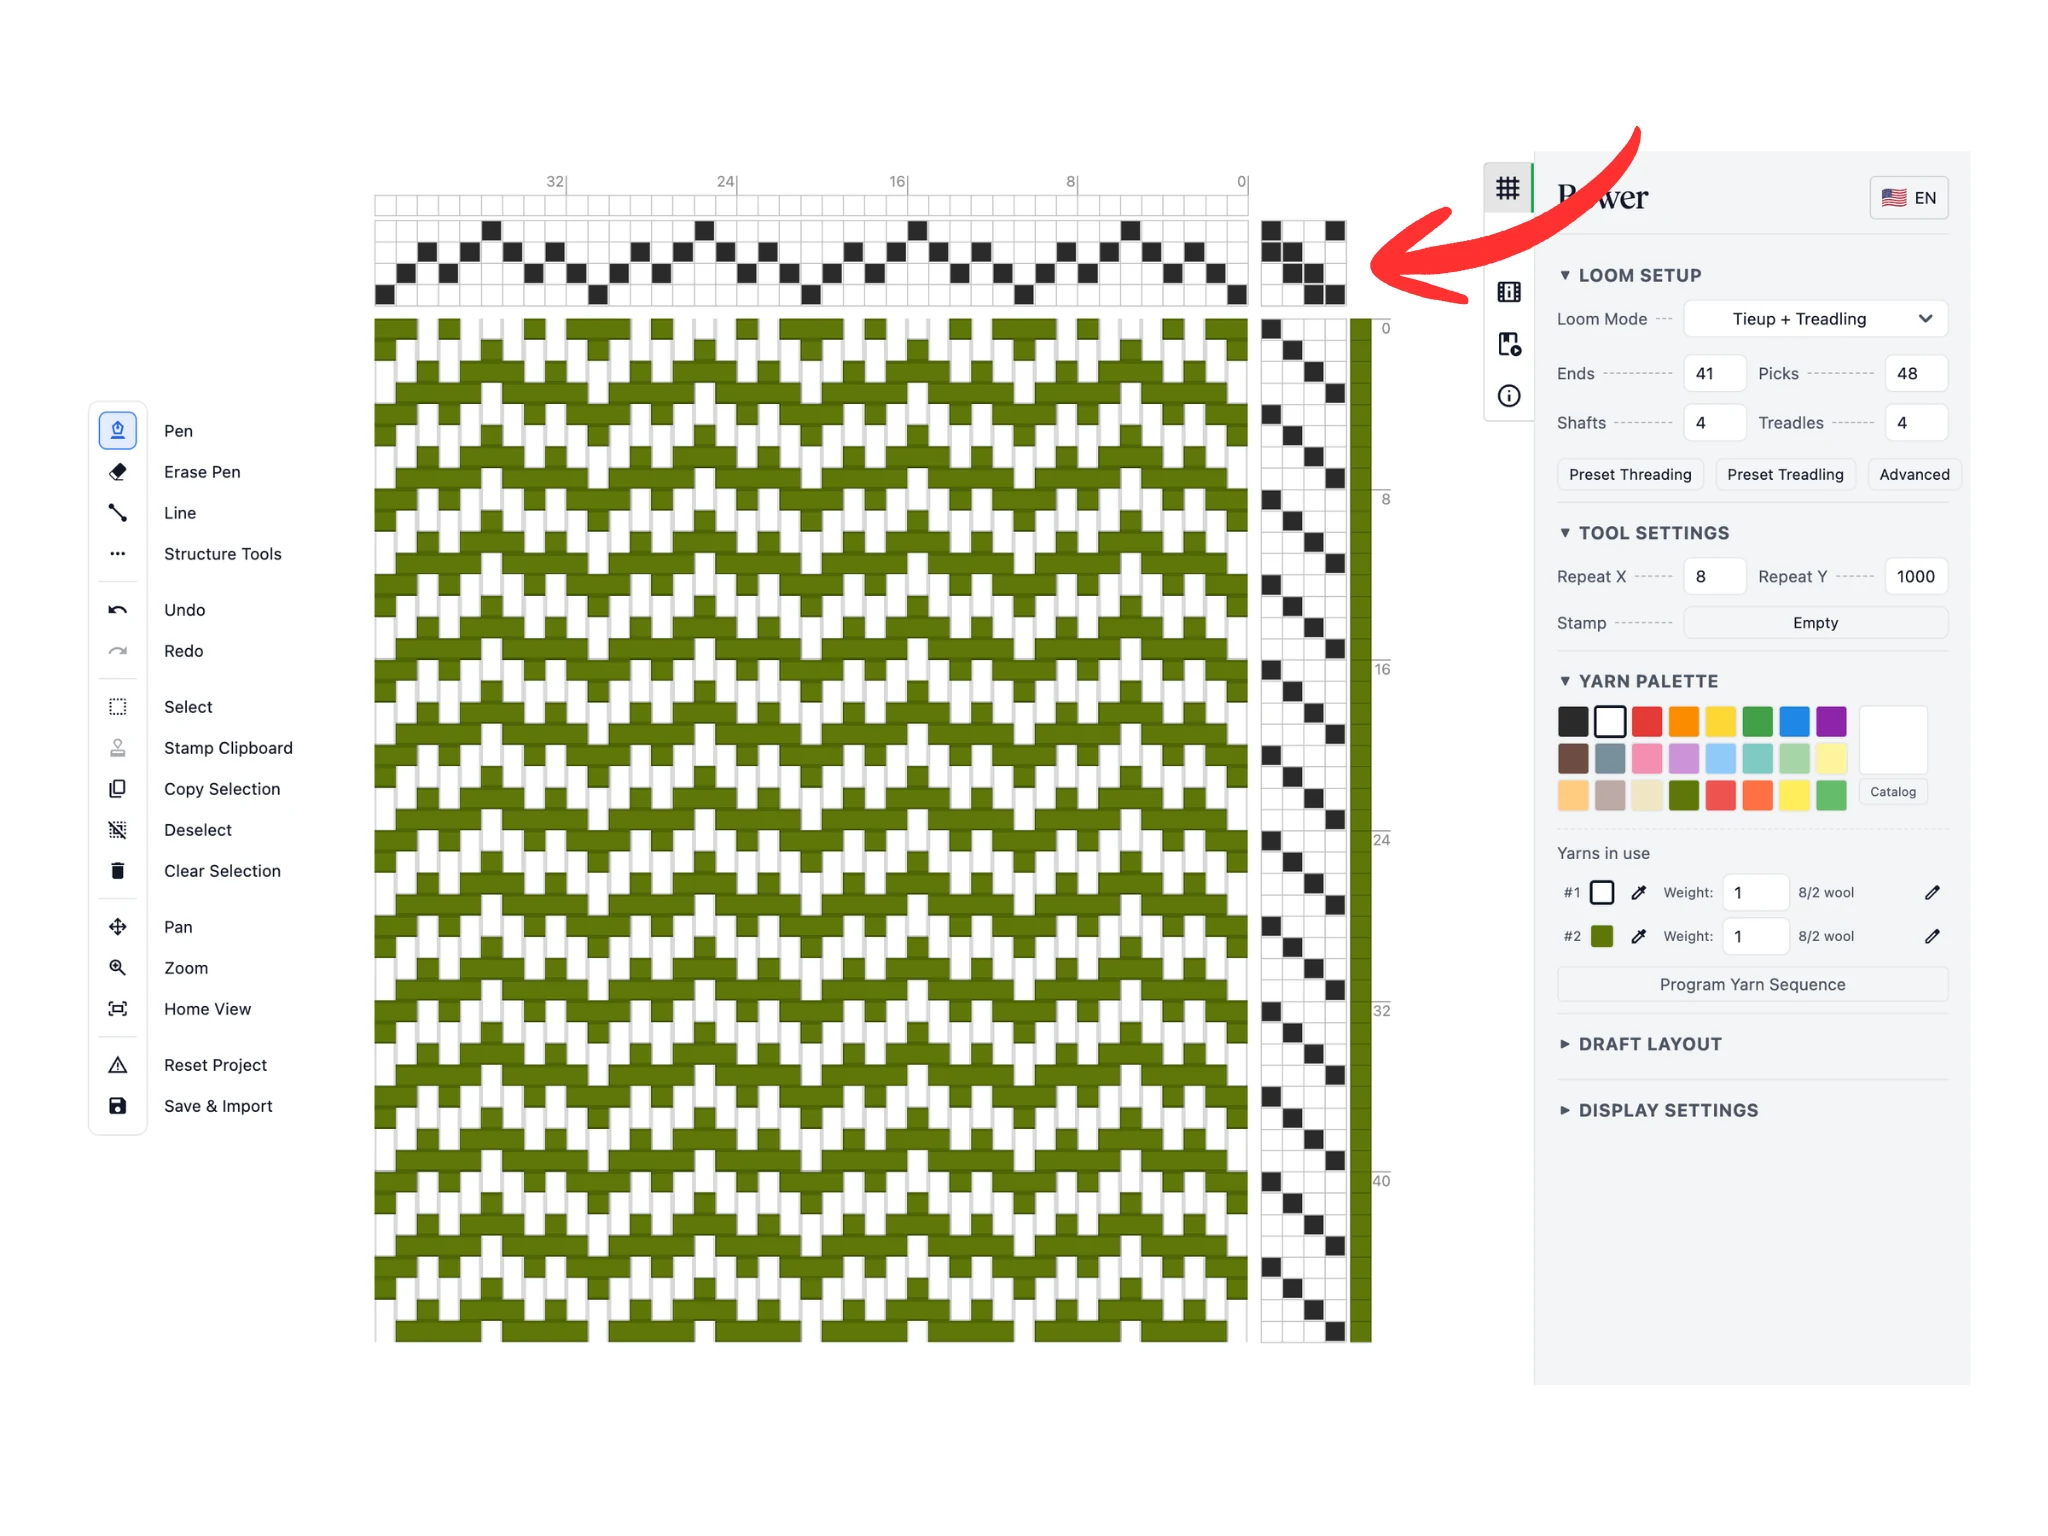
Für die Anleitung haben wir mit dem Stift-Werkzeug eine fallende 2/2 Köper-Anbindung gezeichnet.
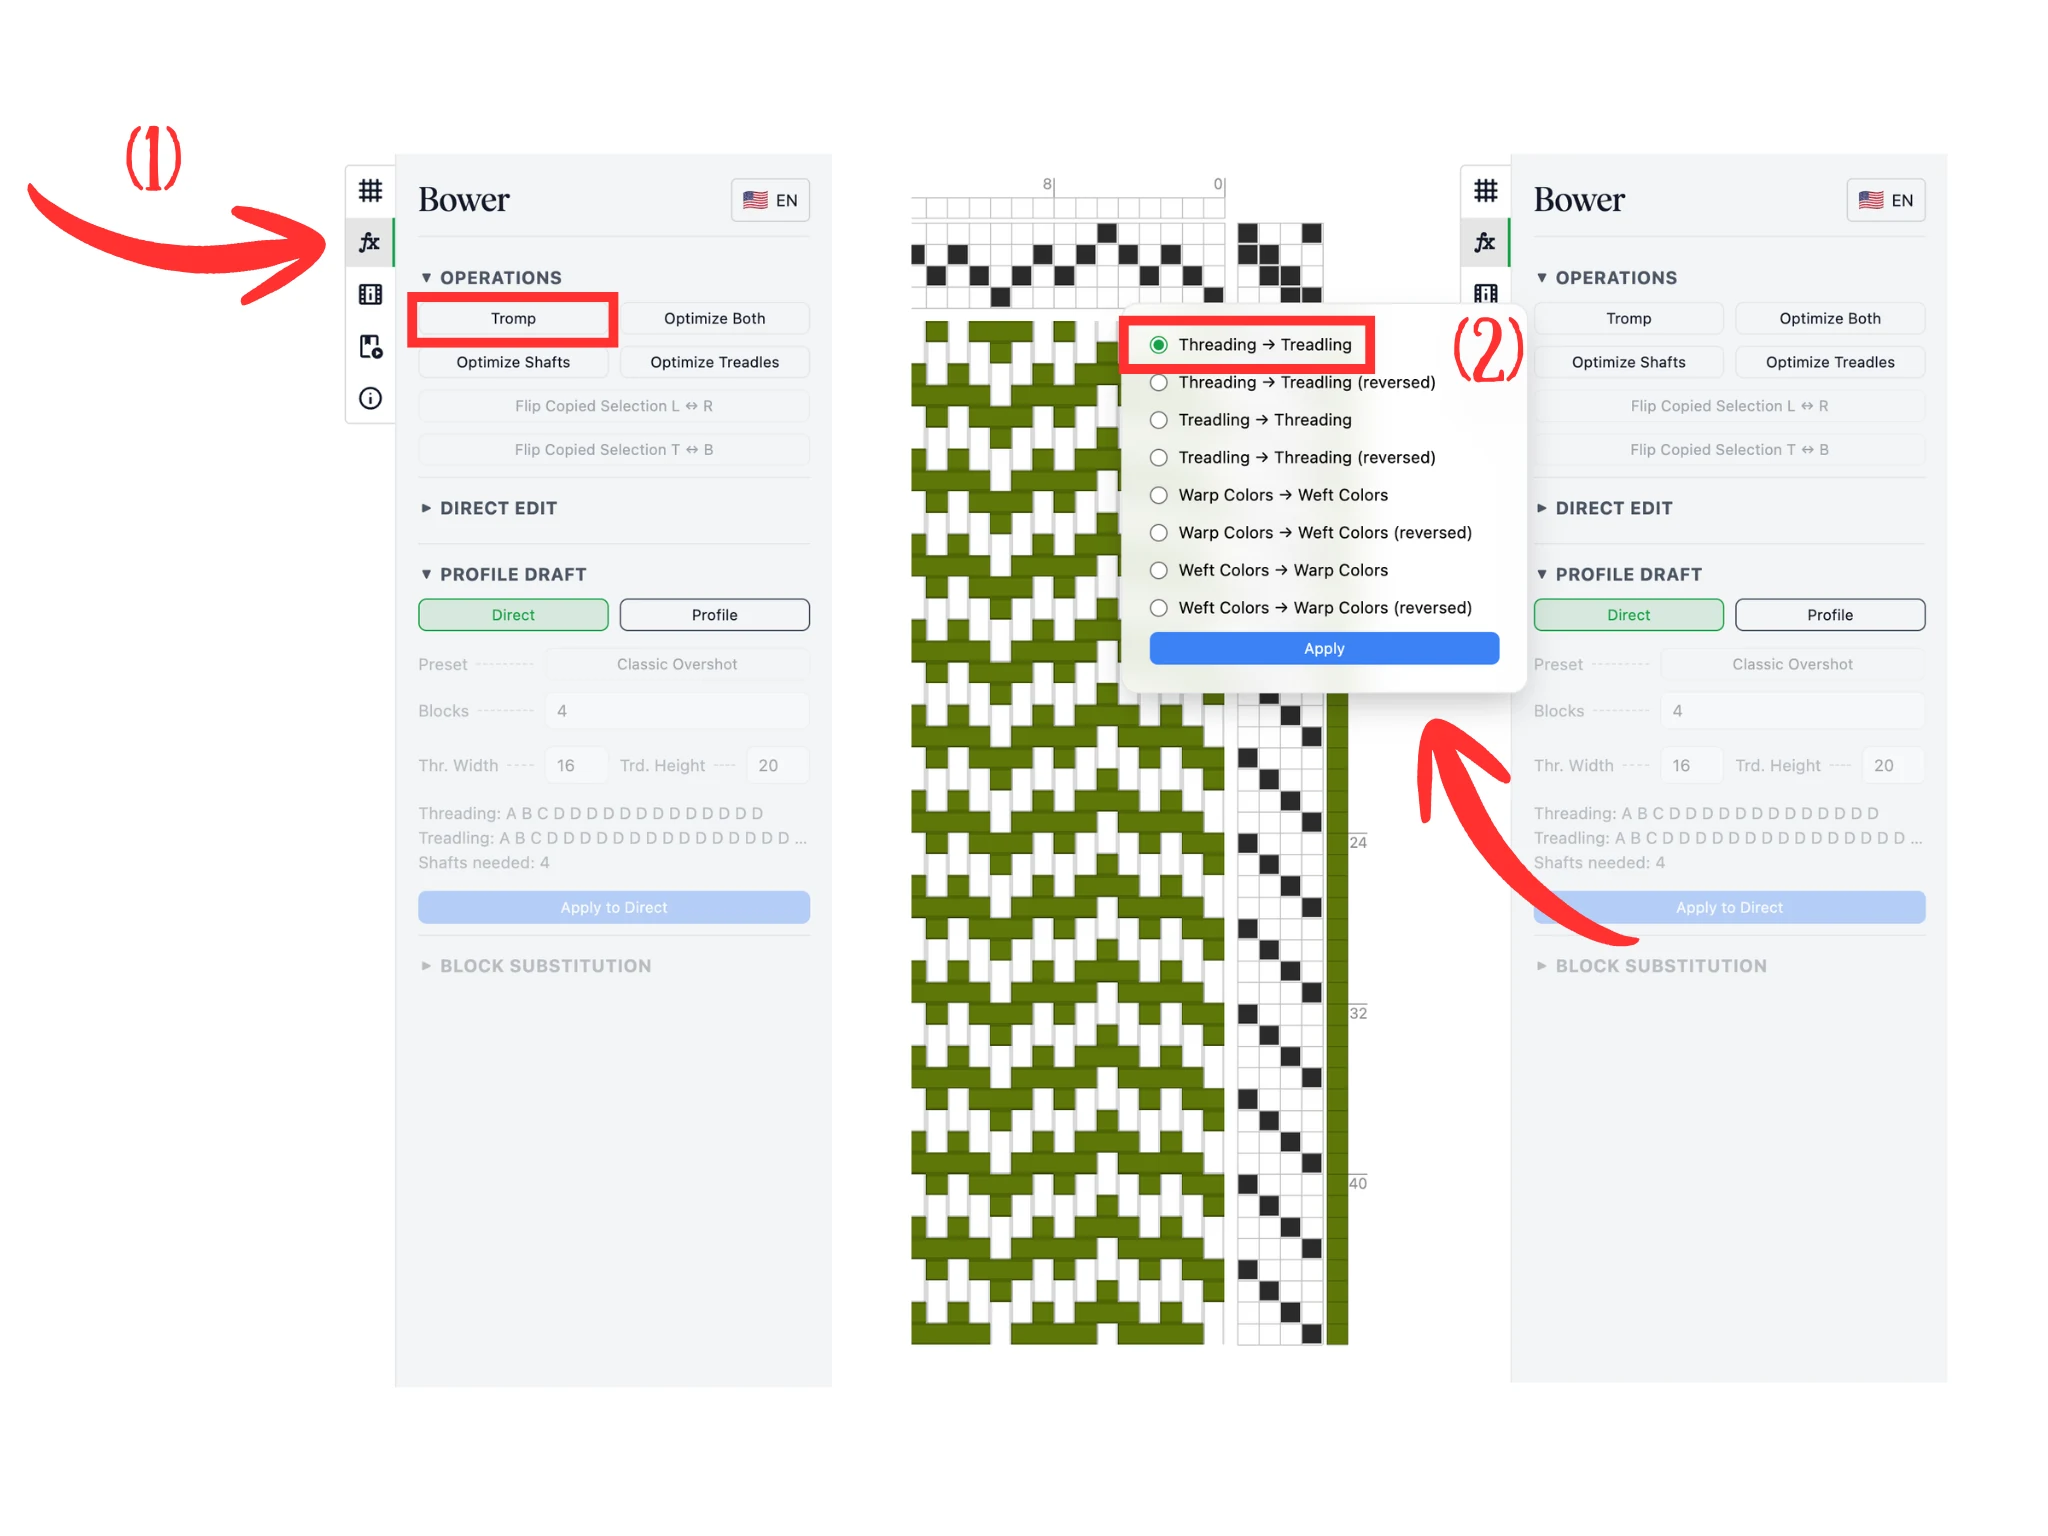
Als Nächstes verwenden wir die Funktion Tromp as Writ in Bower. Sie kopiert die Einzugssequenz in die Trittfolge oder umgekehrt.
Gehe zum Tab Operationen (1), der ein „fx“-Symbol hat. Klicke im Bereich Operationen auf die Schaltfläche Tromp.
Damit öffnet sich ein Pop-up-Fenster mit vielen Optionen für Tromp as Writ. Wähle die Option Einzug -> Trittfolge (2) und klicke auf Anwenden, um die Änderung zu übernehmen.
Du siehst, dass die Einzugssequenz in den Trittfolgebereich kopiert und entsprechend gedreht wurde.
Beachte: Wenn nicht genug Sequenz zum Kopieren vorhanden ist, beginnt sie von vorn. So wird ein Einzug 1-2-3-4-3-2-1 als Sequenz 1-2-3-4-3-2-1-1-2-3-4-3-2-1-1-... kopiert. Verwende das Werkzeug Faden/Schuss löschen, um doppelte Schüsse zu entfernen, falls du das möchtest, oder richte den Einzug als 1-2-3-4-3-2 ein, was sich sauber wiederholt.
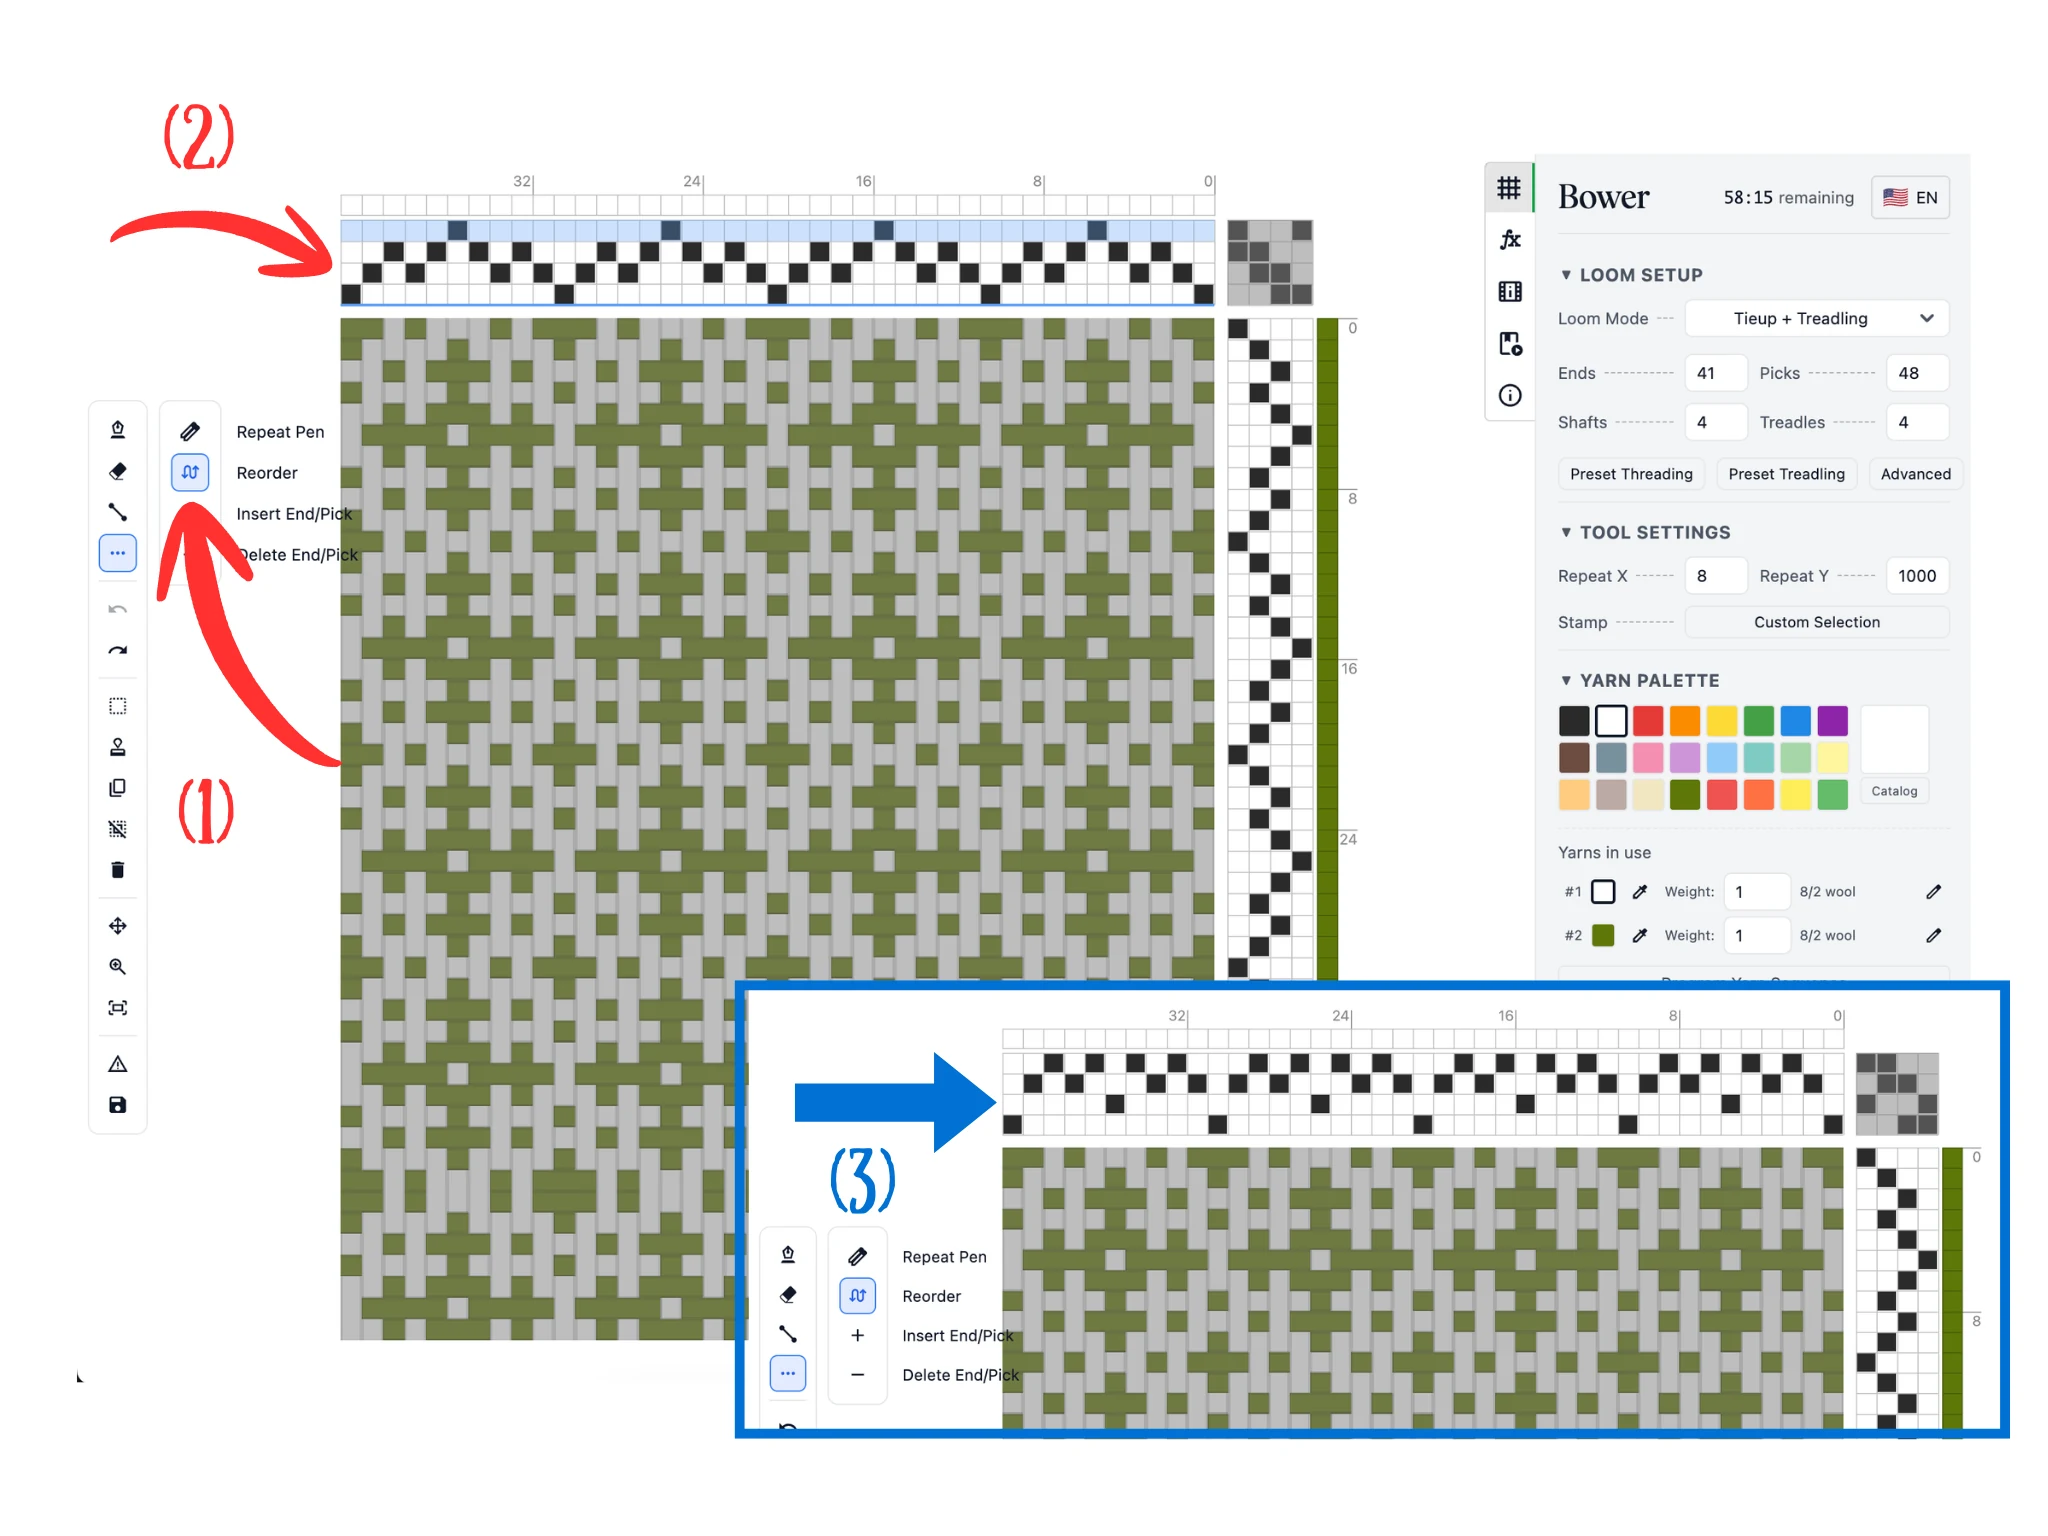
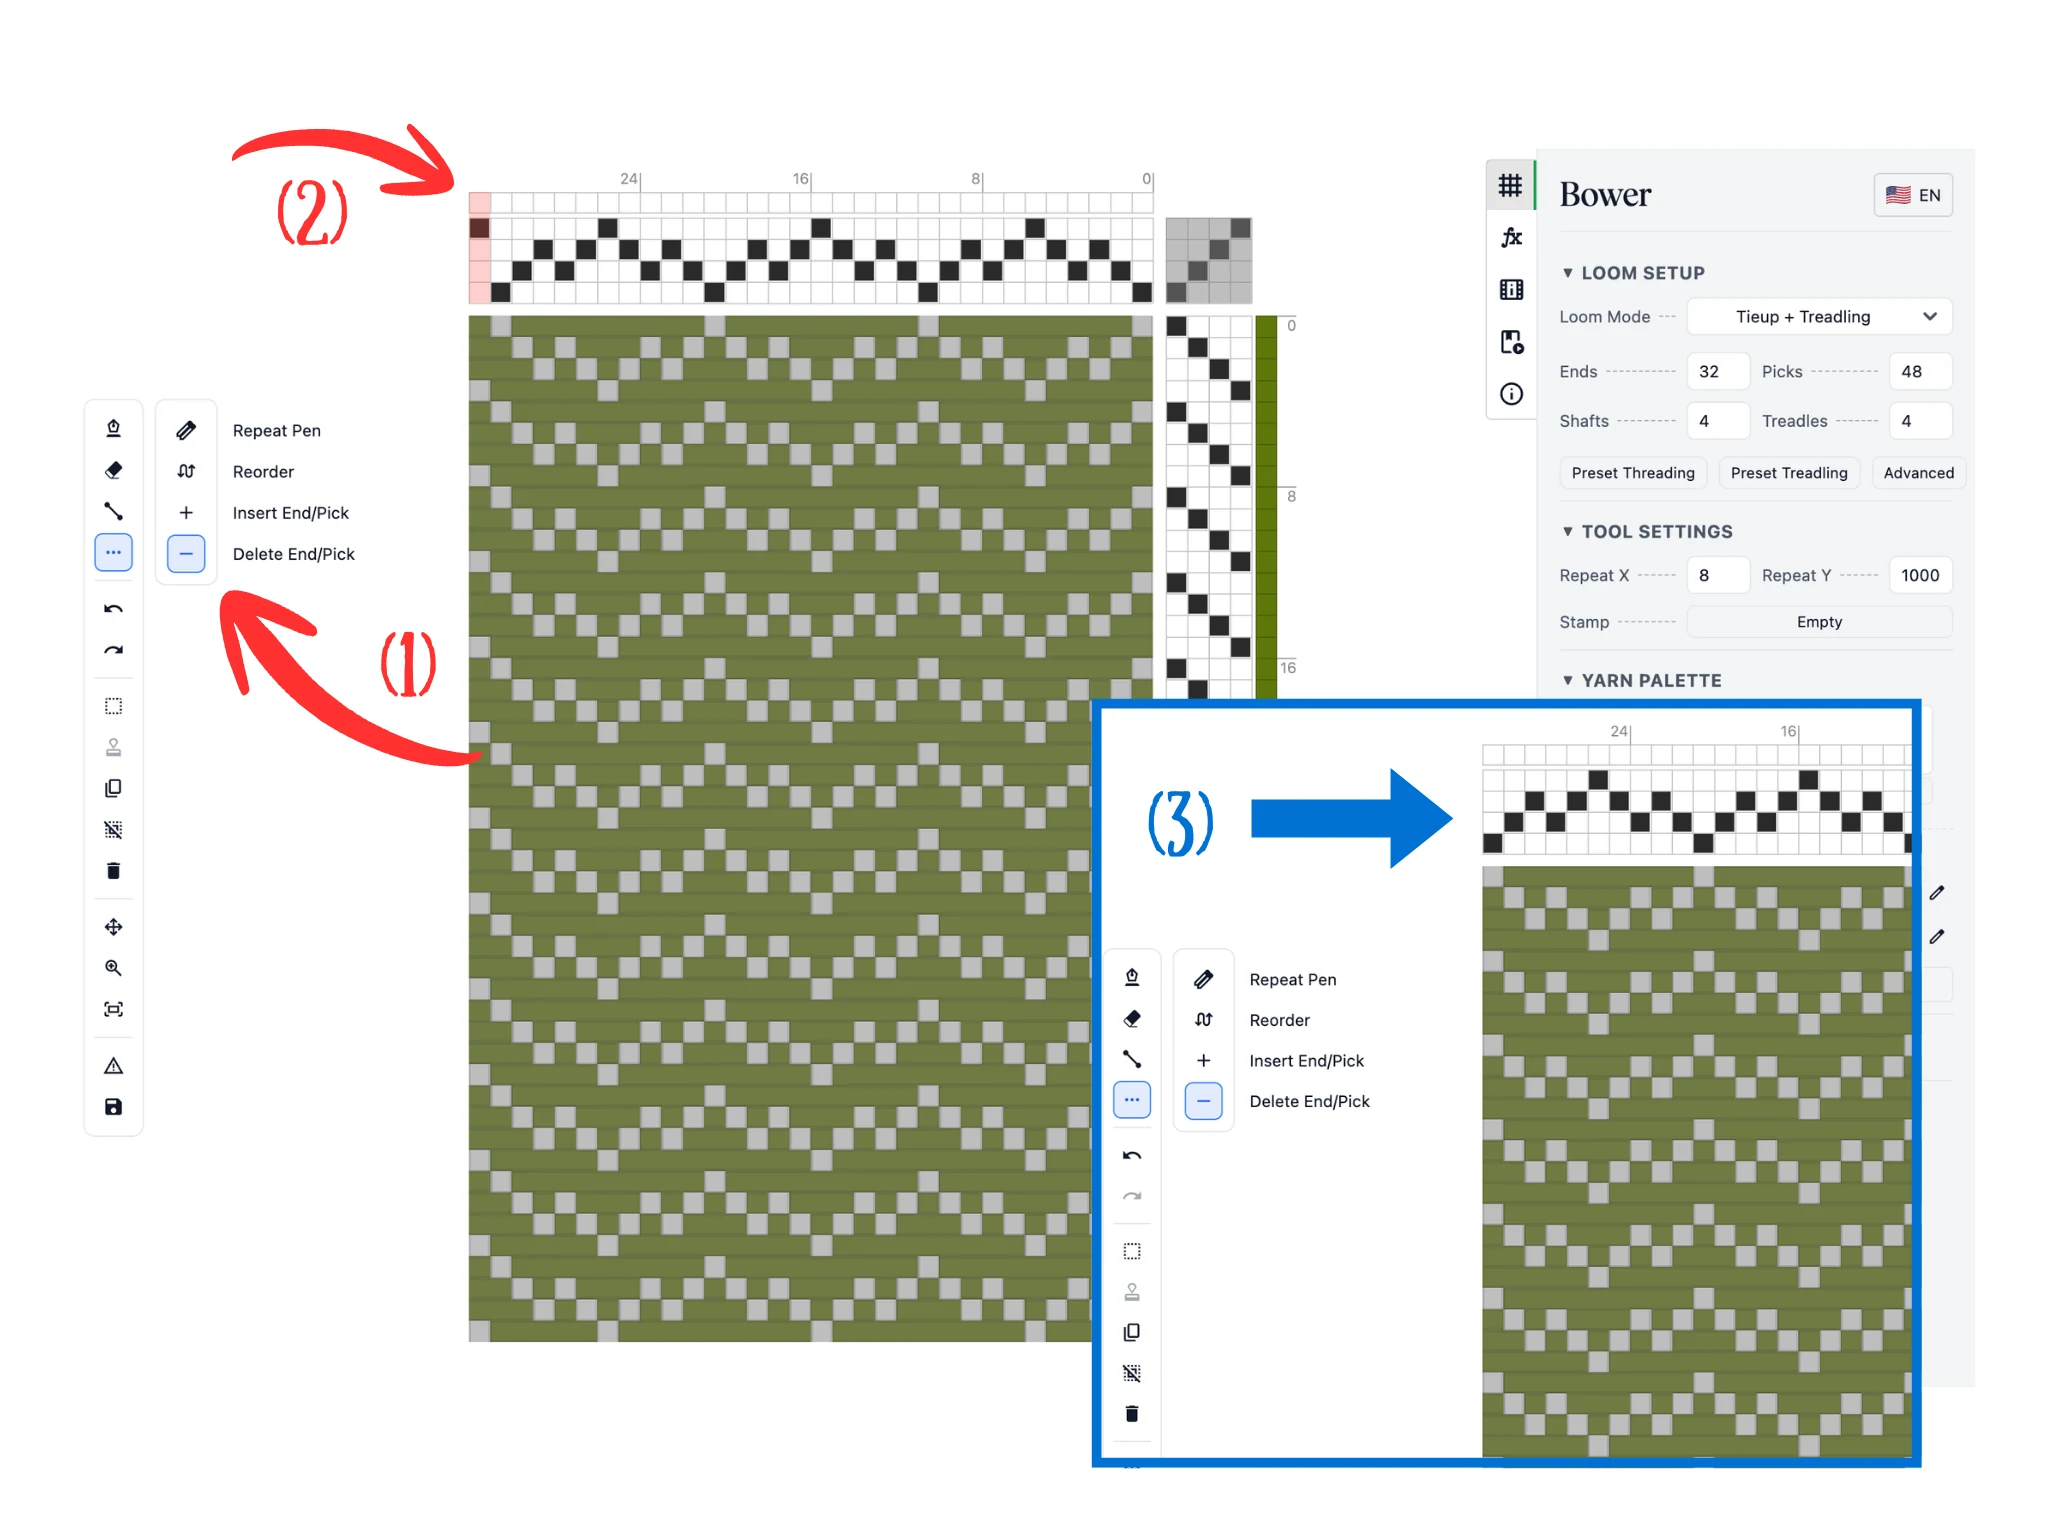
Das letzte Werkzeug, das wir dir in dieser Anleitung vorstellen, ist das Umordnen-Werkzeug, mit dem du deine Schäfte oder Tritte umordnen kannst. Klicke darauf (1) in der Unterleiste der Strukturwerkzeuge.
Fahre über den Einzugsbereich des Editors (2), und es wird eine ganze Schaftzeile hervorgehoben. Klicke mit der linken Maustaste und ziehe sie an eine neue Lücke, die als dunkelblaue Linie hervorgehoben wird. Sobald du die Maustaste loslässt, verschiebt die Software die gezogene Schaftzeile in diese Lücke, wie in (3) zu sehen.
Das funktioniert auch im Trittfolgebereich, wo ganze Trittspalten hervorgehoben werden. Dieses Werkzeug hilft dir, deine Schäfte und Tritte für einen leichteren Einzug bzw. eine leichtere Trittfolge am physischen Webstuhl zu organisieren.
Herzlichen Glückwunsch zum Abschluss dieser Bower-Anleitung!