Welcome to Bower! In this tutorial, you will learn the basic skills to start drafting your weaving projects in software.
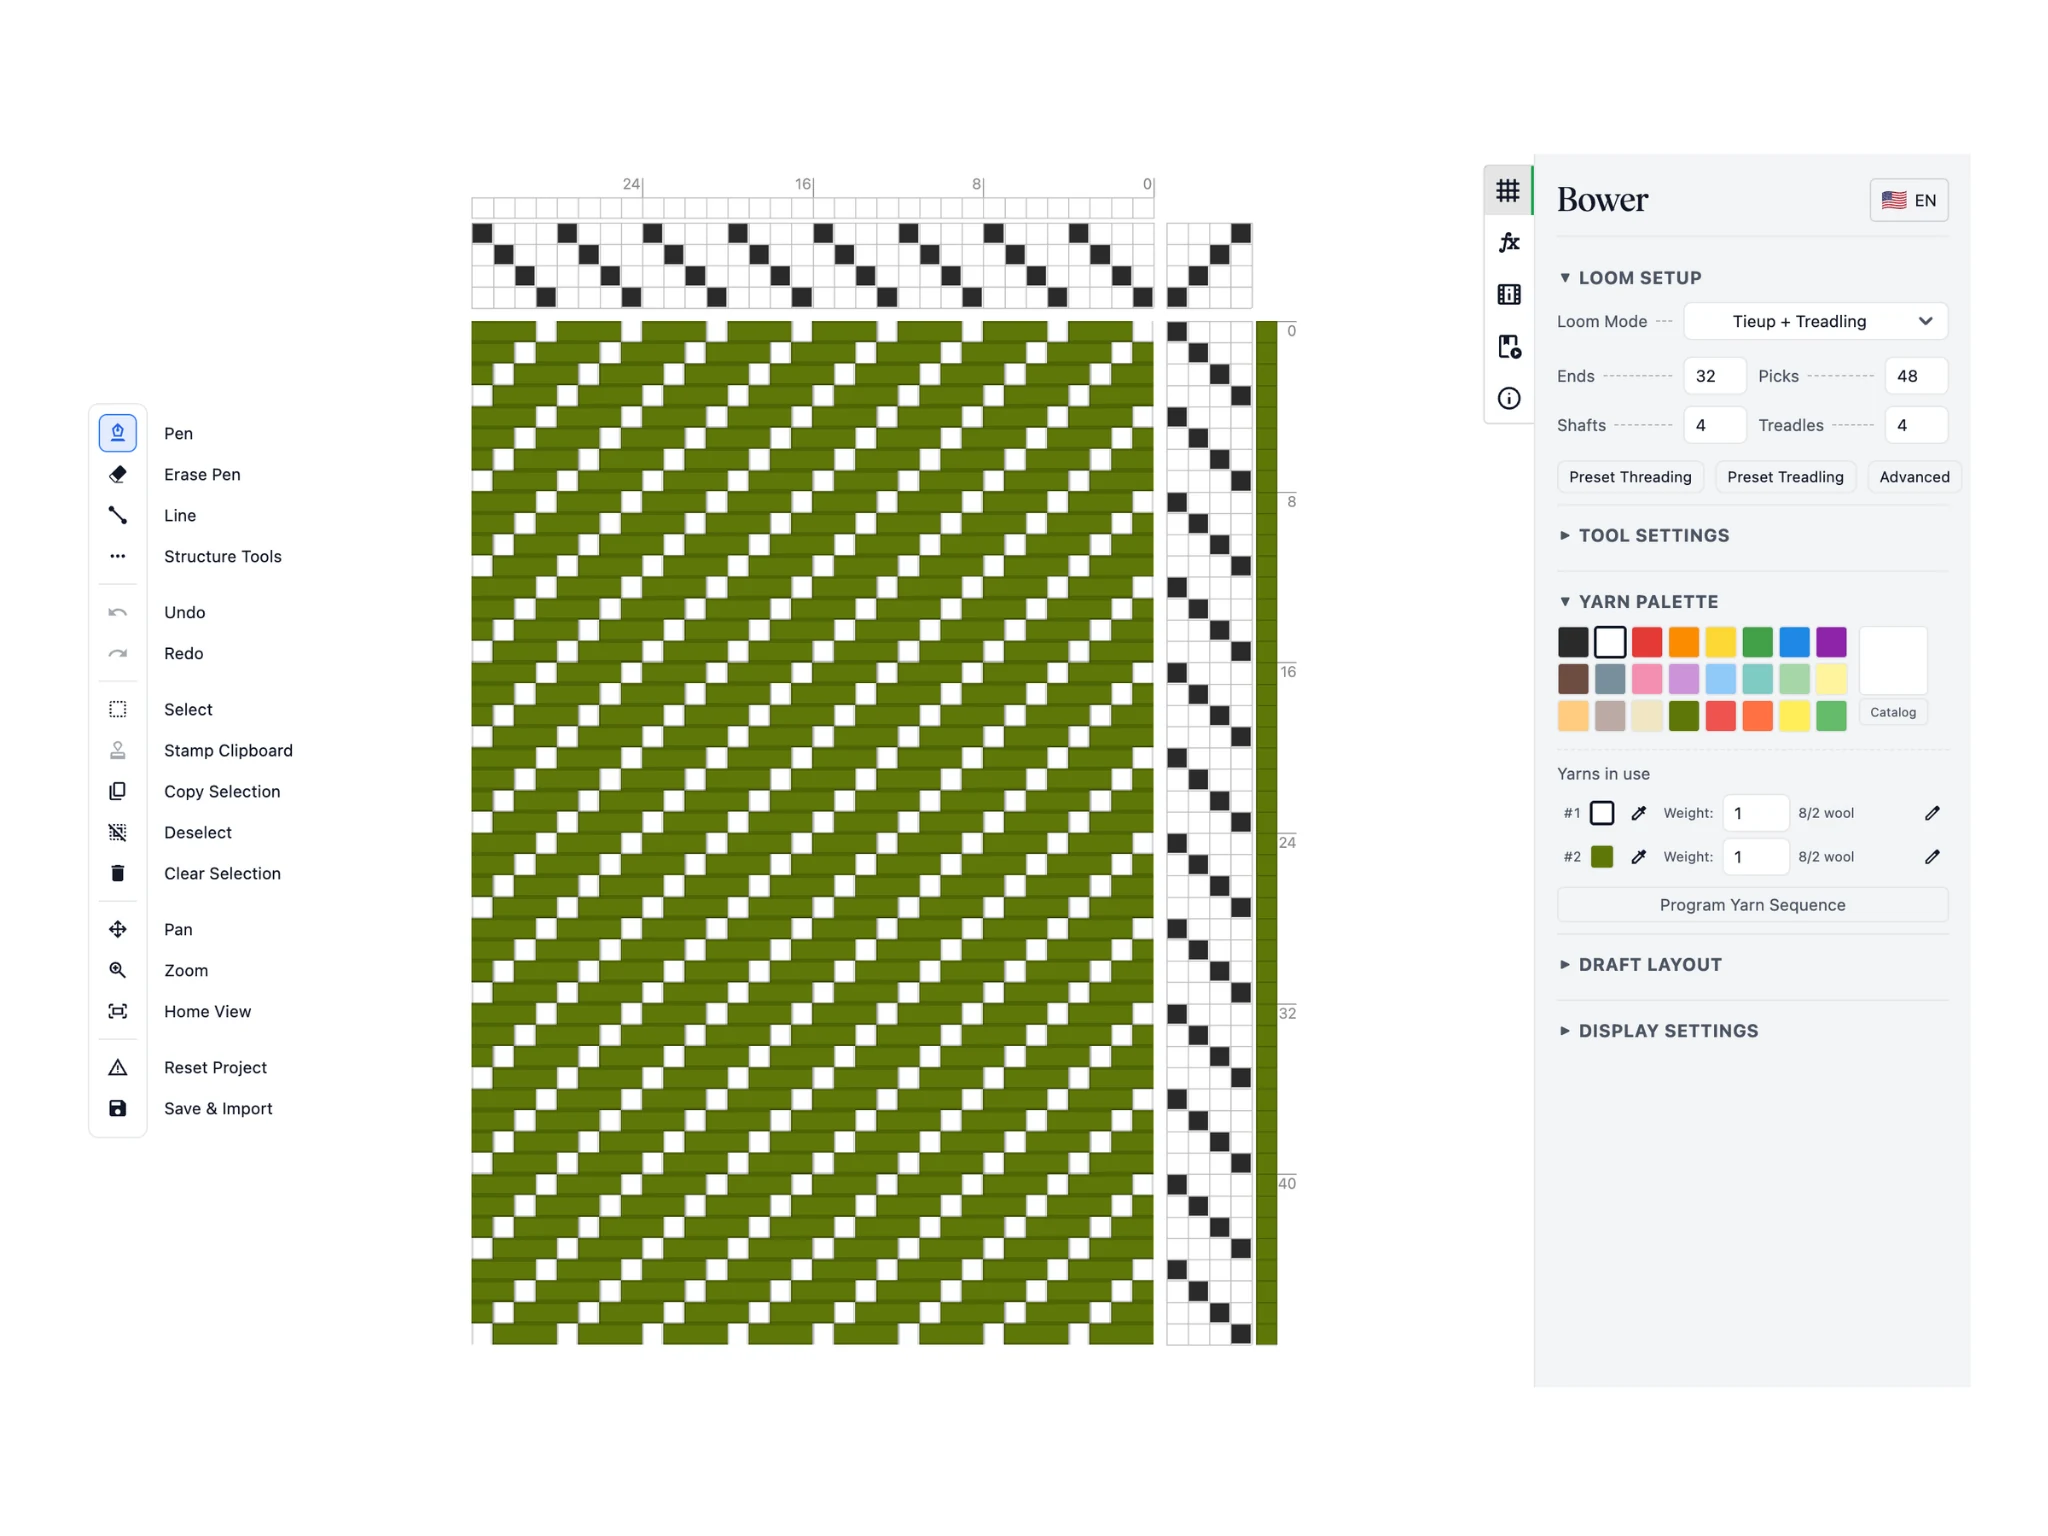
This is your starting screen. The Bower interface is organized into a toolbar on the left, the editor in the center, and a properties pane on the right.
The toolbar contains a variety of tools that you use to edit the draft. Tools are used in the editor which contains the weaving draft: four sections of your threading, tie-up, treadling, and drawdown. Finally, the properties panel has options to configure your tools, draft, and additional actions for drafting.
This is a lot, but don't worry! It is easy to get started in Bower and you can level up into the more advanced features as you follow our tutorials.
Notice when you start out in Bower, the Pen tool is selected by default in the toolbar. It will allow you to draw in the threading, tie-up, and treadling of your draft.
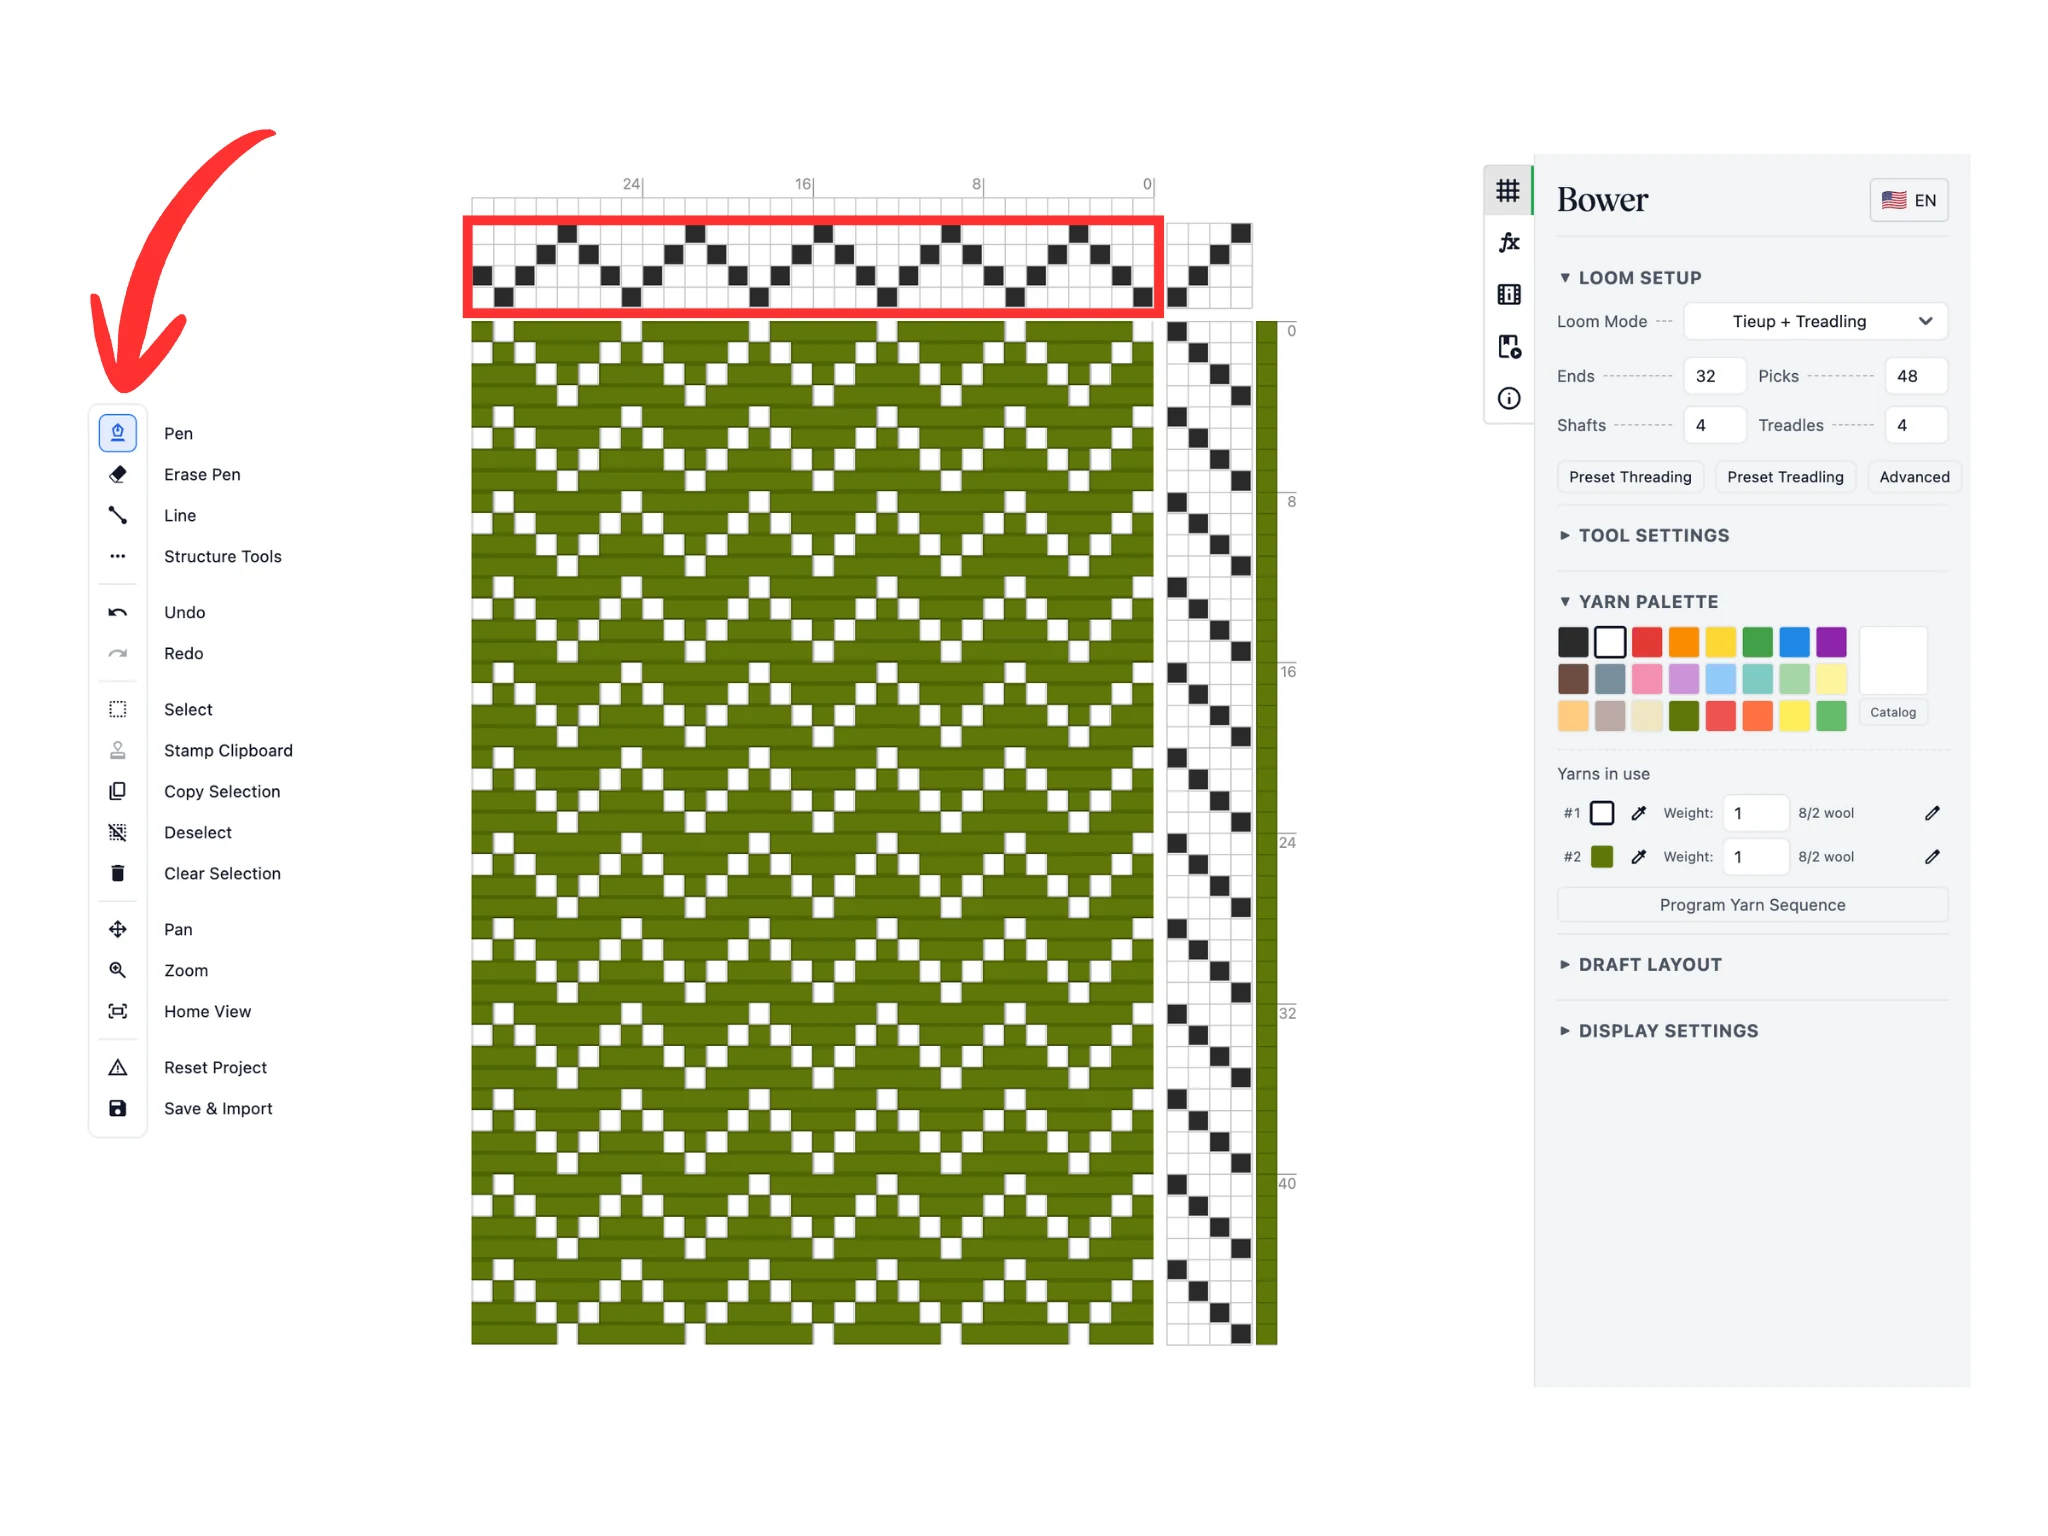
You can try using it in the threading section of the editor. Left-click on the cells to change that end's shaft assignment. In this tutorial, we've changed the straight draw (1-2-3-4-1-2-3-4...) into a point draw (1-2-3-4-3-2-1...).
Notice how the drawdown updates automatically as you change the threading.
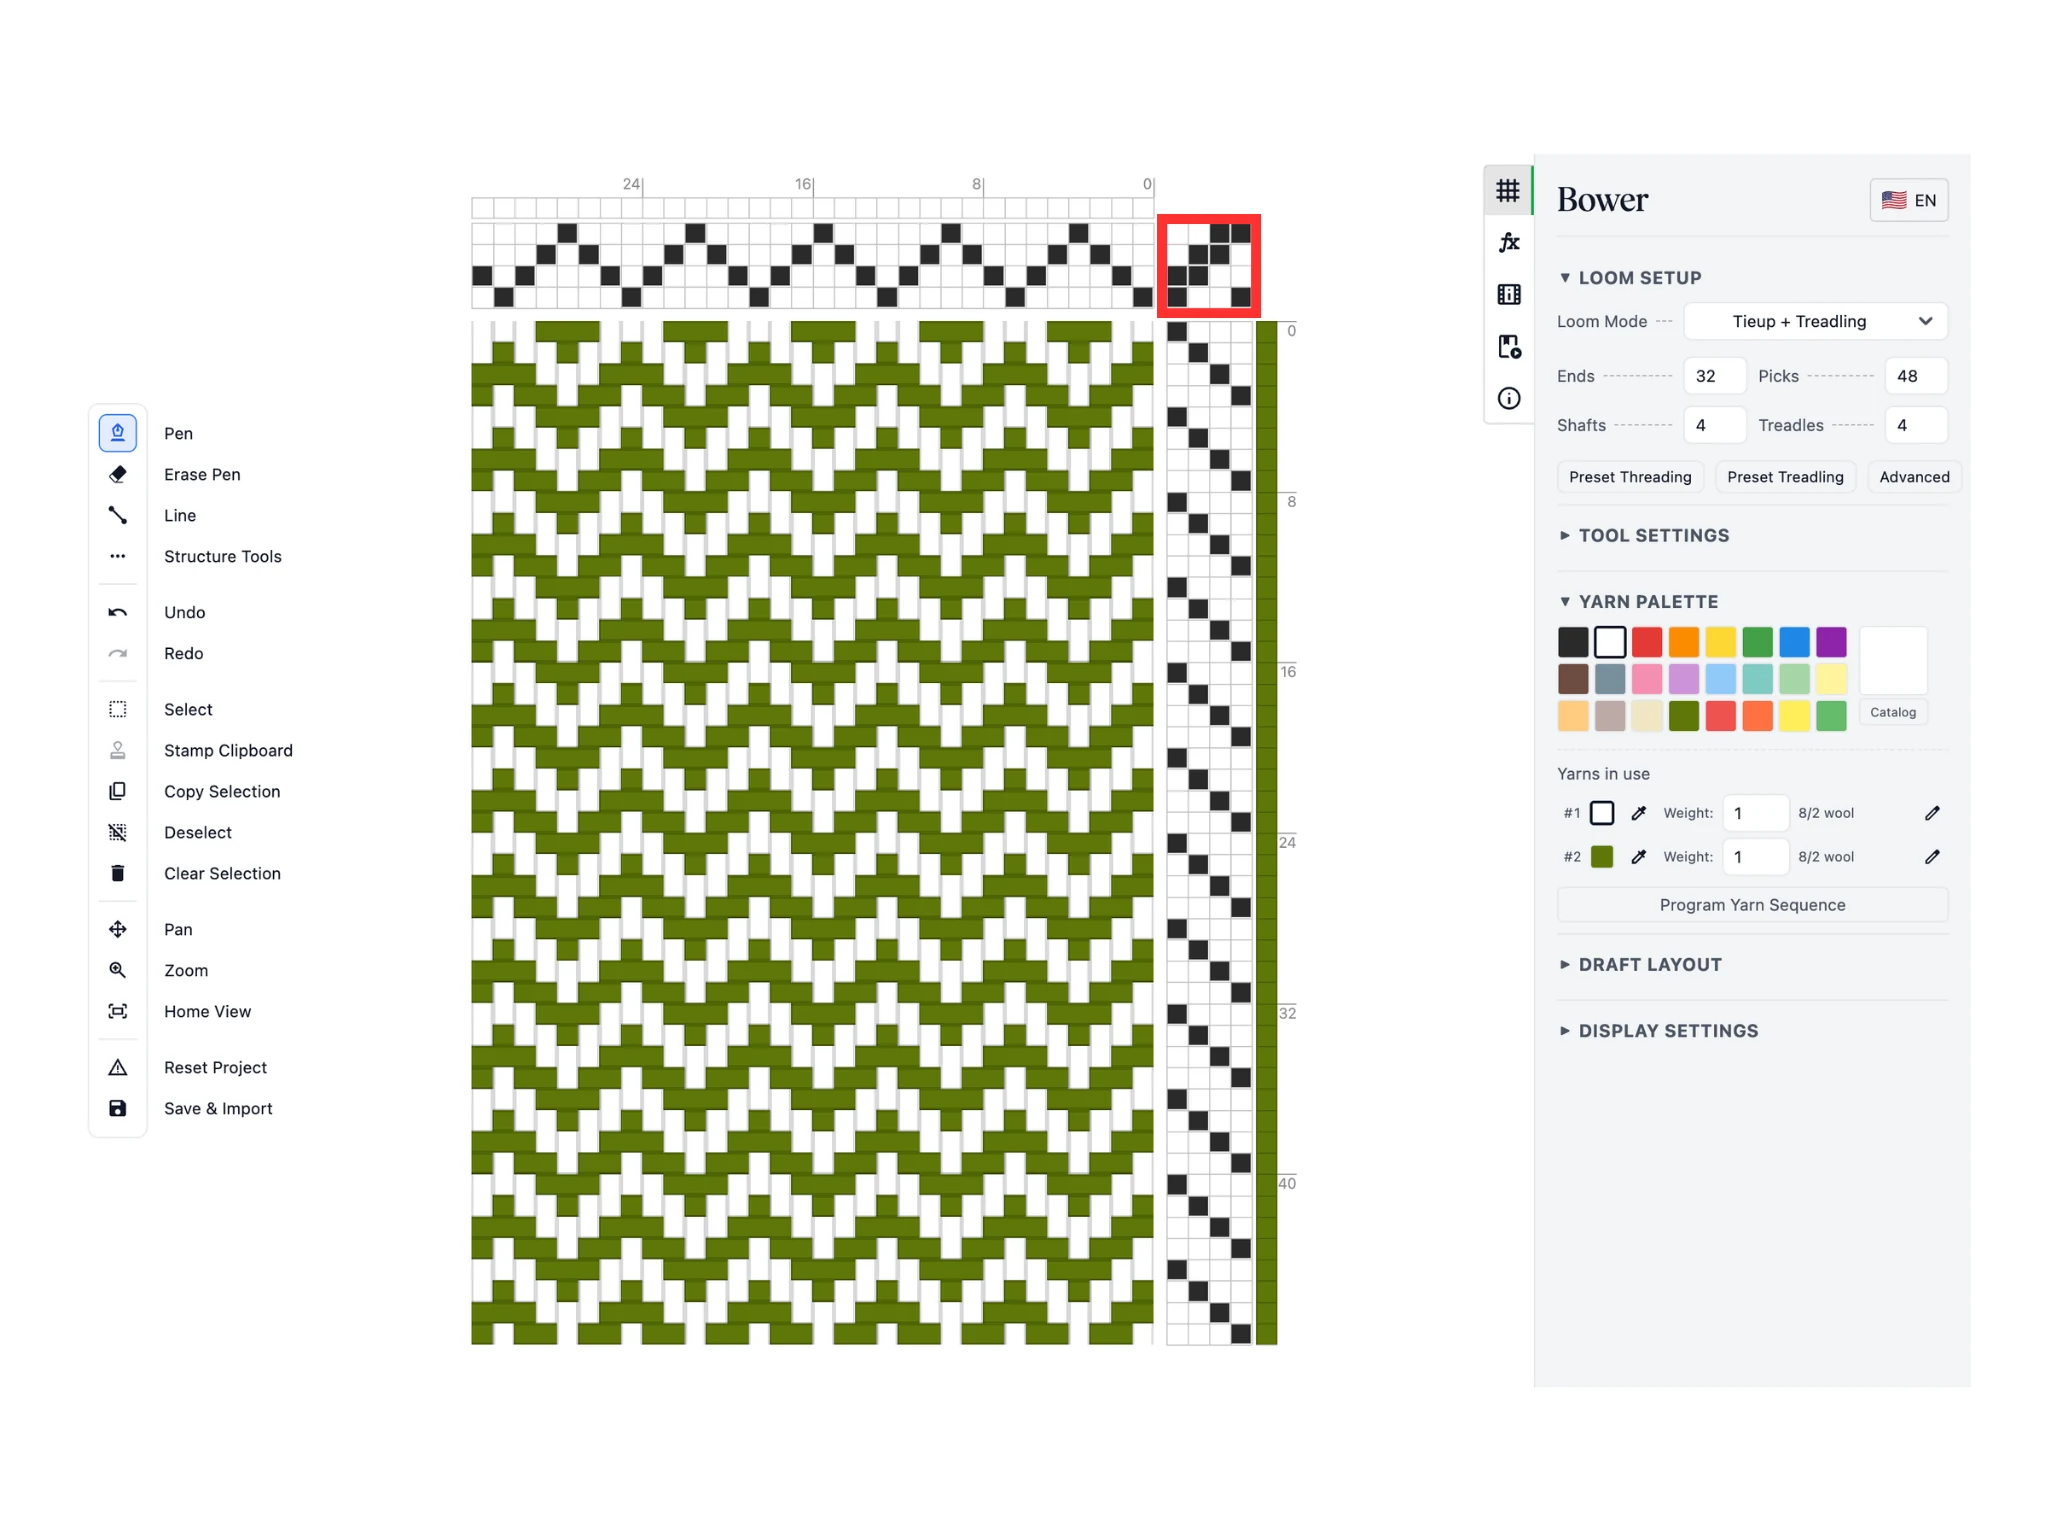
Try using the pen tool in the tie-up section of the editor next. Click on the cells to assign the shafts/harnesses a treadle lifts. In this tutorial, we've changed a 1/3 twill tie-up into a 2/2 twill tie-up.
If you make a mistake, you can use the Erase Pen tool to erase. A shortcut to remember is the pen tool can also erase if you use right click instead of left click.
Again, notice how the drawdown updates automatically as you change the tie-up.
Finally, use the pen tool in the treadling section of the editor. Click on the cells to assign which treadle will be used for each pick. In this tutorial, we've changed the straight draw into a point draw again.
Notice how the software only lets you set one treadle per pick for now. This is an option you can change later.
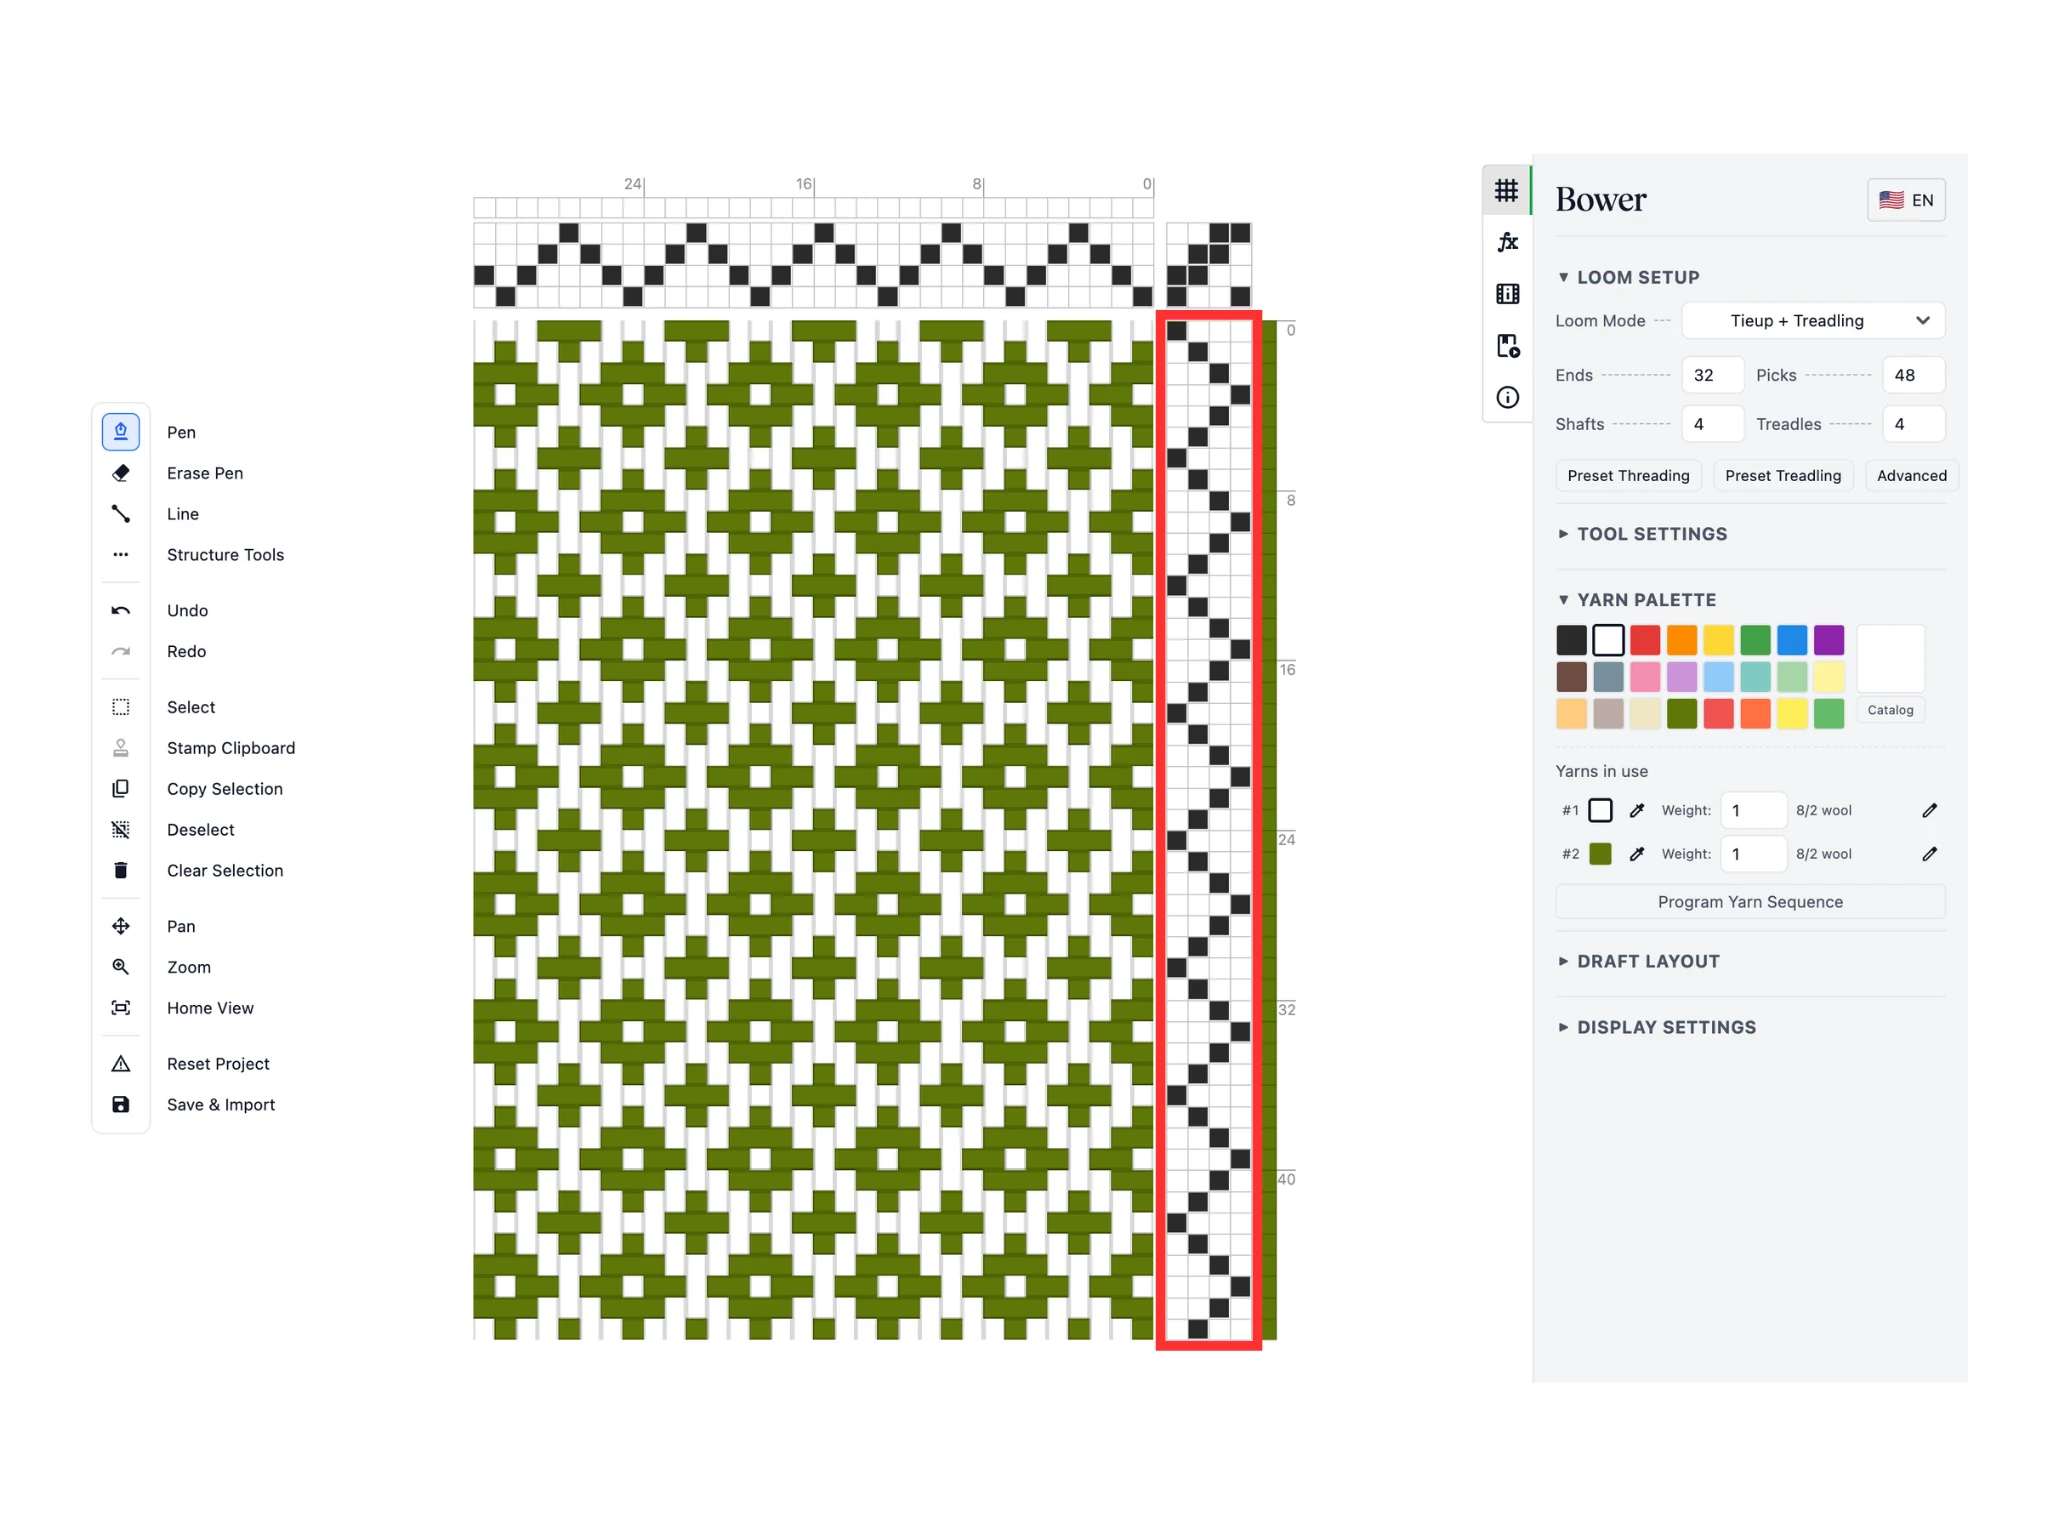
The pen tool can also change the yarn color for each end and pick. To the side of the threading and treadling, you can see an additional row of cells in color. Clicking on these cells will set the respective end or pick to the software's active color.
The active color can be seen in the Yarn Palette section in the properties panel on the right; the big colored square is the active color.
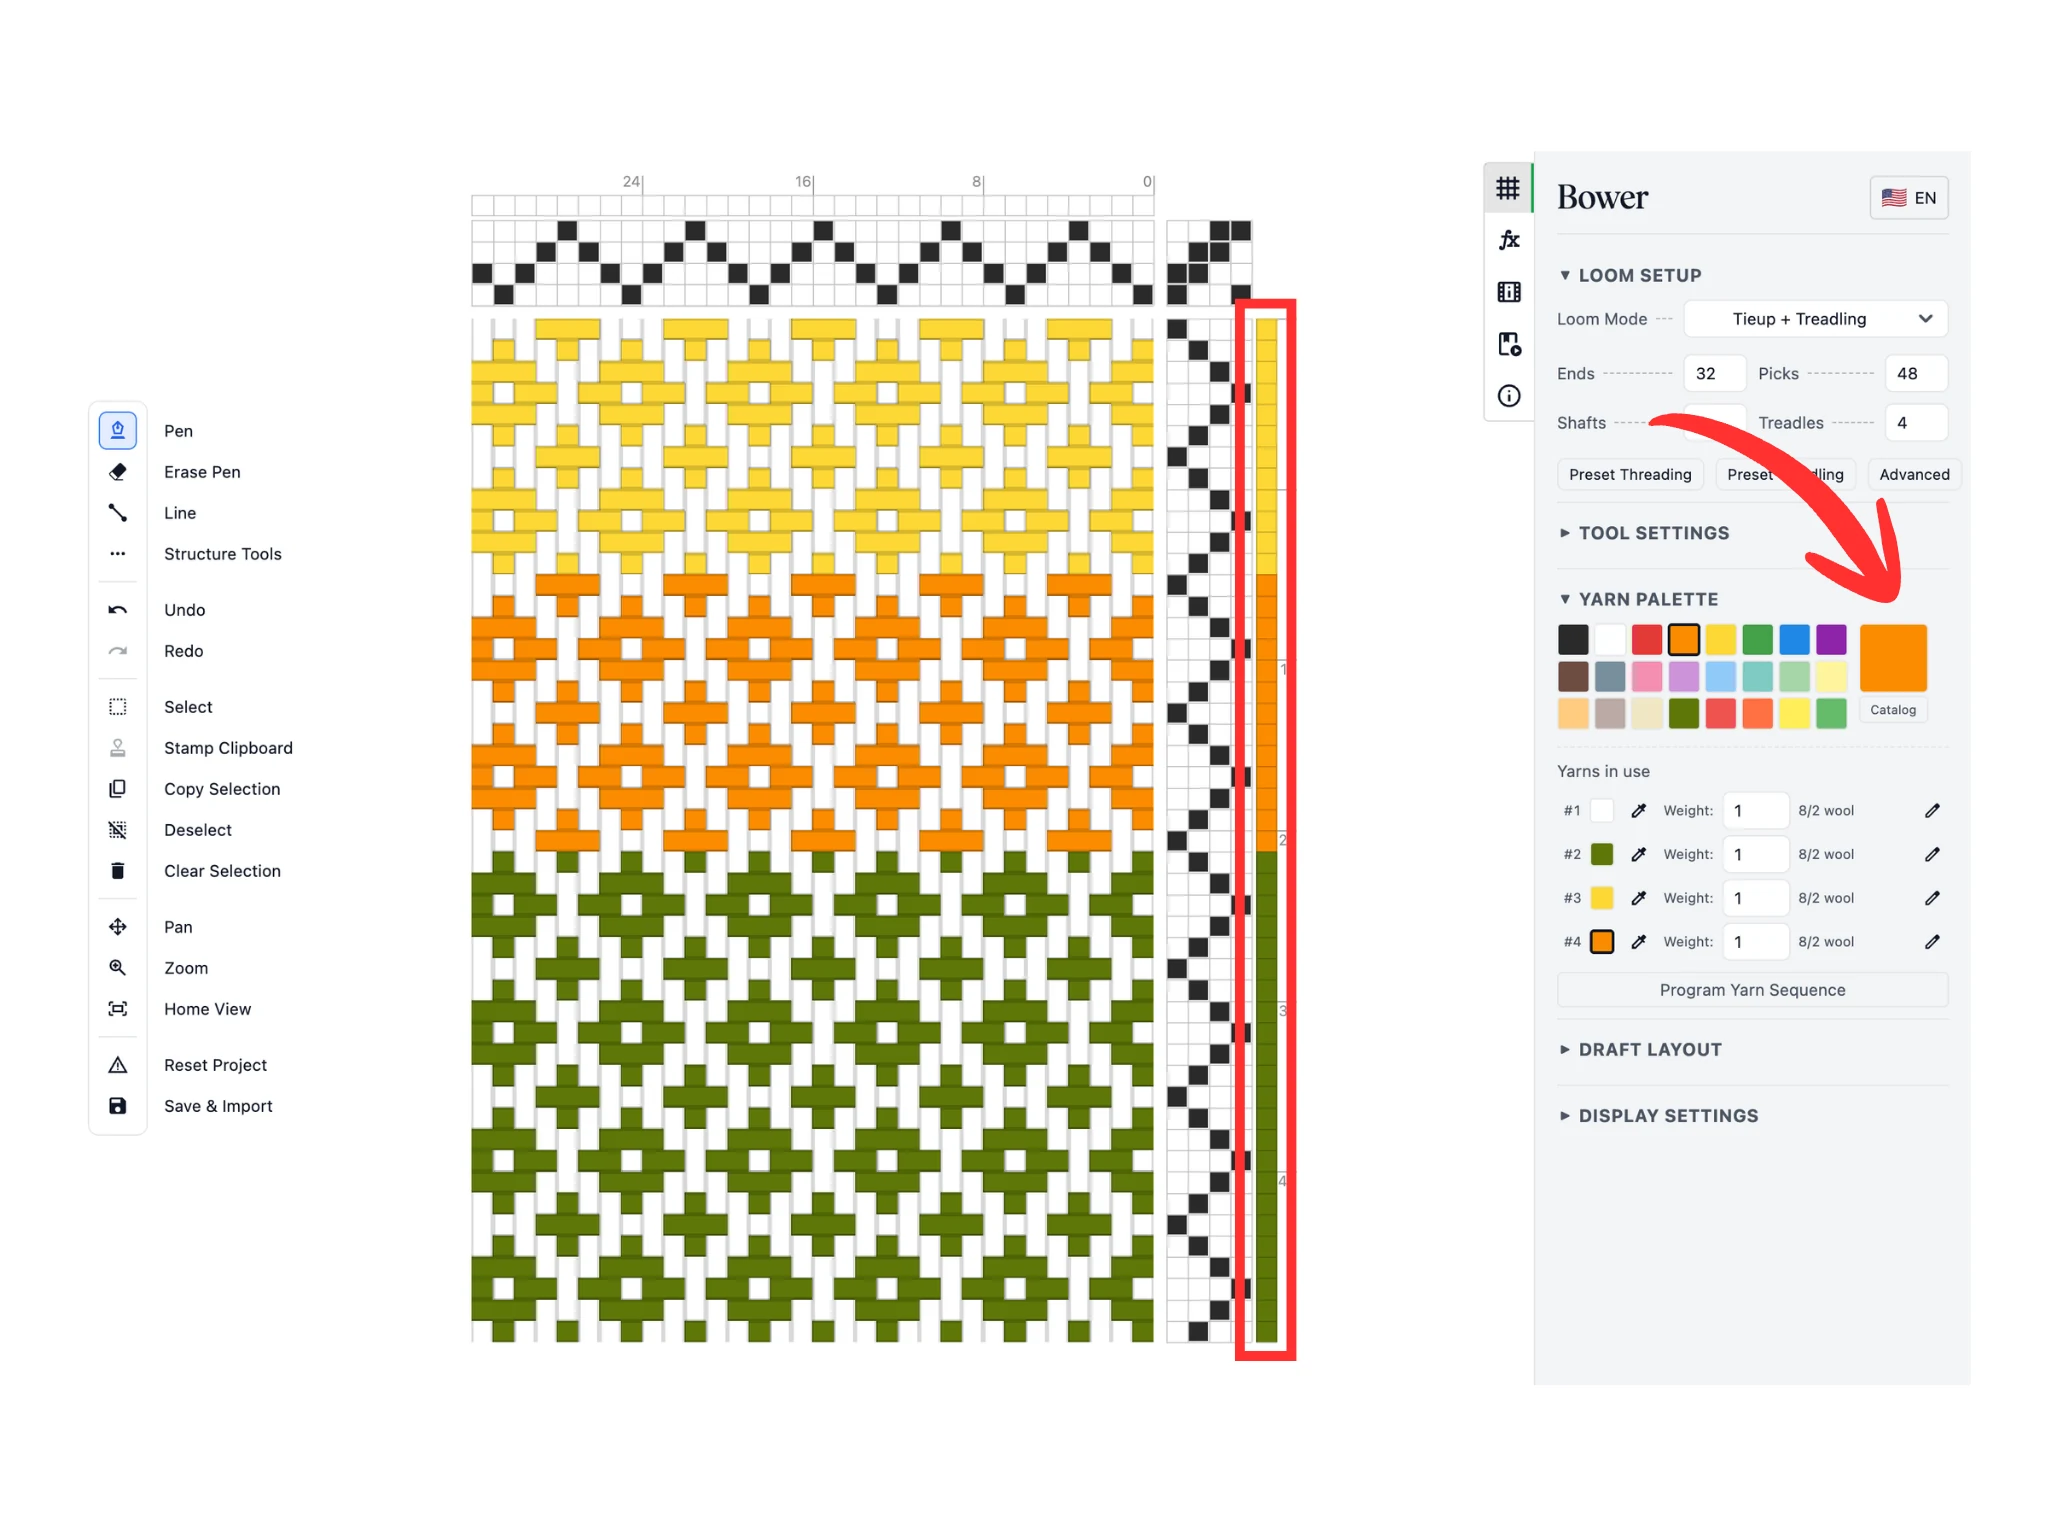
You can change the active color by choosing one of our 24 preset color options in the Yarn Palette. This is outlined in red inside the tutorial image.
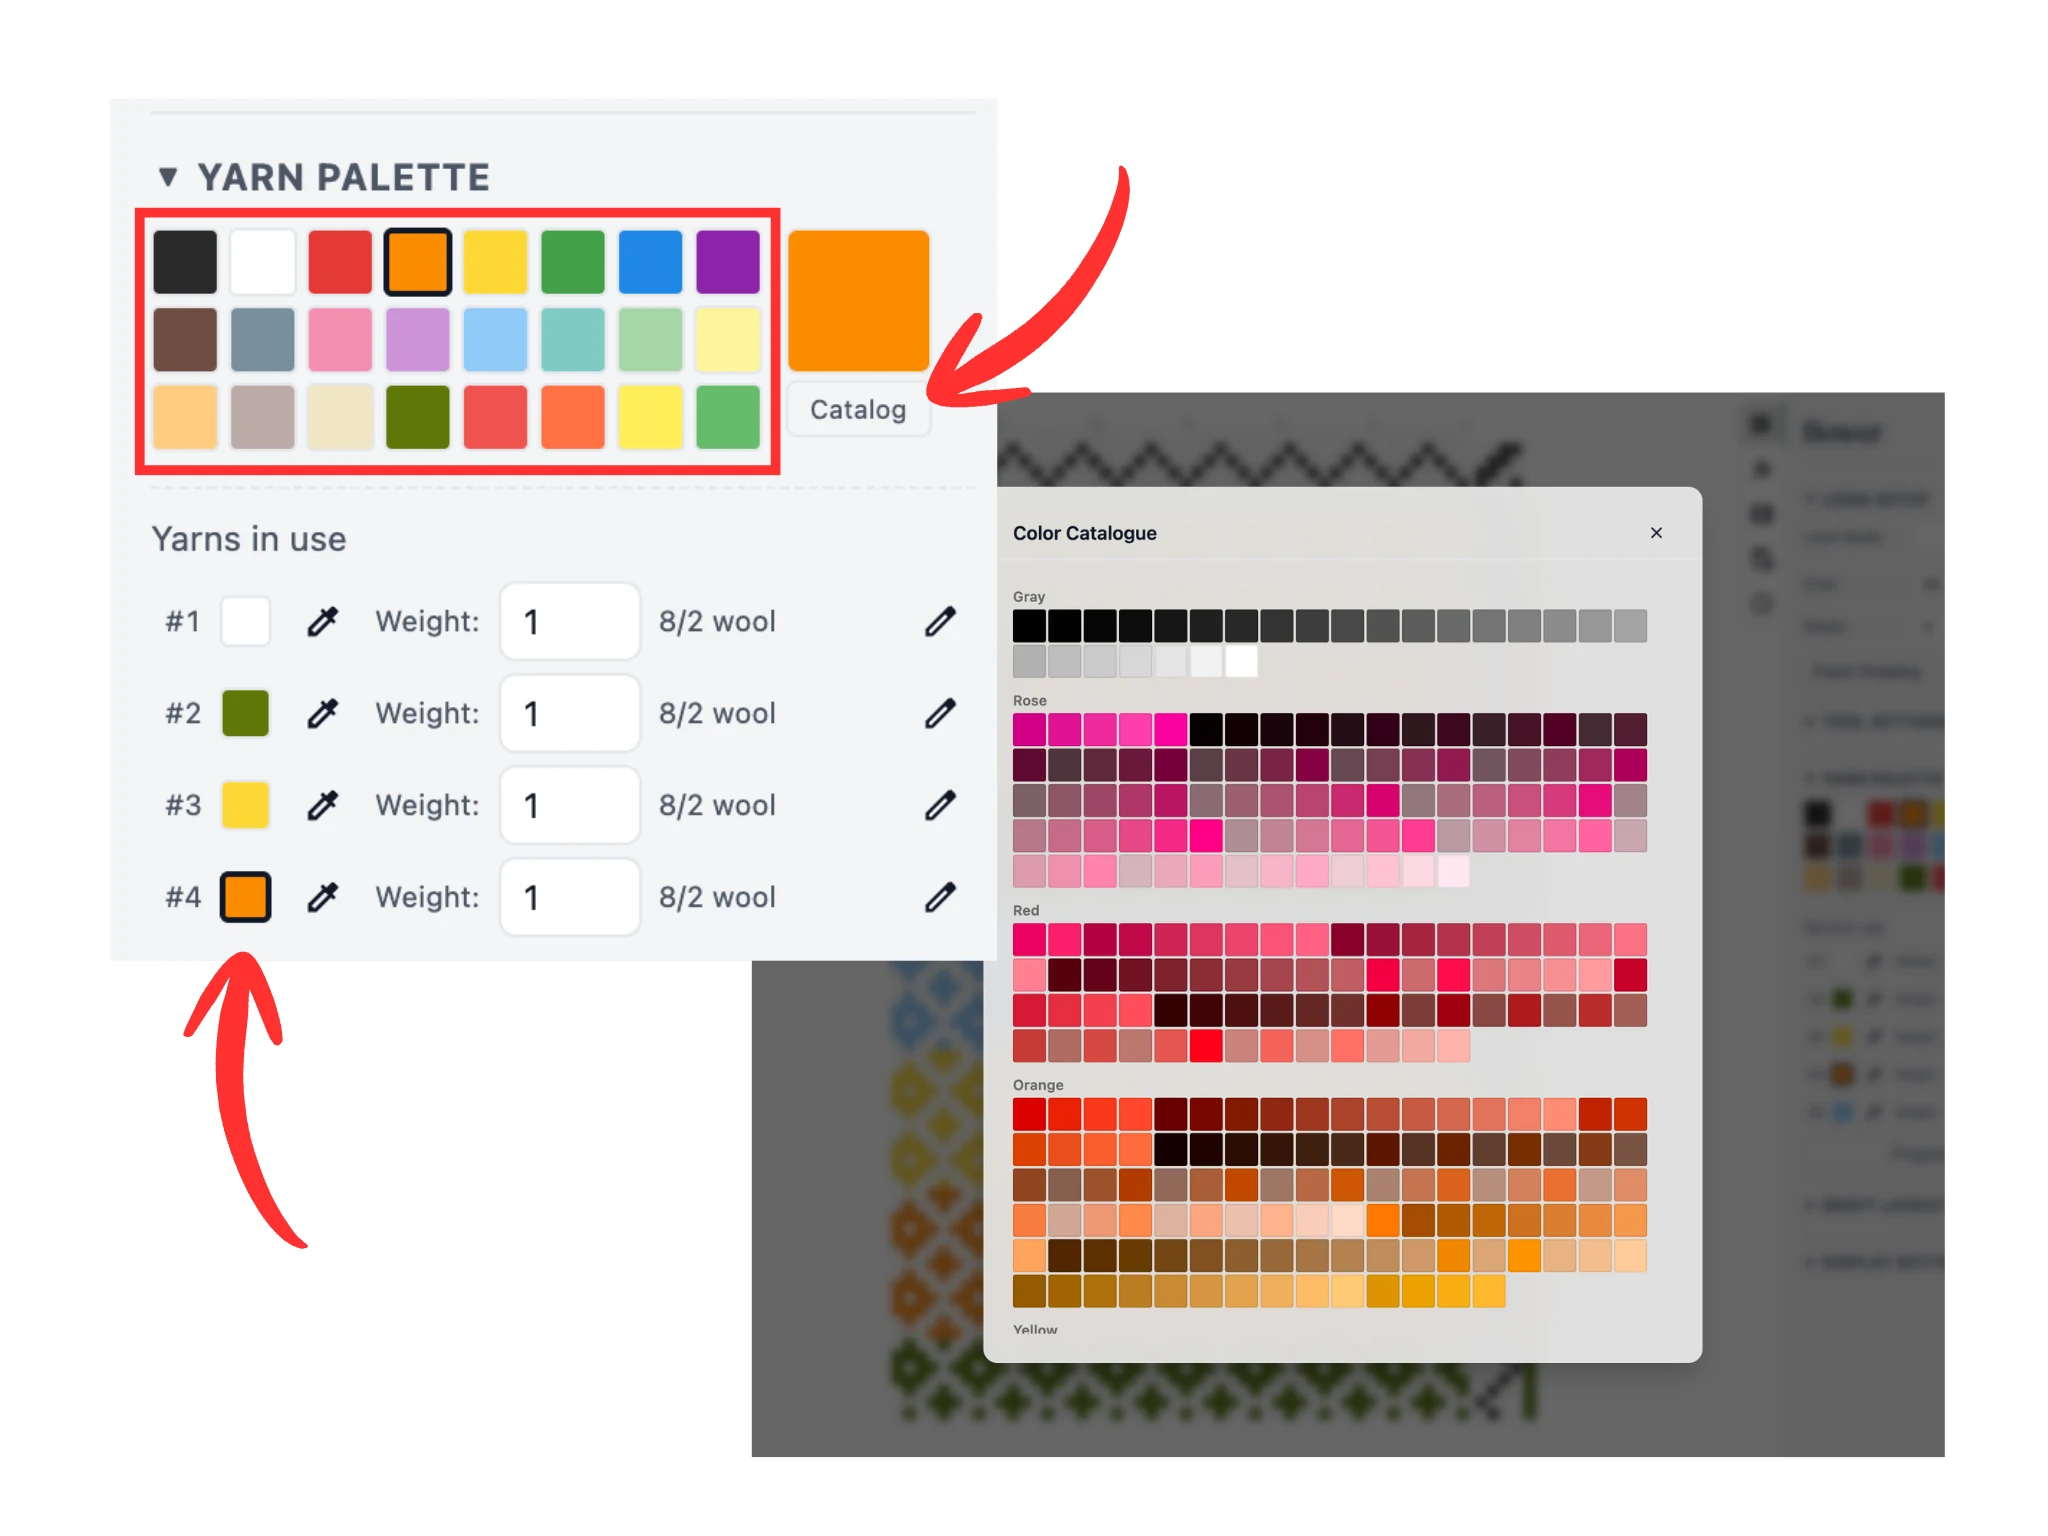
You can also choose from 1000+ colors in our scrollable catalog, opened by the Catalog button under the active color square.
Finally, you can change the active color by clicking on the small color chips under the "Yarns in use" subsection. A color is only added to this subsection if an end or pick has been assigned it.
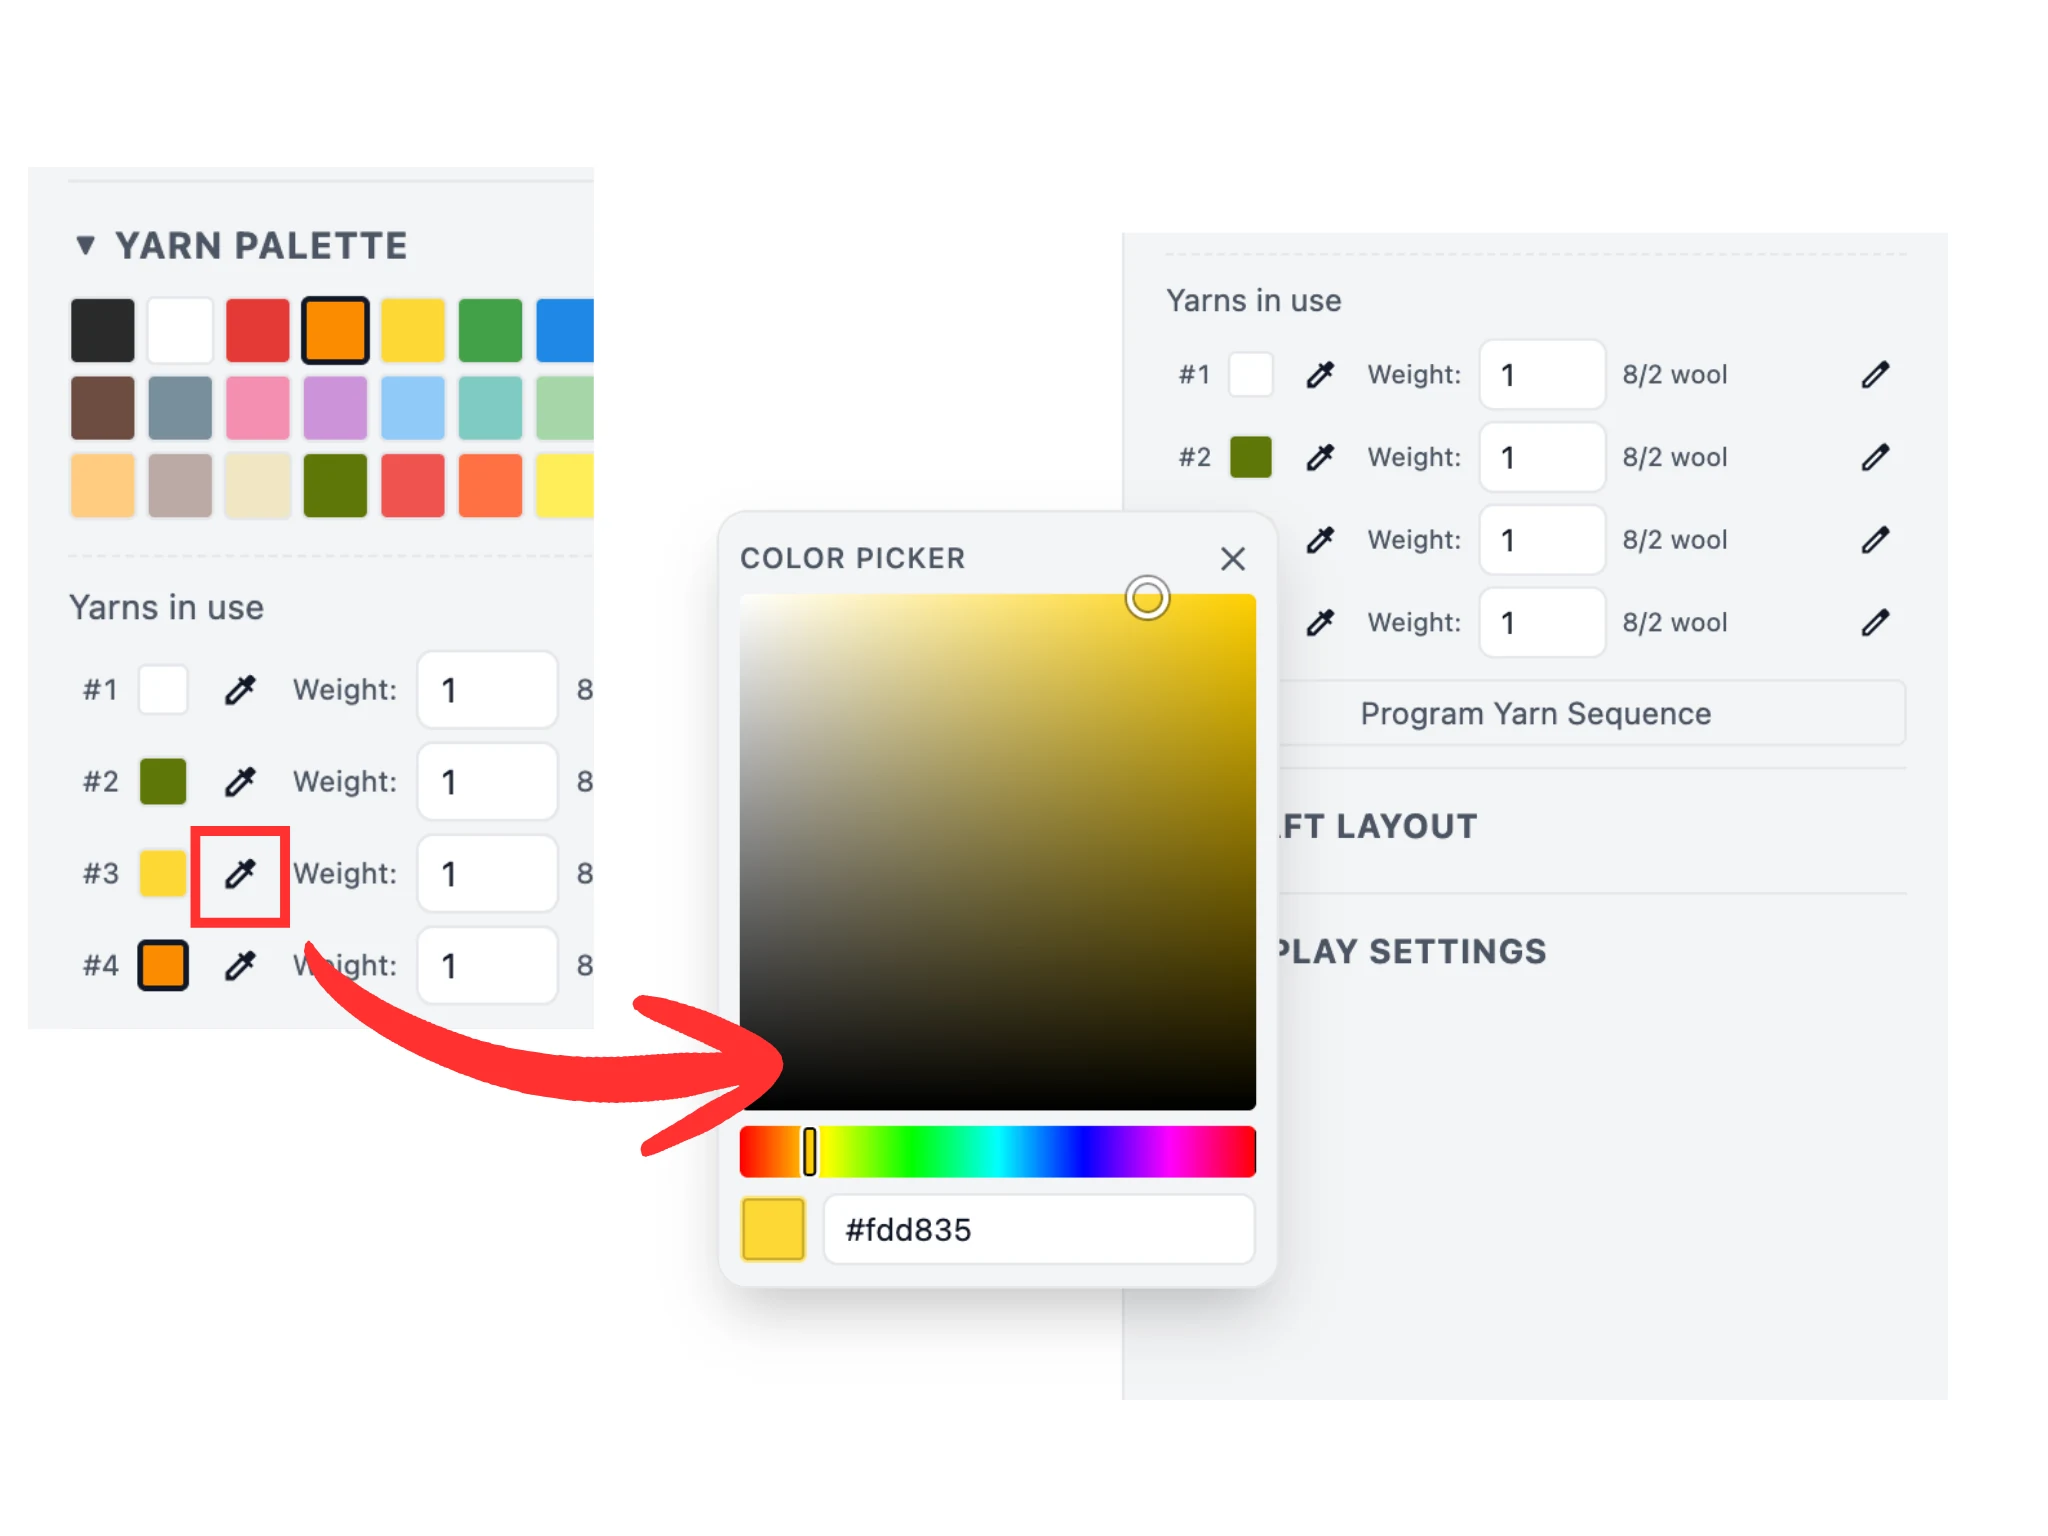
You can also change one of the colors that are currently in use. These colors under the "Yarns in use" subsection have an eyedropper button to the right of each square color chip.
When you click on such an eyedropper button, a color picker will appear. You can change the hue, saturation, and value of the color and see your draft recolor accordingly.
Use this feature to tune the color of your draft.
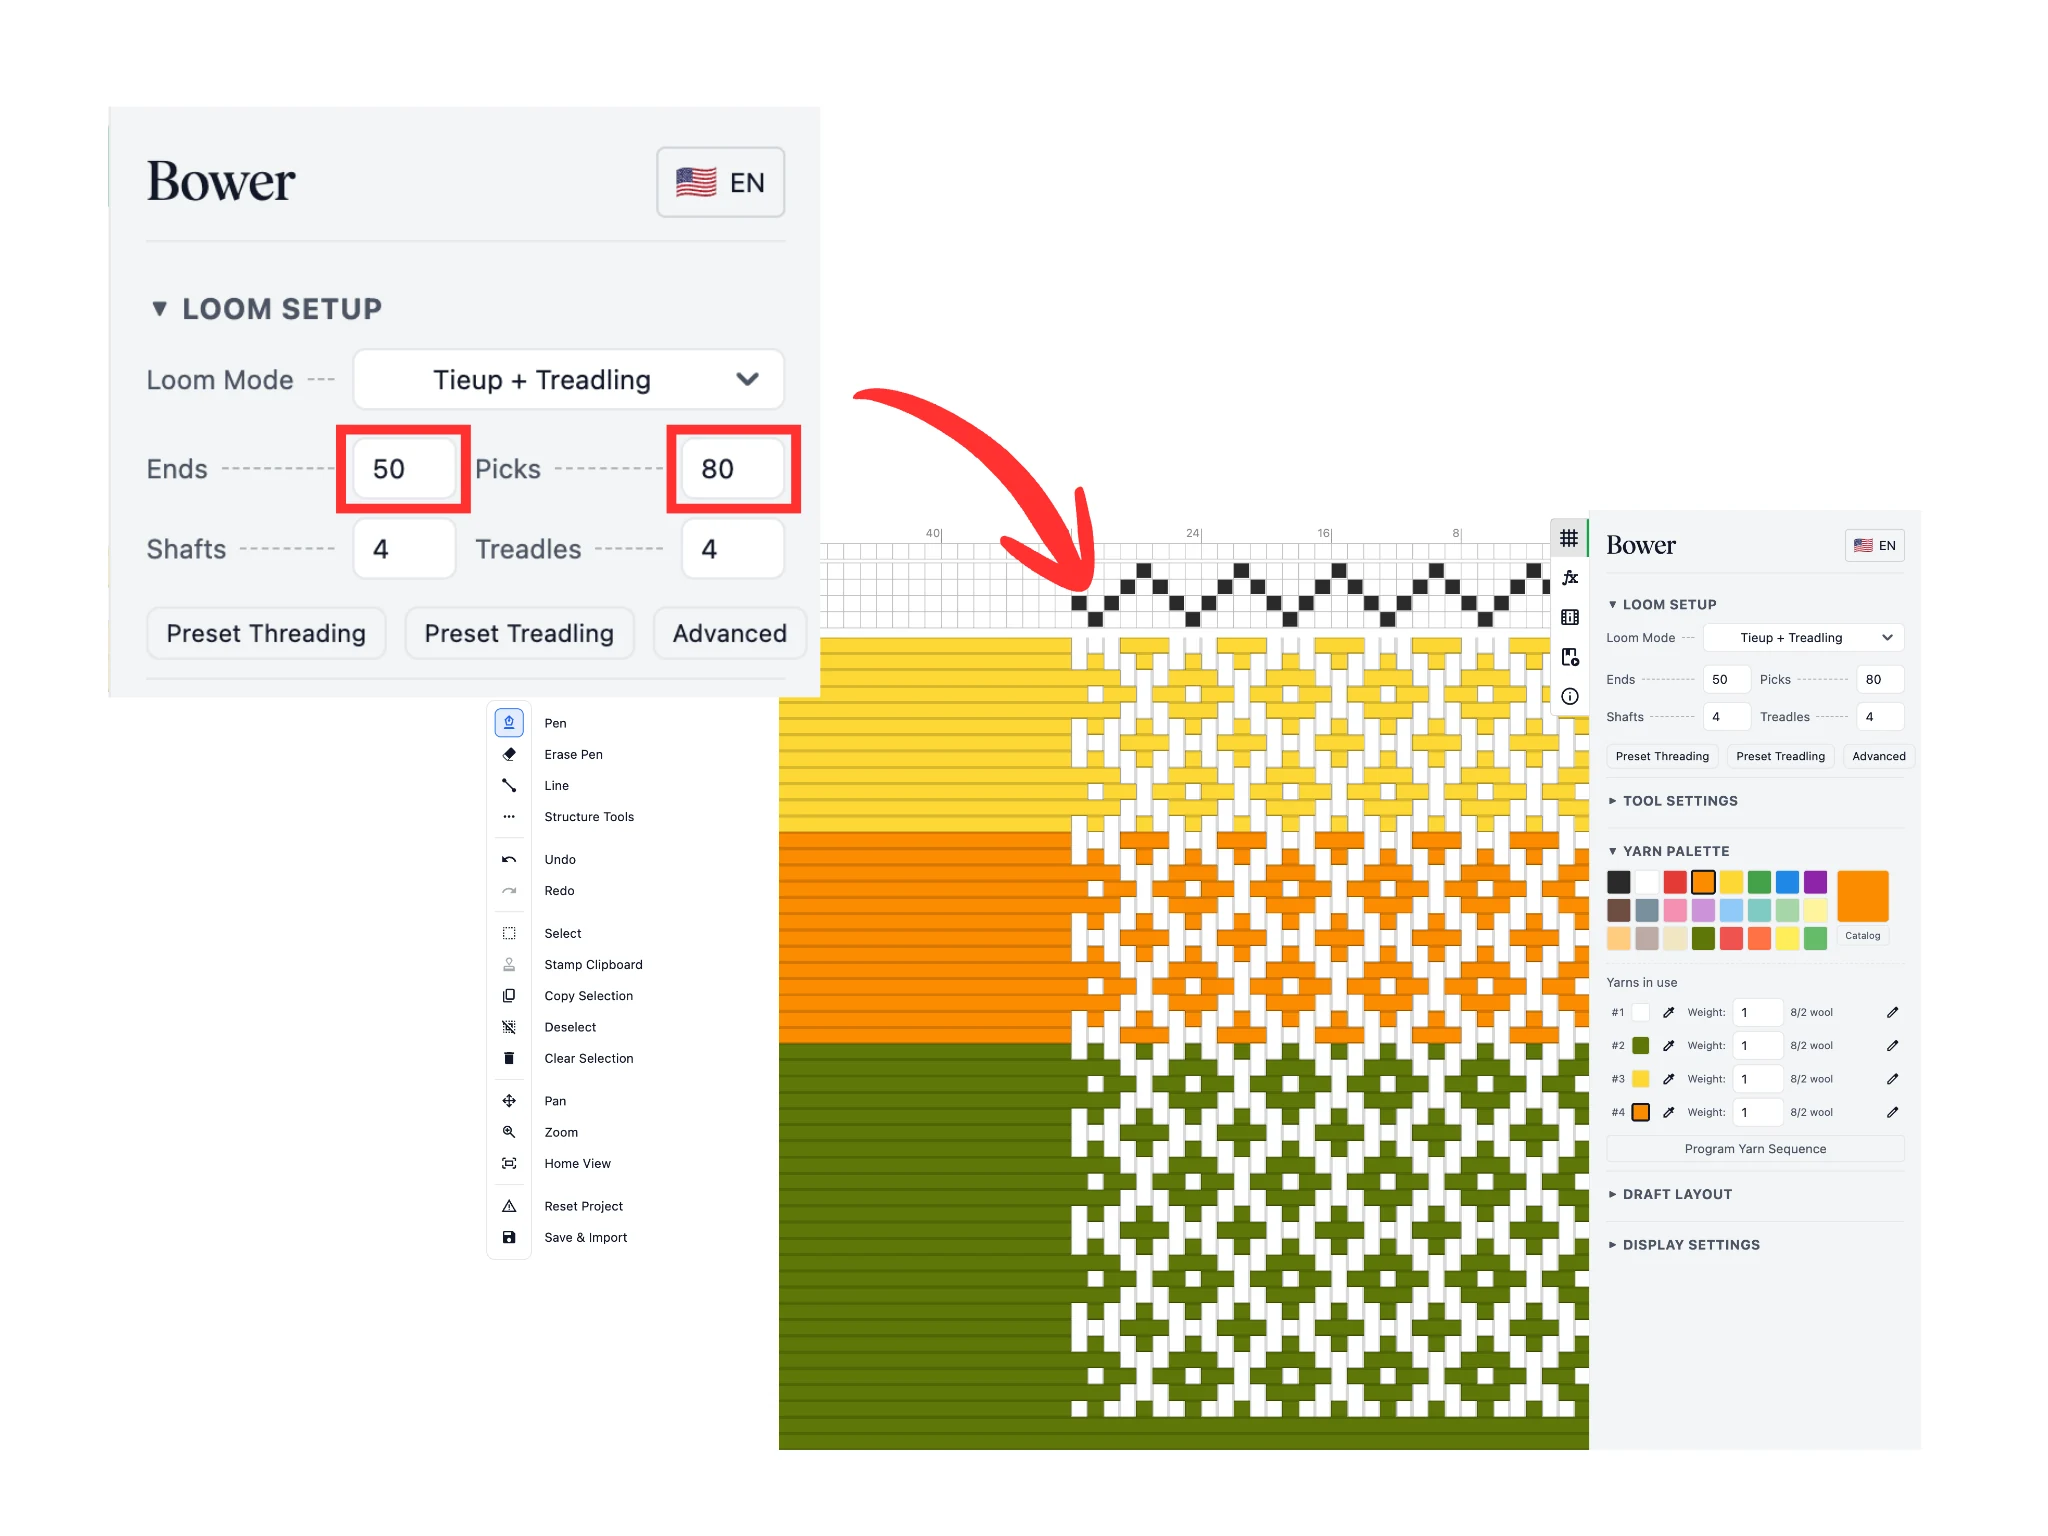
Next, let us visit the Loom Setup section in the properties panel on the top-right. This is where we configure the software to match your physical loom and project goals.
First, let's adjust the size of the project by changing the number of ends and picks. For the purposes of this tutorial, we've set them to 50 and 80 respectively. Notice that when you resize the draft, the respective threading and treadling cells are empty.
The Loom Setup section is where you can also set the number of shafts and treadles your loom has, or switch into a liftplan mode for dobby loom users.
Notice how the threading and treadling sections in the editor change accordingly with the Loom Setup configuration.

Larger drafts can get awkward since they often do not fit on the screen. In the toolbar the Pan, Zoom, and Home View tools will help you navigate the editor.
With the Pan tool active, left-click and dragging on the editor will pan the draft around. You can move left, right, up, and down with this tool.
With the Zoom tool active, left-click and dragging on the editor will zoom the draft up and down. Dragging left zooms out; dragging right zooms in.
Finally, the Home View button resets your view completely and zooms out so you can see the entire draft.
A very handy shortcut is to use scrolling to zoom. Use your mouse (or trackpad) scroll wheel to zoom in and out. This zooming action is centered on where the computer cursor is.
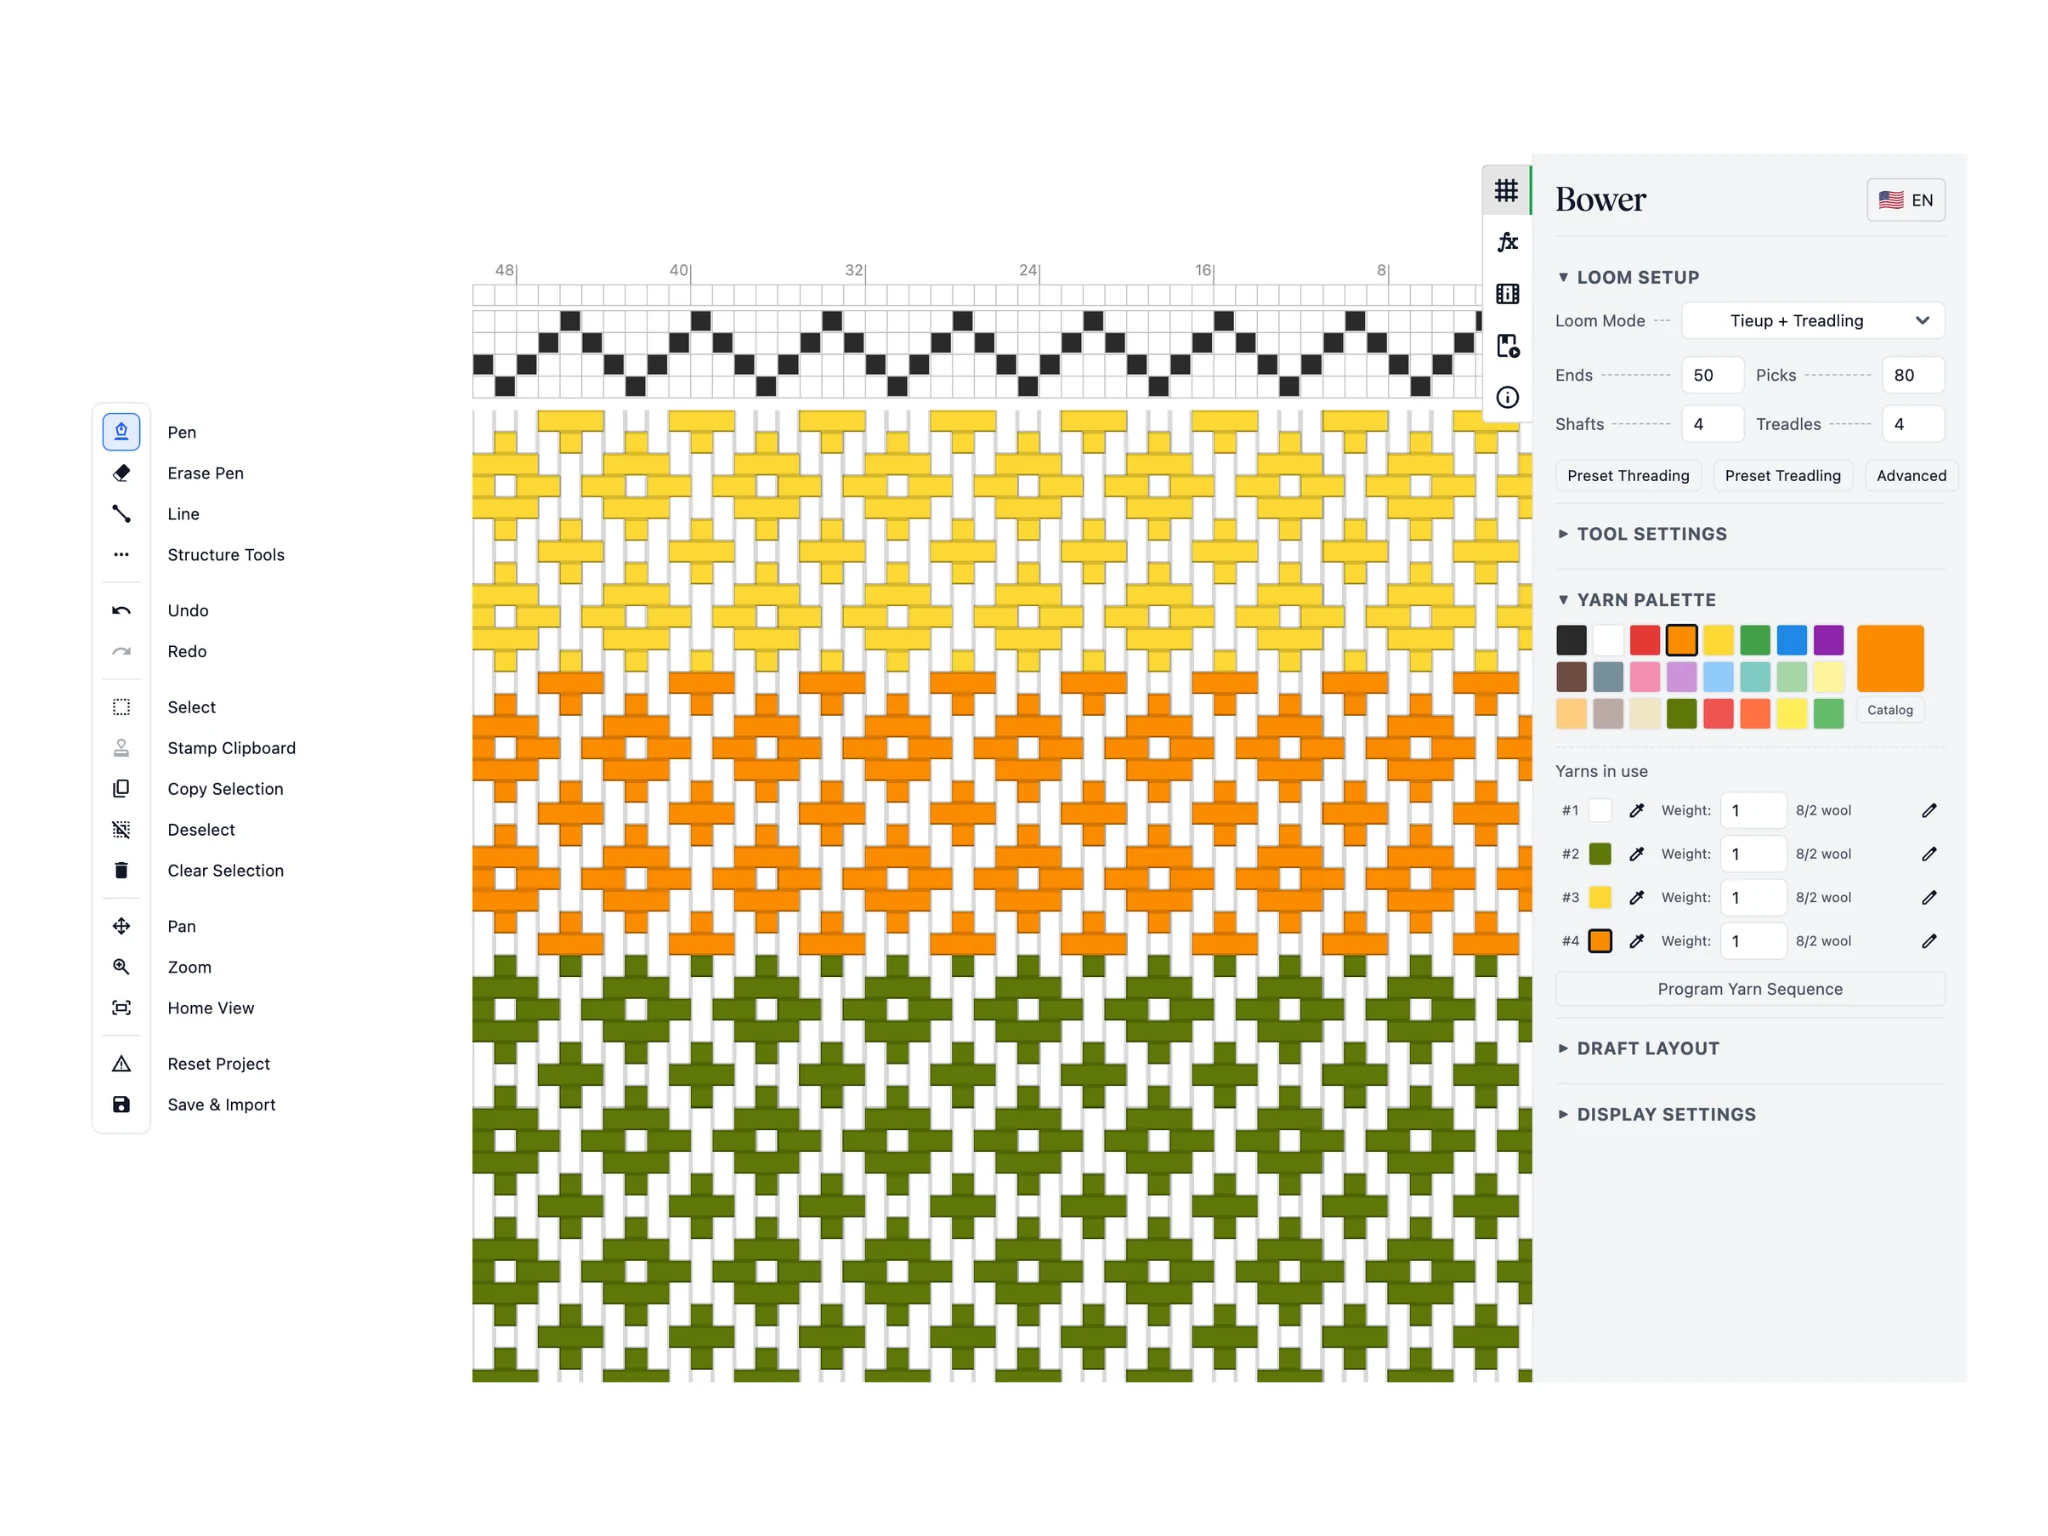
For the tutorial, we've zoomed in on the empty threading (which makes it easier to precisely click on individual cells) and filled out the pattern.
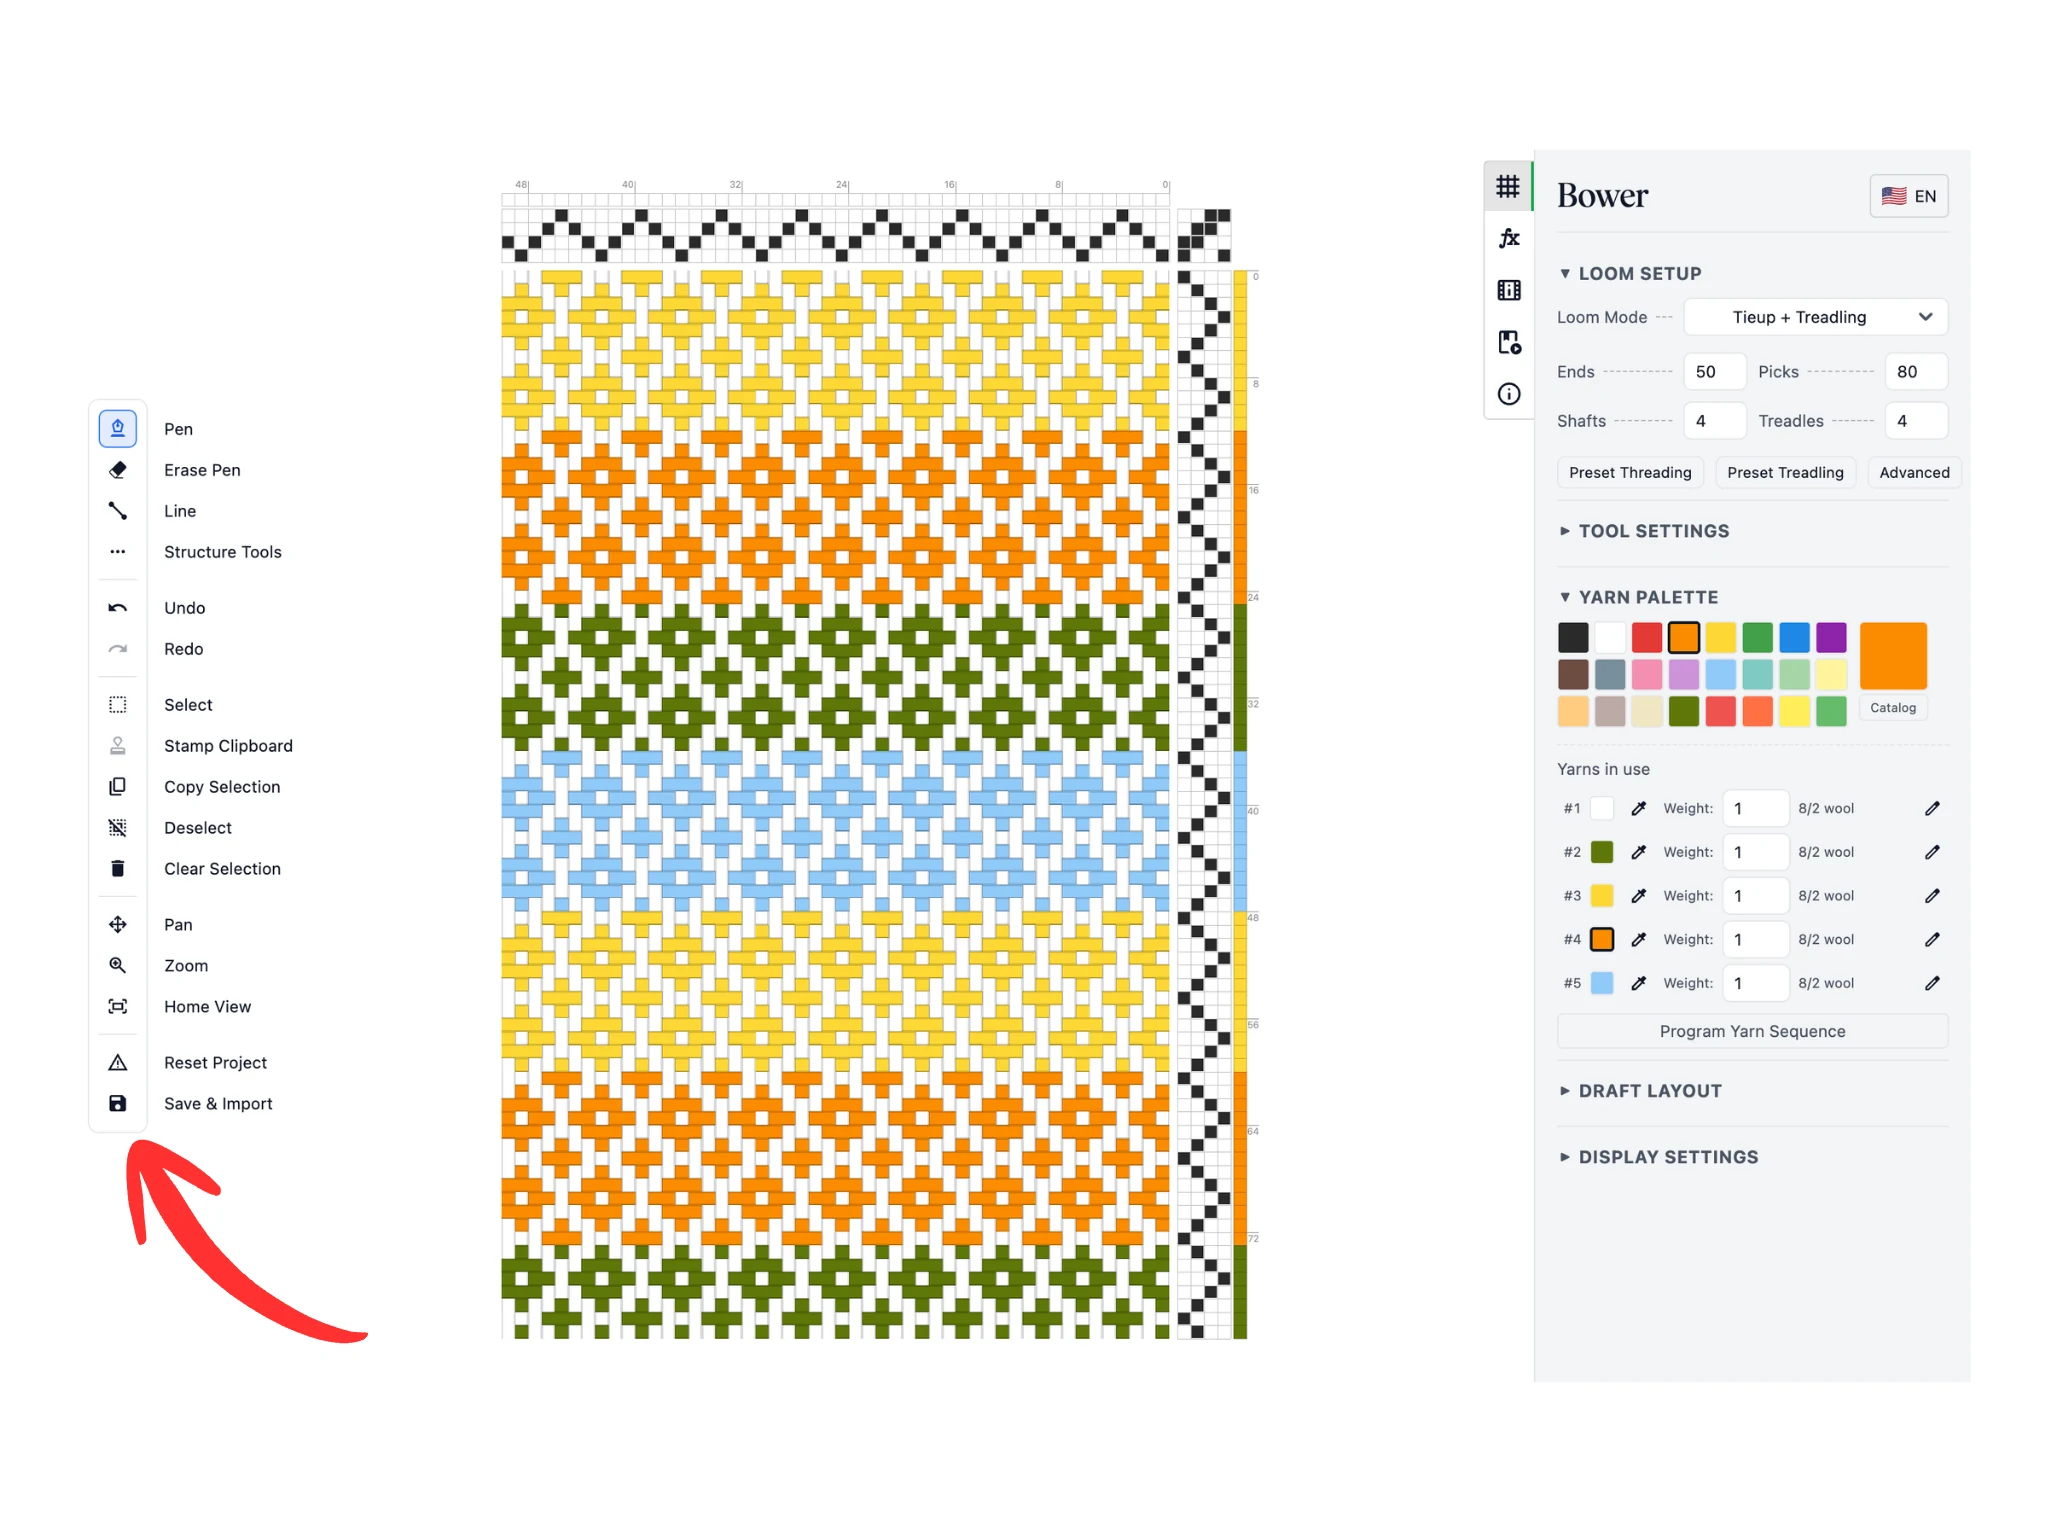
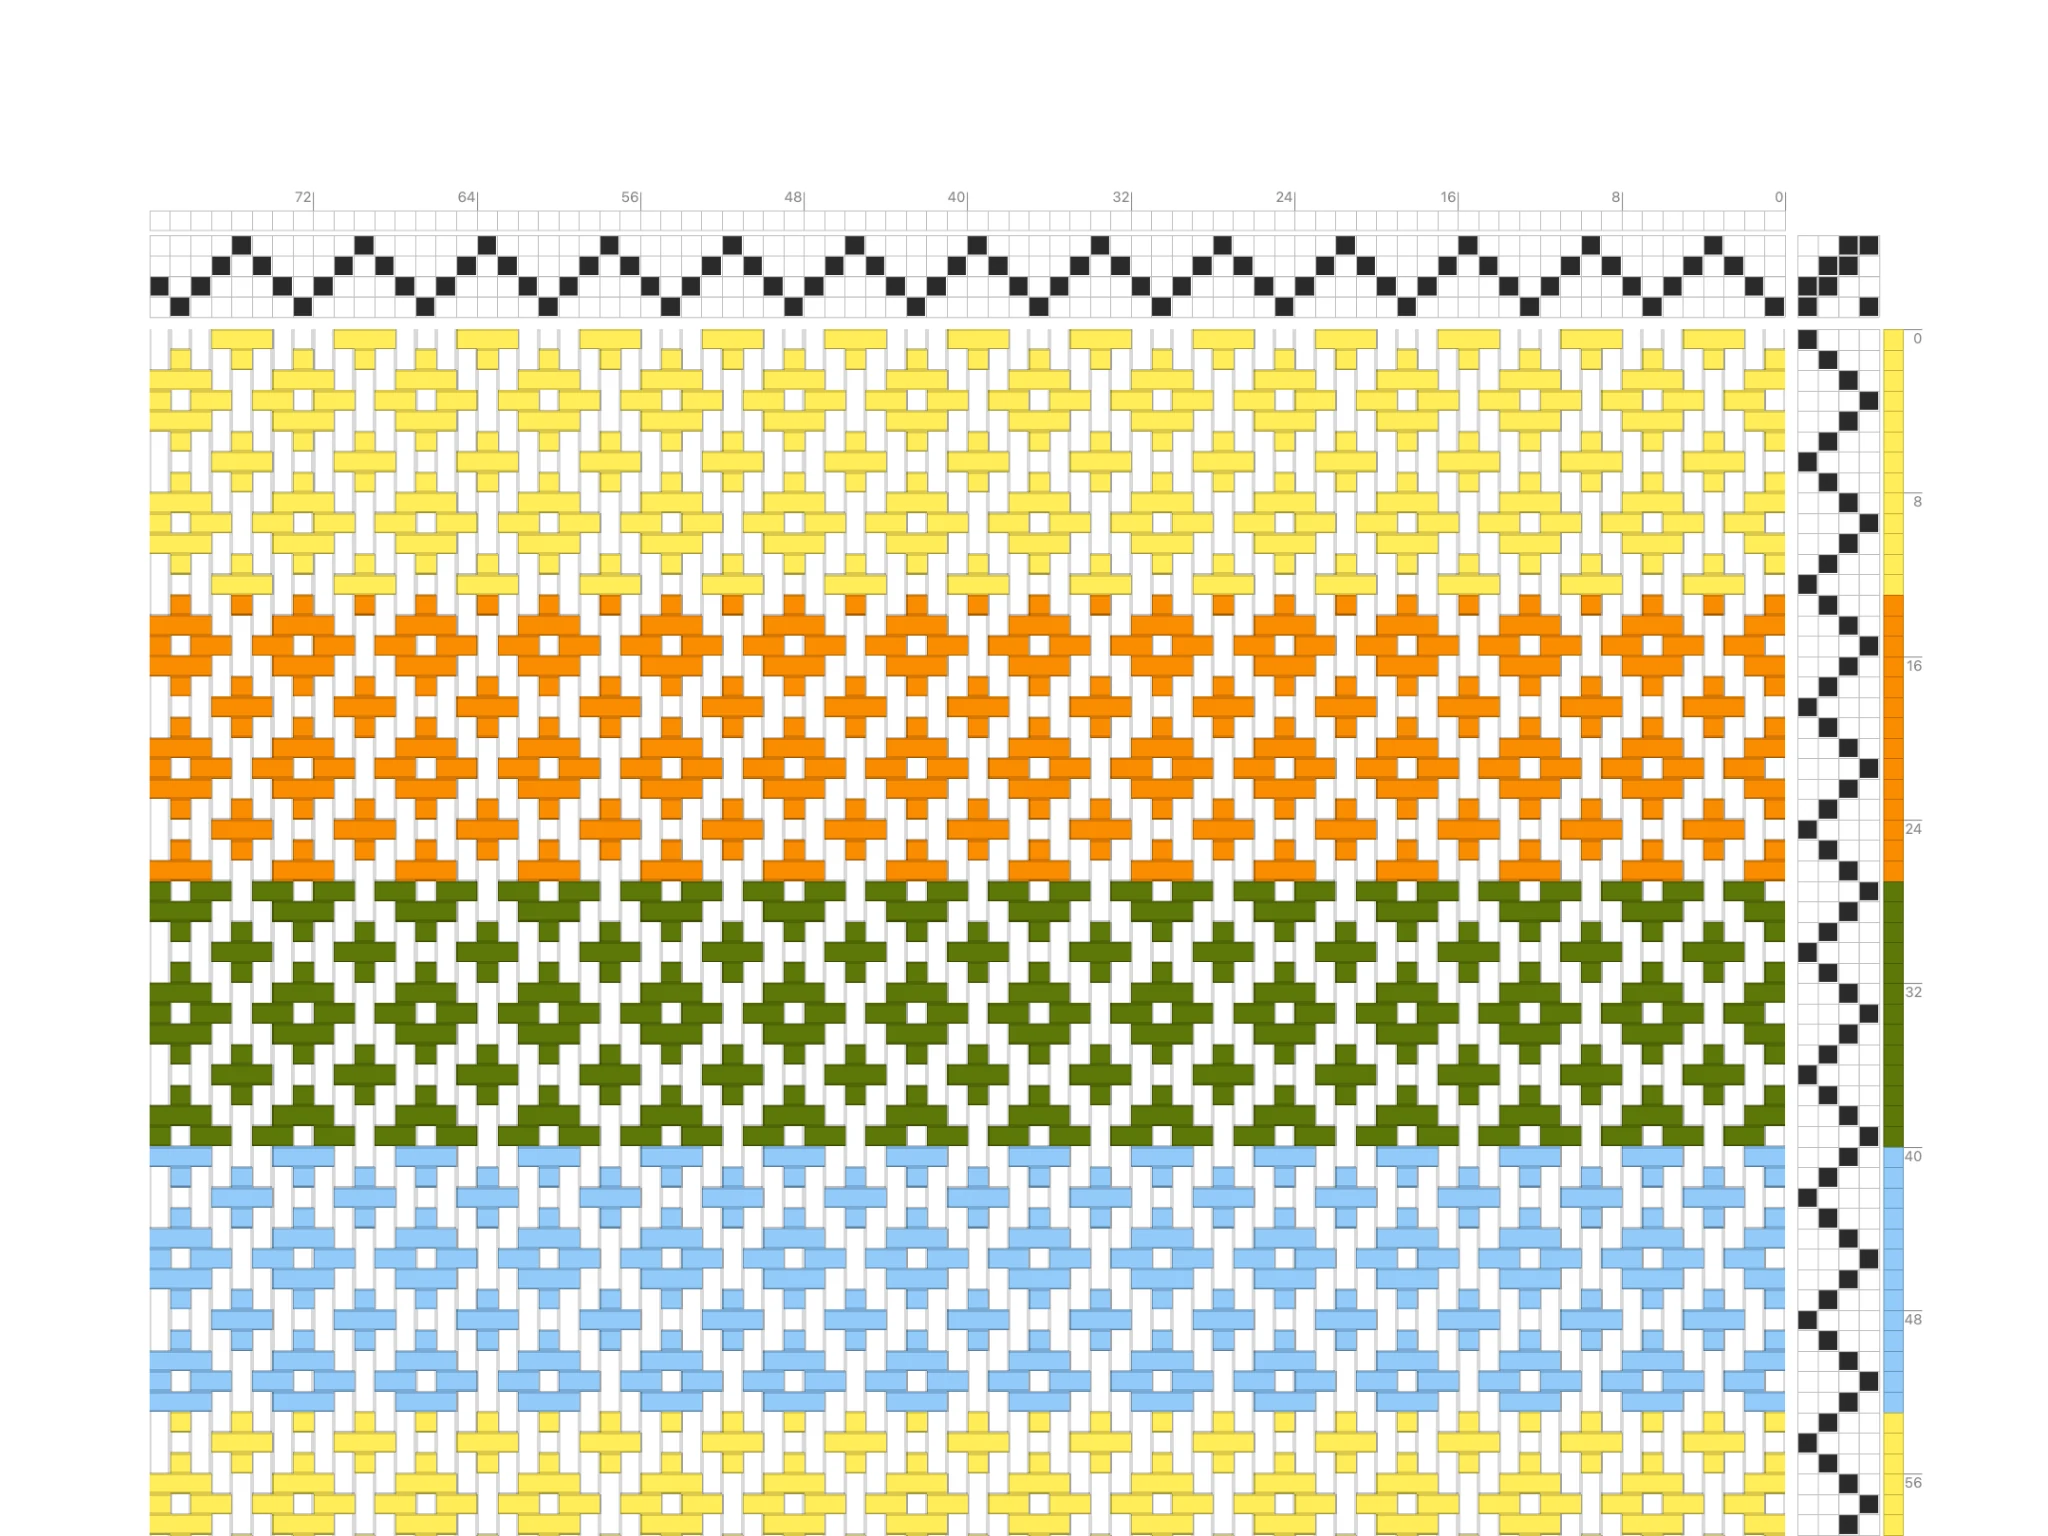
Complete filling out the threading and treadling and adjust colors to your liking. This is what the final draft looks like for this tutorial. Remember, you will create much more complex, impressive weaving drafts in future tutorials!
Now how do we save our work? Click on the "Save & Import" button which will open a window with many options. Remember, you need to click on the tool's icon and not the tool label.
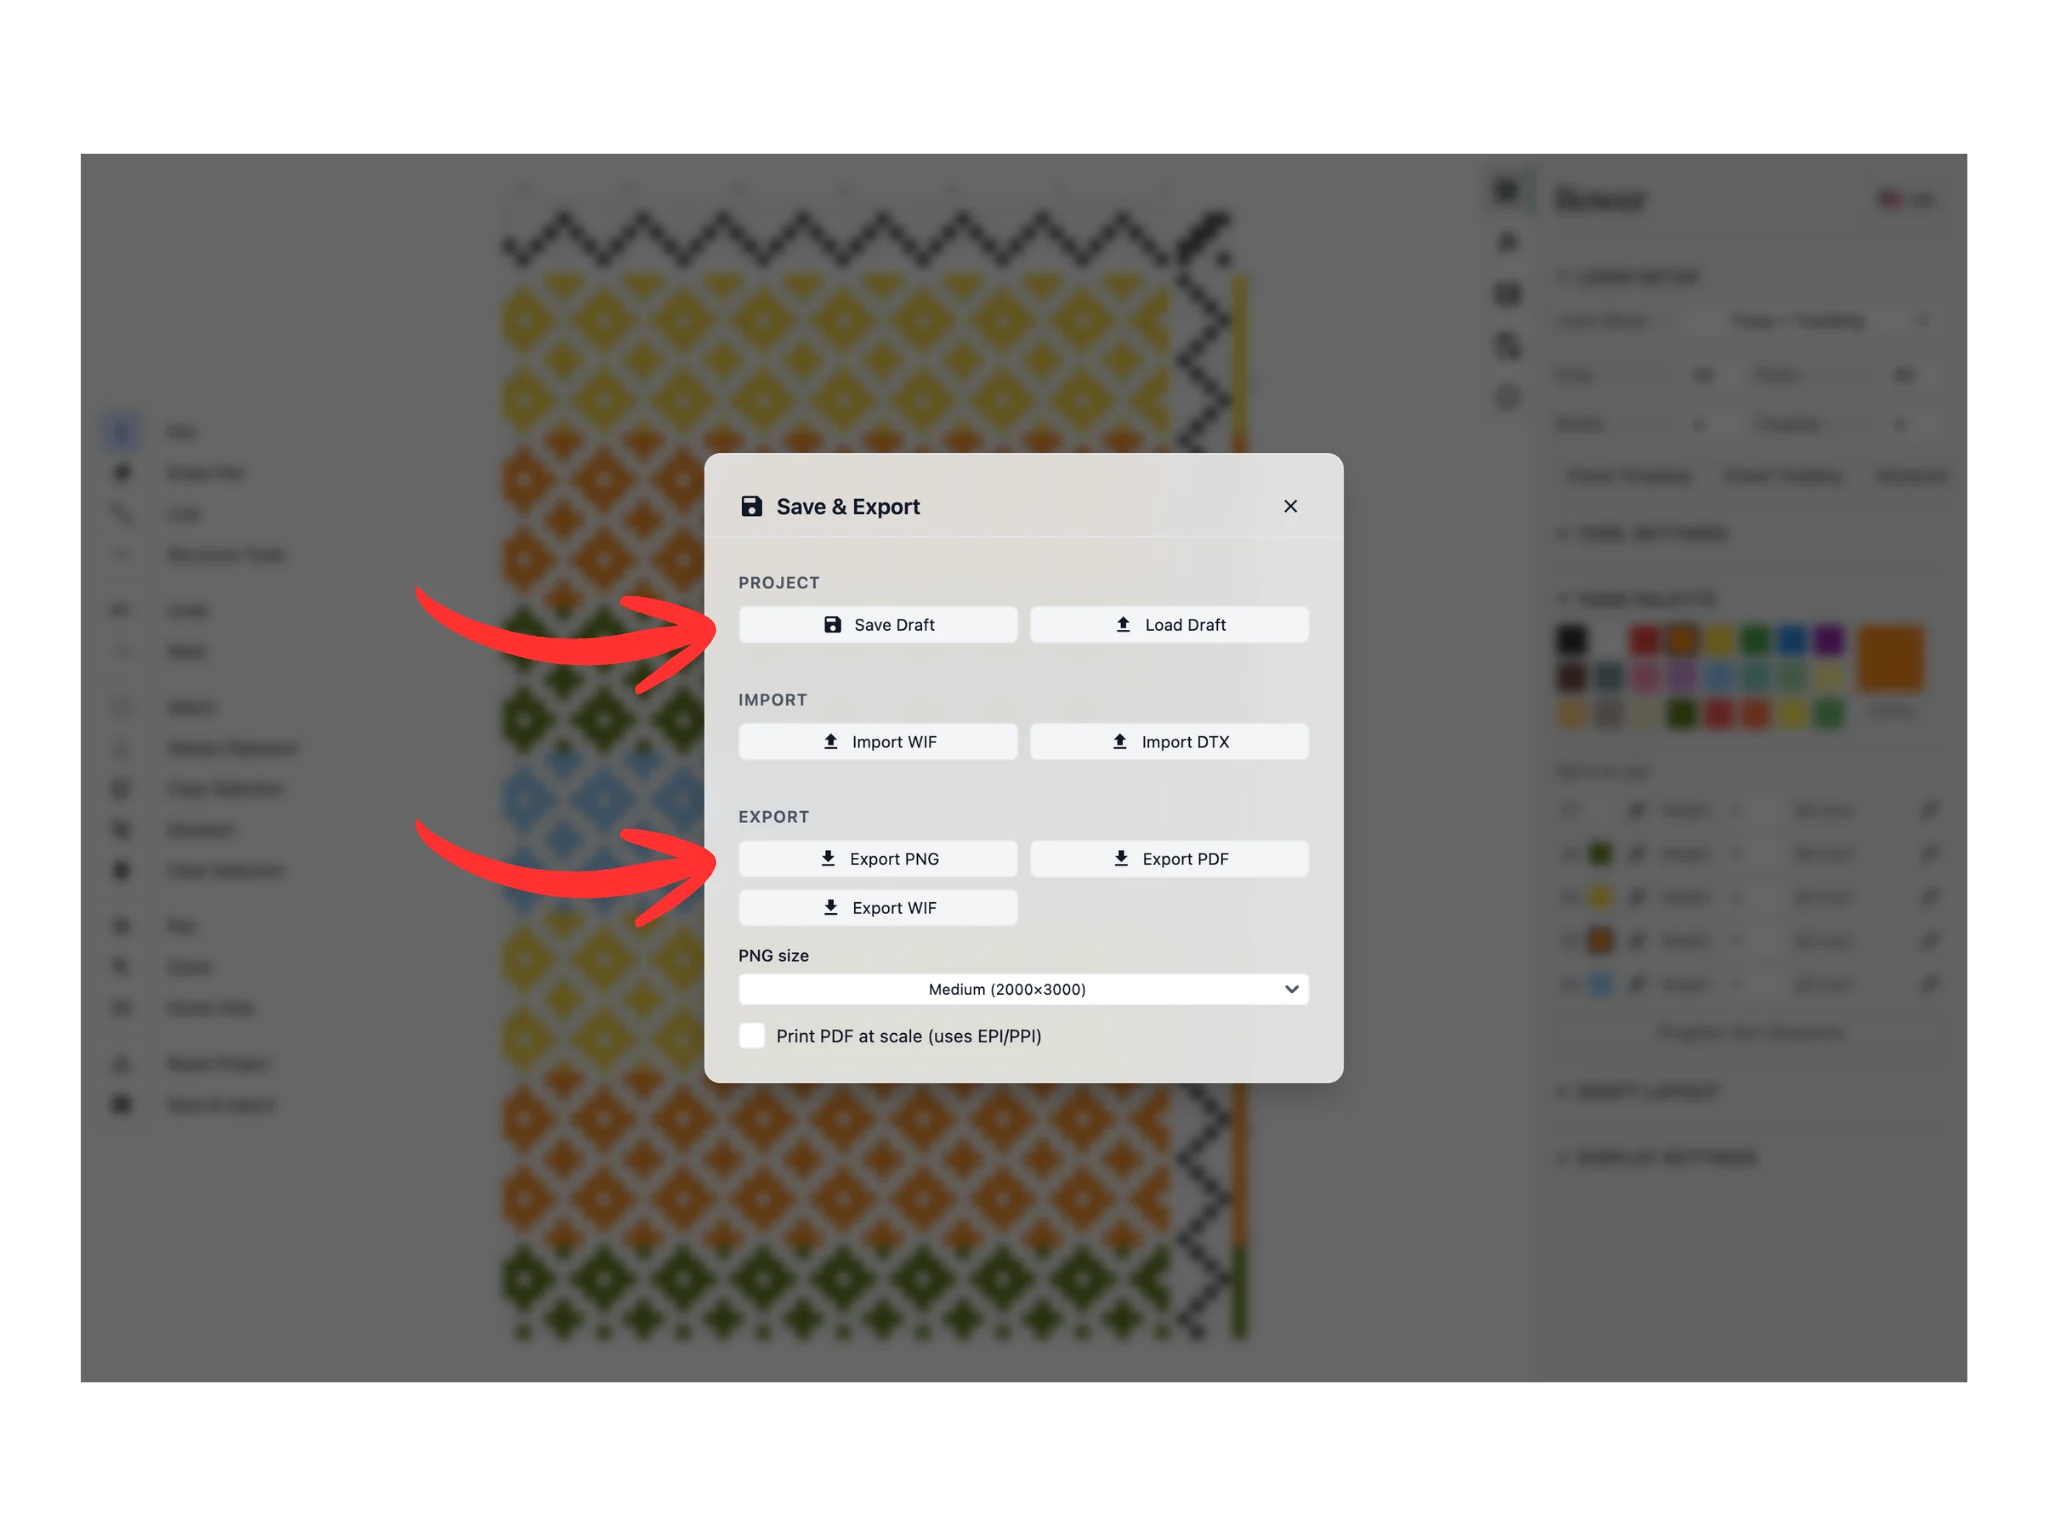
Click on the "Save Draft" button which will download a .BOWER file to your computer. This is the file format that all projects from Bower are saved in. You will be able to load these projects back into Bower using the "Load Draft" button.
You can also export PNG, PDF, and WIF files from Bower. They download your project in the respective file formats to your computer.
Congratulations on finishing your first tutorial using Bower! You have embarked on an amazing weaving software journey :)